|
|
Post by terryrob on Apr 13, 2008 19:21:08 GMT
I'm finally doing a bit on my rv, Although I am rebuilding a 4.4:1 axle its a way off yet so I decided just to use the the one that came with the rv which is a 3.85:1 off a 1.6 cortina and the one I fitted in 1988. The brake shoes were new and the drums ok but I noticed that the adjuster links had been welded together, I can't see the point of this at all?. I had a few old ones in the garage so fitted these untill I can get some new ones if is possible. Hopefully the internals will be ok for a while and I will be able to see what the ratio is like. A good brush down and two coats of paint later and it is ready to fit. I came across a paint called RUSTOLEUM COMBICOLOUR and its realy good stuff, it will flex a bit and unlike hammerite can be recoated at any time. new brake built up 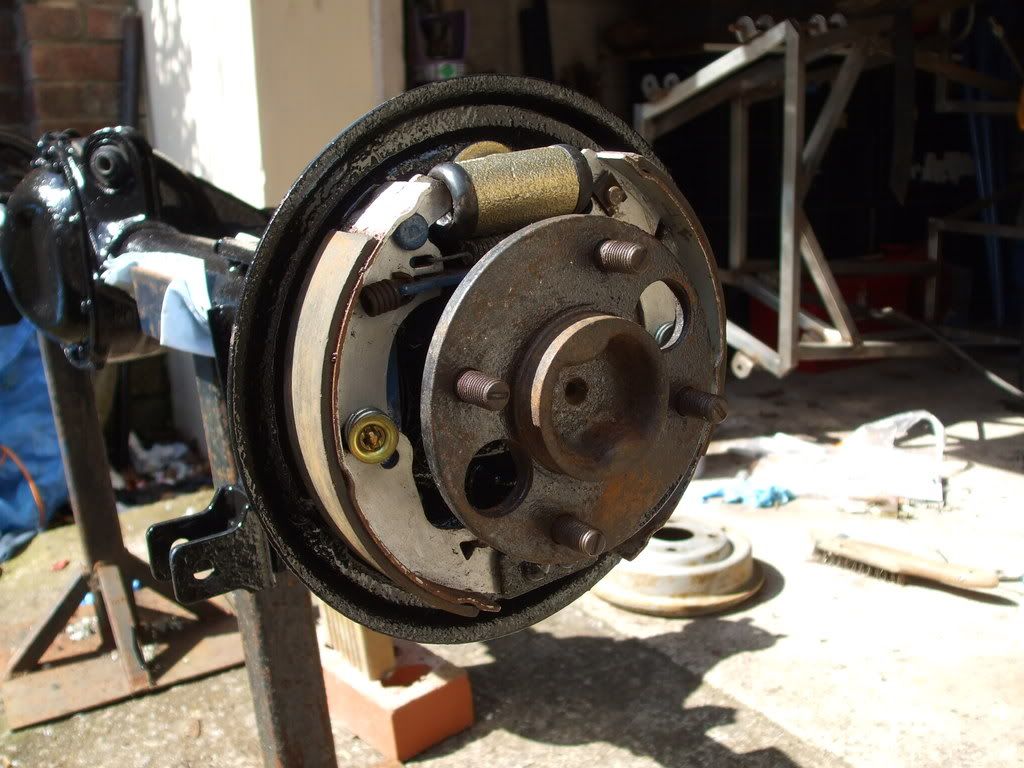 welded adjusters ? 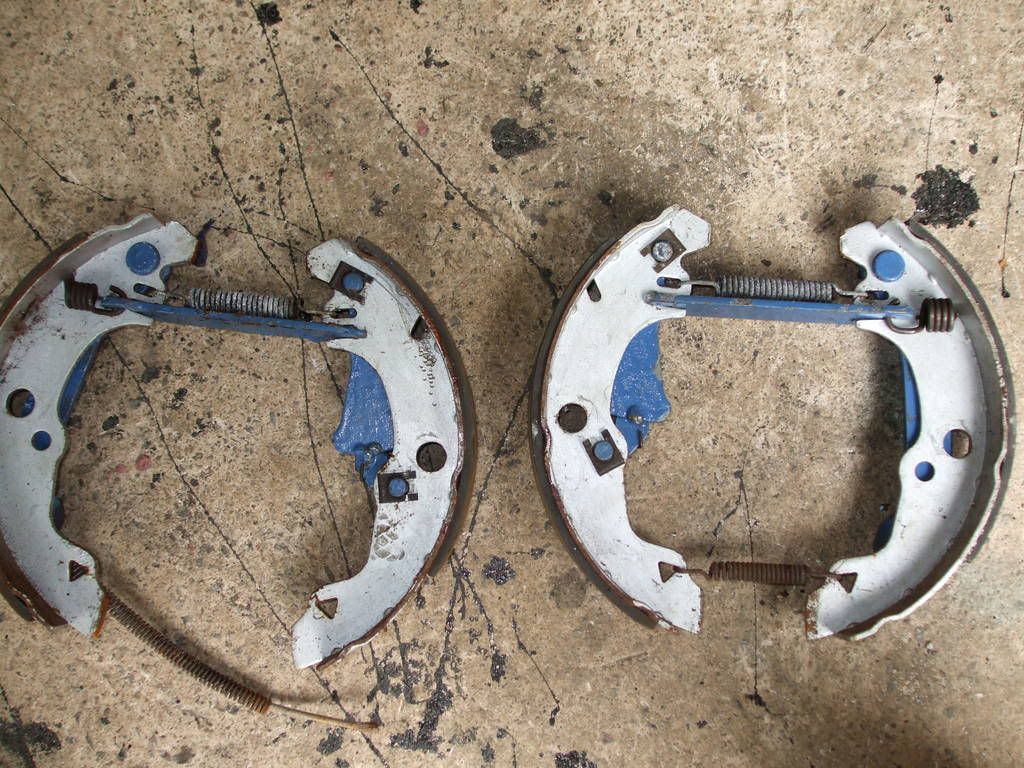 ready to roll  |
|
Deleted
Deleted Member
Posts: 0
|
Post by Deleted on Apr 13, 2008 19:28:42 GMT
they welded the adjusters  then they painted them to make sure they dont slide  |
|
Deleted
Deleted Member
Posts: 0
|
Post by Deleted on Apr 13, 2008 23:08:48 GMT
It depends what engine you're using and how tall your wheel/tyre combination is but I would have thought that the 3.85 ratio would be the better ratio to use as the RV is way lighter than the donor vehicle. You end up with a good compromise of improved acceleration over the donor vehicle and a reasonable cruising speed for less rpm. If you're using a torquey big motor then try for the 3.54 Capri diff. IMO anything with a ratio of 4.1 upwards is gonna make it a bit of a screamer. Good luck anyway...........intrigued with the welded adjusters........One word.........Why?  |
|
|
|
Post by terryrob on Apr 14, 2008 22:14:13 GMT
Well, 1.8 td sierra power is going in for a while, which is a bit of a low revver but those tyres are about 31" dia that is a big step up from skinny 13" jobs. I am going to go for some lower profiled tyres to bring the dia down to about 28". I'l do some calcs and see what numbers come out but also the axle is going on so we'l soon see anyway lol  |
|
Deleted
Deleted Member
Posts: 0
|
Post by Deleted on Apr 15, 2008 16:20:13 GMT
Take a look at this site especially the calculations half-way down page 2: www.carbibles.com/tyre_bible You can fiddle with tyre sizes and guage how much difference different widths and diameters will affect your ride before splashing the cash. Good luck. Chris |
|
|
|
Post by terryrob on Apr 15, 2008 17:52:43 GMT
Cheers for that, I'l have a look on there, see if I've been doing my calcs ok (doubtfull).  |
|
Deleted
Deleted Member
Posts: 0
|
Post by Deleted on Apr 15, 2008 19:03:34 GMT
|
|
|
|
Post by terryrob on Apr 16, 2008 19:39:09 GMT
Cheers Chris, that is realy handy, I'l have a go with it soon  |
|
|
|
Post by terryrob on Apr 26, 2008 21:05:31 GMT
I've just put the rear axle back on and taken a few pics of my home made links and setup. StuM asked about this but its here for anyone who's interested of course, the last postings on this are on the hood fitting thread but I thought I should continue it here. I have also put the screen surround back in on a temp basis so I can see how my new doors will line up. Its been such a nice day today I realy enjoyed doing a bit on the old jeep, winter is such a drag. Lower links 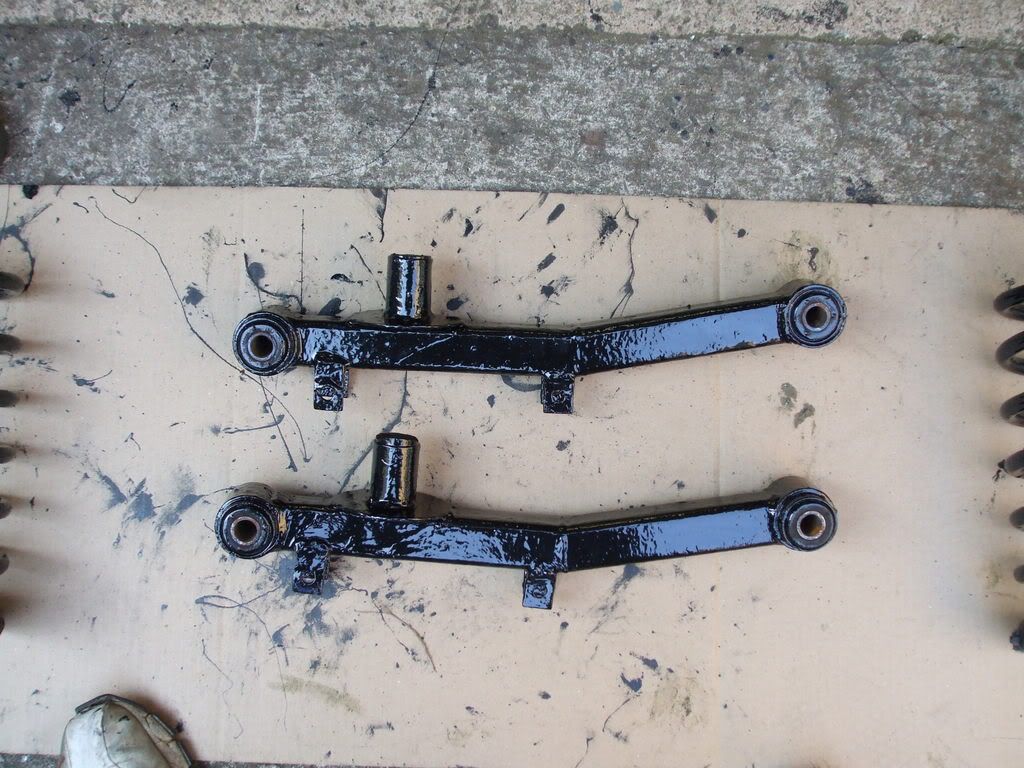 Lifting ring for more height  Links and axle in place 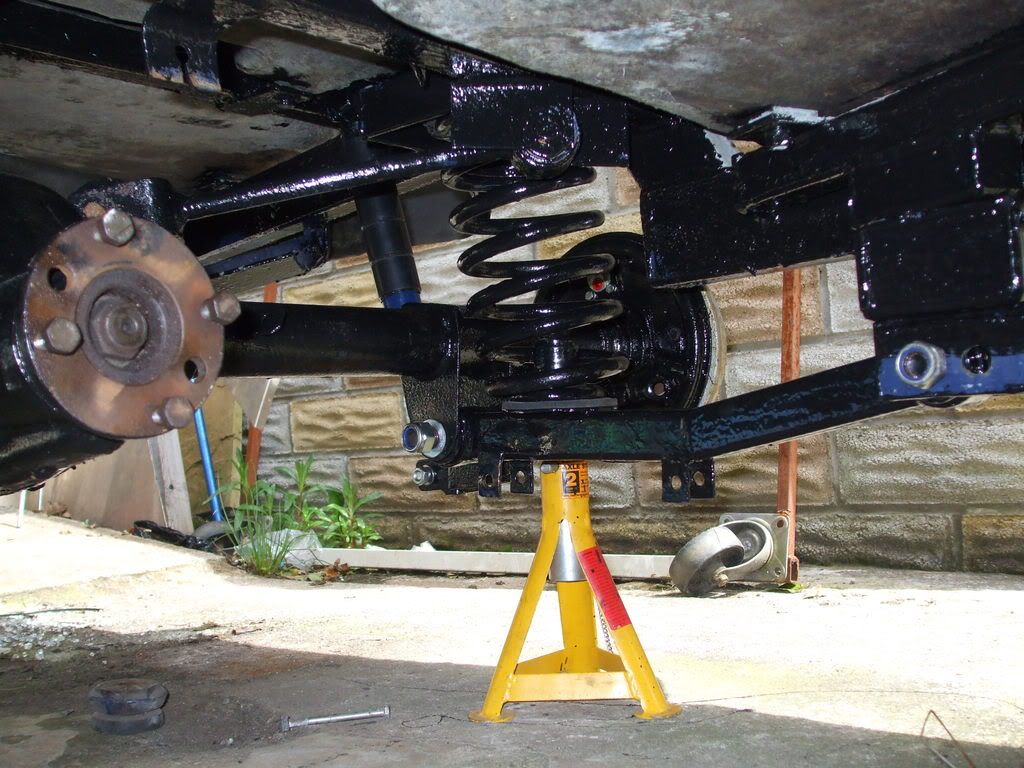  Should I run with these wheels ;D  Screen surround back in temp  |
|
Deleted
Deleted Member
Posts: 0
|
Post by Deleted on Apr 26, 2008 21:52:15 GMT
I knew a cup would be in a picture somewhere  |
|
|
|
Post by terryrob on Apr 27, 2008 9:24:59 GMT
I moved all the beer cans but forgot the cup  ;D |
|
|
|
Post by terryrob on Apr 28, 2008 19:22:57 GMT
I lined up the doors I bought off Maggie to see how they would fit. the angle at the front edge of the door is very close to the angle of the screen surround when its bolted to the bulkhead, there can be no lean back on the screen as that would mean trimming back the angle on the door edge and there isn't enough material there to do that, as it is I just had to trim a bit of the screen surround. BUT (isn't there always one) now the hard top is about 15mm short of the front of the screen surround so that would have to be altered if I was going to use it. When I am satisfied with the fit I think I'l take them off and bond in some extra fiberglass to stiffen them up a bit and also fit new runners and seals etc. Anyone know what these window regulators are out of ? screen srround trimmed 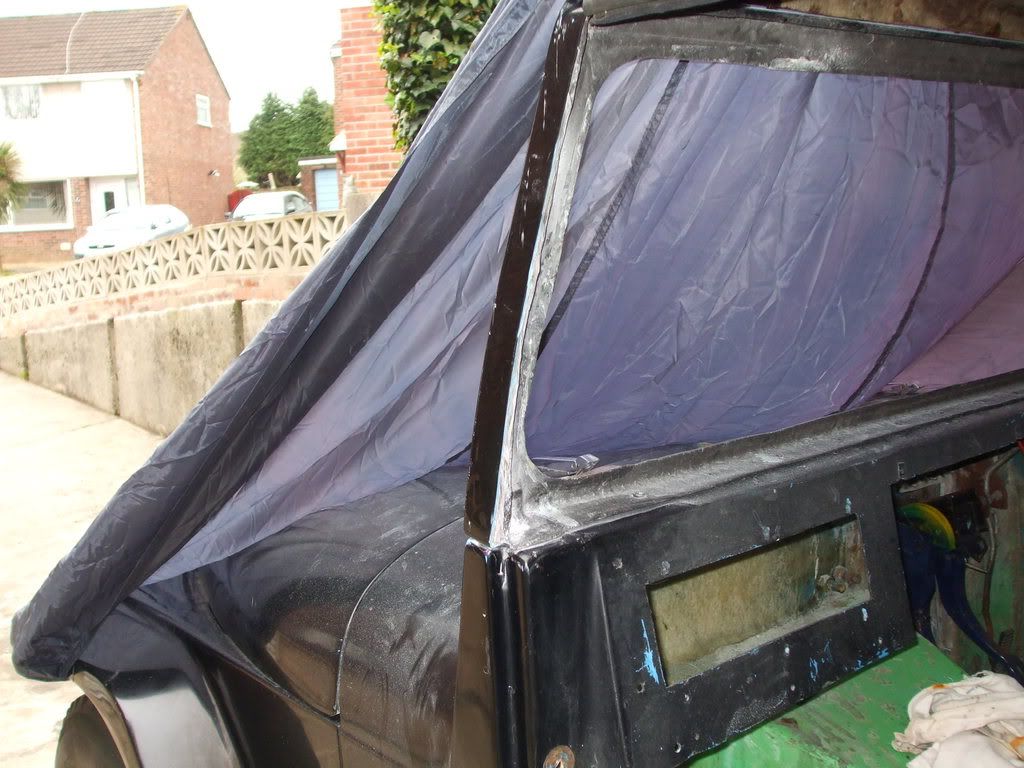 Door trial fitted 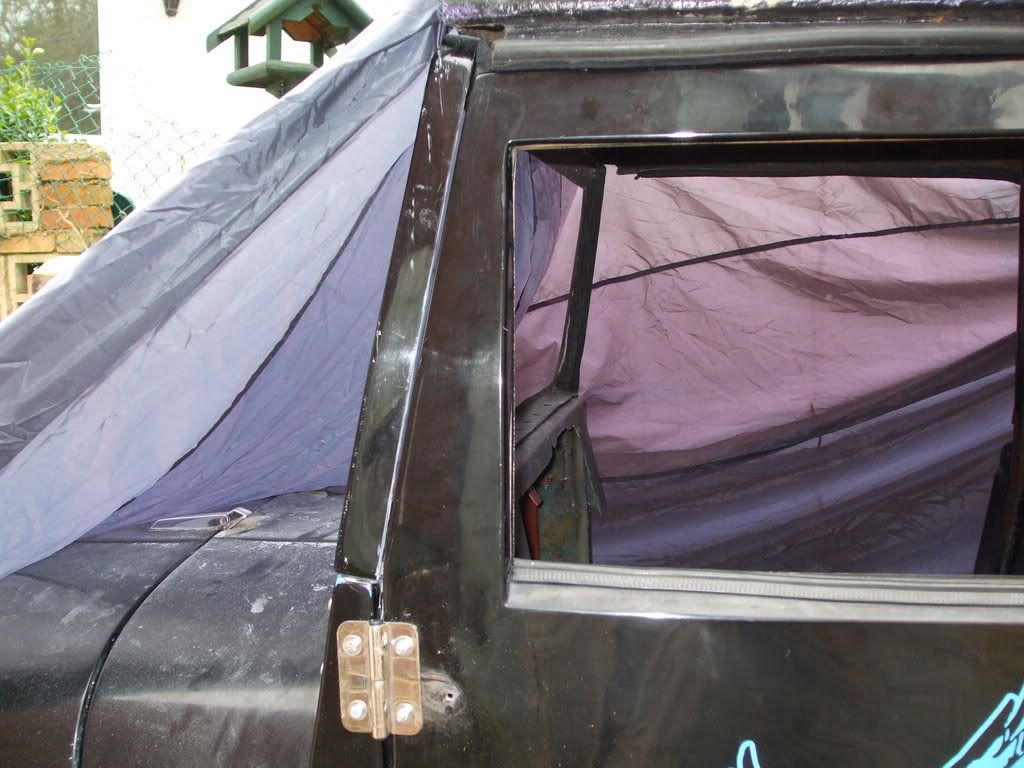 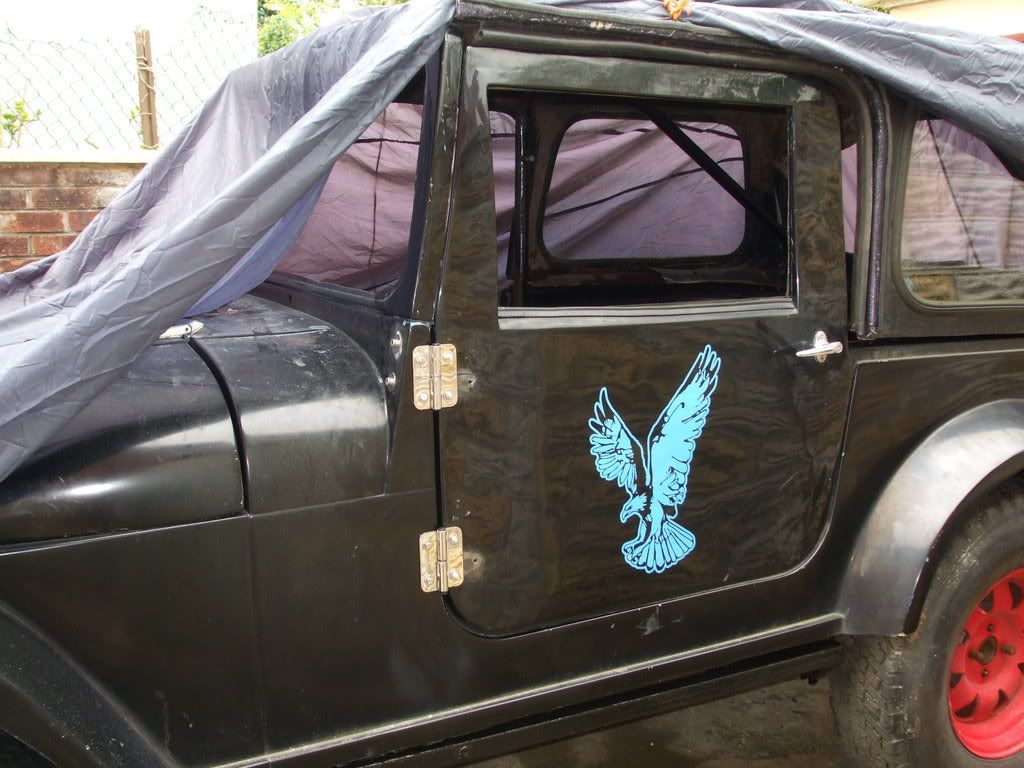 anyone know what these are off 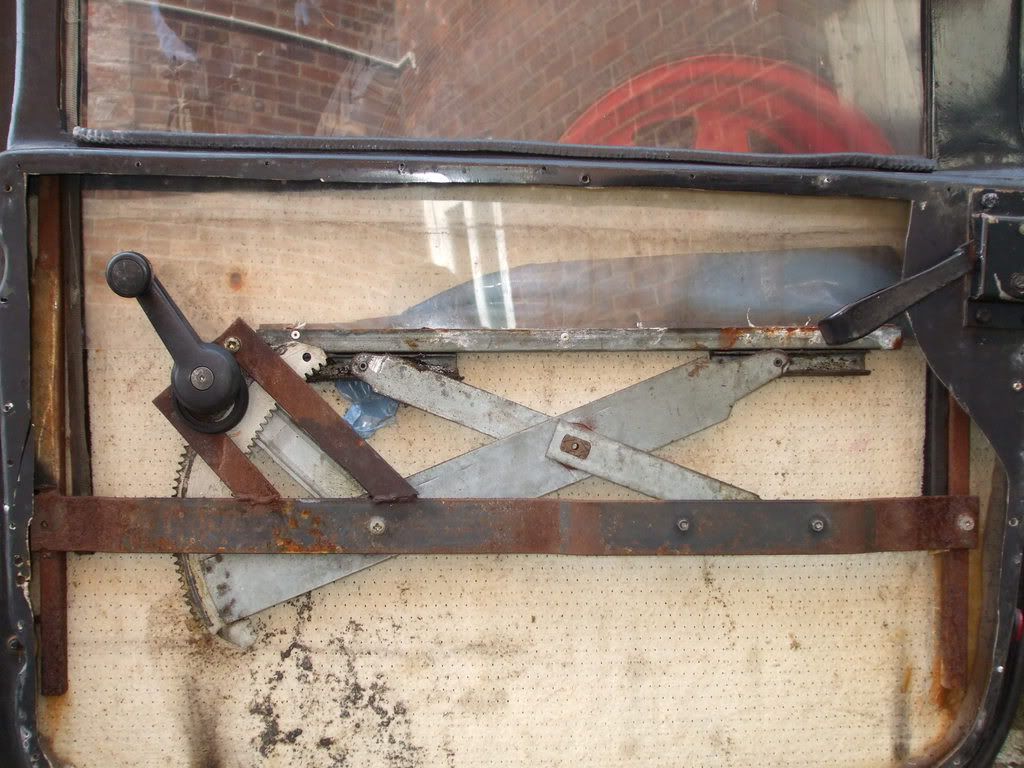 |
|
Deleted
Deleted Member
Posts: 0
|
Post by Deleted on Apr 28, 2008 20:57:35 GMT
Car's coming on a dream, but an awful lot of work  The joy and fun of restoration  Thank God I haven't got solid doors ;D ;D ;D Keep up the good work Terry it will be worth it in the end. See you at Stoneleigh. |
|
Deleted
Deleted Member
Posts: 0
|
Post by Deleted on Apr 29, 2008 23:06:32 GMT
anyone know what these are off Don't know for sure, but they look similar to some Metro winders and regulators I had on a GTM |
|
|
|
Post by terryrob on Apr 30, 2008 21:15:03 GMT
Thanks David, I'l have to go on a scrapyard trawl and check that out  |
|
|
|
Post by terryrob on Jun 7, 2008 22:50:53 GMT
Hi there guys, just a quick update of what I've been doing. I decided to pull out the 2.3 diesel lump and replace it with a 1.8 td engine and box from a sierra, but first while the engine is out i took off the front suspention for overhaul. While this lot is out I will paint the rest of the chassis. I just stripped thr front suspention and all the bushes are knackered so I have to replace them all. Off to search ebay : Front suspention coming off 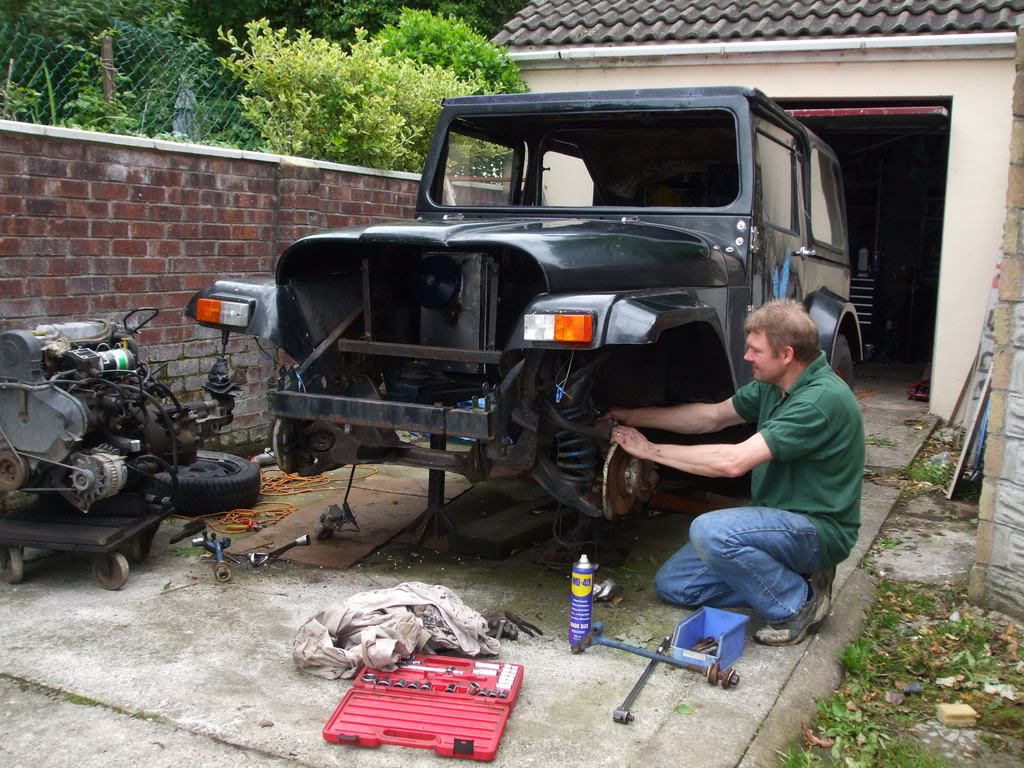 Off ready to strip 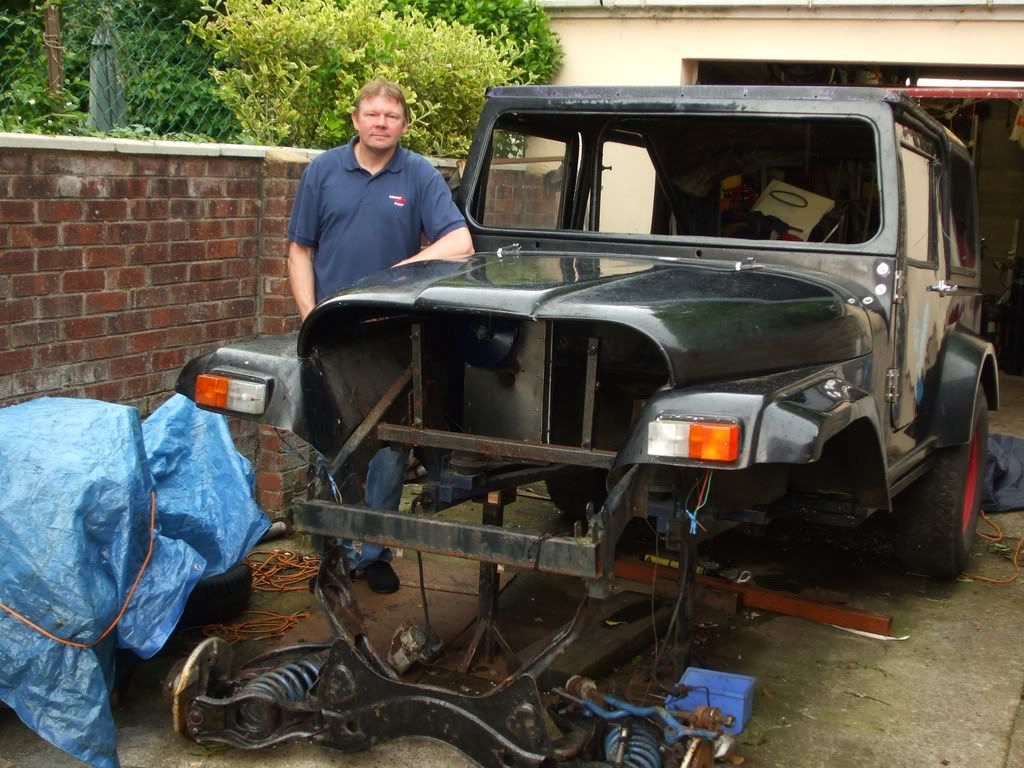 1.8 td lump & box ready to go in 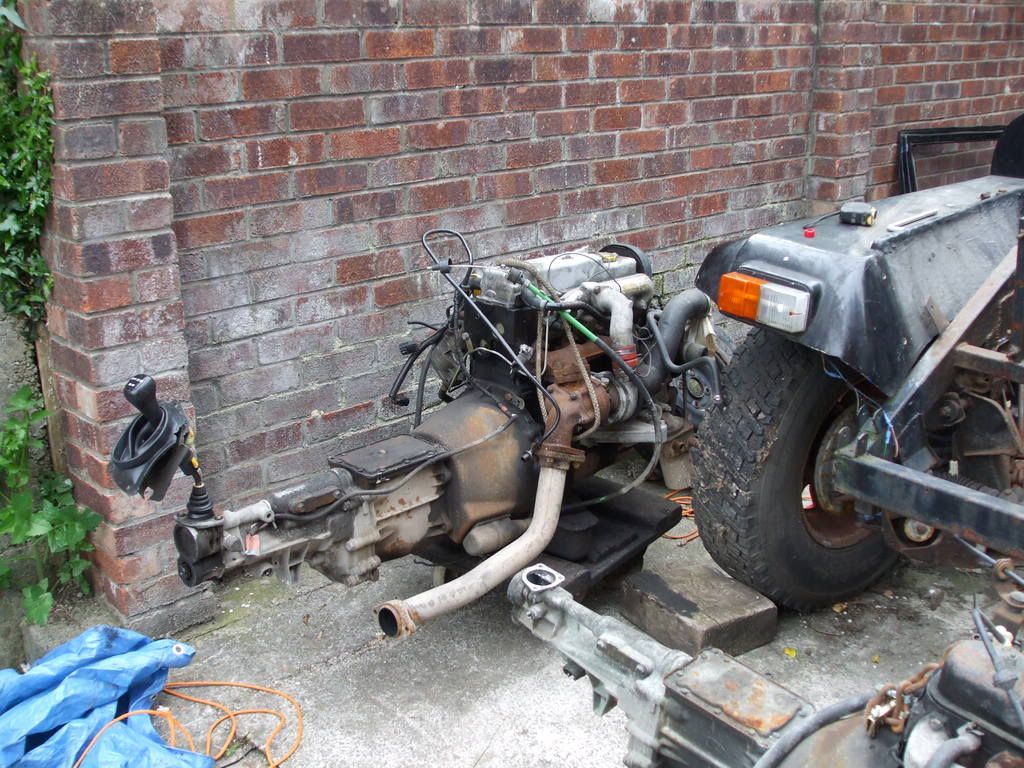 |
|
|
|
Post by terryrob on Jun 8, 2008 19:18:13 GMT
|
|
Deleted
Deleted Member
Posts: 0
|
Post by Deleted on Jun 9, 2008 19:19:54 GMT
Good thorough job there buddy. Keep up the good work. ;D
|
|
Deleted
Deleted Member
Posts: 0
|
Post by Deleted on Jun 9, 2008 19:47:25 GMT
|
|
|
|
Post by terryrob on Jun 9, 2008 22:37:16 GMT
 THATS why there was ao much play 
|
|
|
|
Post by terryrob on Jun 12, 2008 20:25:59 GMT
Stripping down and cleaning up all the parts that make up the front suspension makes me wonder how the hell ford could have designed so many water traps and reservoirs into a simple peice of engineering. Its absolutely guarenteed to rust away unless you got a rust free one years ago and did a good job on it. They could pass on tips to the water board on how to retain water.  |
|
Deleted
Deleted Member
Posts: 0
|
Post by Deleted on Jun 26, 2008 22:14:42 GMT
Who's in Complete Kit Car magazine then........? ;D
Good job..............!!
|
|
|
|
Post by terryrob on Sept 21, 2008 20:12:25 GMT
|
|
|
|
Post by Gary on Sept 21, 2008 20:24:36 GMT
Good to see things are finally coming together for you Terry. Can't you use one of the remote oil filters with the plate with the pipe take offs, you could then site the new filter anywhere you want. Will it be ready for Stoneleigh  |
|
|
|
Post by terryrob on Sept 21, 2008 20:41:36 GMT
Yes Gary that is another option I could go for, I just have to try the escort one first to see if it will do  .  It realy has to be ready for stoneleigh next year we have to have at least one car on the stand lol ;D with a bit of luck hopefully some of the other guys rebuilds will be there also. |
|
Deleted
Deleted Member
Posts: 0
|
Post by Deleted on Sept 22, 2008 12:17:05 GMT
Looks like a crime scene  hang up some lights and you are away |
|
|
|
Post by terryrob on Sept 25, 2008 23:03:35 GMT
Your right Don  , I hope the boys in blue don't start calling round  |
|
Deleted
Deleted Member
Posts: 0
|
Post by Deleted on Sept 26, 2008 12:17:20 GMT
I was thinking lights in the tent for 24hr working  ;D |
|
Deleted
Deleted Member
Posts: 0
|
Post by Deleted on Sept 26, 2008 21:40:56 GMT
Hi mate.........looks like you're making progress  From the looks of the pic it appears that you have fitted a Sierra engine complete with a Type 9 Ford gearbox? I have done the same but using the 2.0 Pinto with the same box. However I have hit a problem and wondered if you encountered the same. The engine and box had to be sited quite high in order that the gear lever protruded far enough in to the cockpit to use. The engine has been fitted paying attention to the fact that the float chambers in the carbs should be near as poss to the horizontal. However, the UJ's on my propshaft are going to be working close to their maximum range. It seems impossible to get a straight line through the crank, gearbox, prop to the rear diff......which is what I should be aiming for. I have had the engine and box in and out several times, each time mocking up different engine mounts but I'm not getting anywhere. My only solution is to site the engine and box lower concentrating on getting as straight a line as poss from crank to diff and then lengthening the gear lever.....but I reckon it'll end up 15 inches long!!  How have you managed? Any comments, suggestions or even pics of your engine mounts etc would be gratefully appreciated. I should mention that my RV is a Sierra based Pilgrim whilst yours appears to be Cortina based? Thanks. Chris |
|
|
|
Post by Gary on Sept 27, 2008 21:48:26 GMT
|
|