Deleted
Deleted Member
Posts: 0
|
Post by Deleted on Sept 27, 2008 22:09:49 GMT
Thanks Gary......your engine and box is sitting about as low as mine resulting in as near as d**nit straight prop but my gear lever which is a stock Sierra item, (Uncut), and is too short. I've spent all day on this today...........  I'm beginning to think that lengthening the lever is the answer and I can make this feel a slicker shift if I incorporate a quick shift kit to reduce the throw. |
|
|
|
Post by terryrob on Sept 28, 2008 20:50:04 GMT
Hi Pelland, The gearstick hole on my type 9 is about 25mm below the flat part of the centre tunnel but comes through at the start of the sloping bit. the engine & box look pretty much horizontal and yes there will be a fair angle on the prop shaft. When I ran with a cortina pinto and box I think the angle ws slightly less but not much and worked fine. looking at the angles on some of the jacked up land rovers, jeeps and monster trucks I think we should be ok. I will be making up a prop shaft in a month or so, I guess I' find out then. You could compromise by raising the engine mounts a bit and lowering the gearbox a bit I think the carb would probably live with it ?  Let me know how you get on cheers Terry |
|
|
|
Post by terryrob on Sept 28, 2008 20:59:52 GMT
I was thinking lights in the tent for 24hr working  ;D Good idea don, maybe not 24 hr, but the nights are getting darker realy quickly  |
|
|
|
Post by terryrob on Dec 28, 2008 18:37:53 GMT
 Remember the £60 marquee, well it did a great job of keeping my rv dry for a couple of months, and i did get a few jobs done as well. But the high winds of mid december proved a bit too much for it ripping off all the velcro fastenings and bending the poles, in the end I had to take it down before it dissapeared accross glamorgan !. It was crap quality realy  So I decided to build a proper car port and if I'm clever I can sneak on some sides and doors and it then becomes a garage extention ;D I will post some pics later this week, I'm about half way there. CHEERS EVERYONE, HAVE A HAPPY NEW YEAR 
|
|
Deleted
Deleted Member
Posts: 0
|
Post by Deleted on Dec 28, 2008 19:44:35 GMT
Yes ;D - but did forensics find anything before their tent blew away?  |
|
|
|
Post by terryrob on Dec 29, 2008 0:21:03 GMT
Well I'm not behind barrs yet lol ;D
|
|
|
|
Post by derekkitcar on Dec 30, 2008 19:09:50 GMT
Well my tent is still standing (just) though I have replaced a few of the poles which bent in the wind  and it is very good for working on the RV when it's raining etc. I finally collected my hard top and gearbox of Scorpio this weekend (  i took so long) but it is just too cold for working on it at the moment  what happened to global warming?  |
|
Deleted
Deleted Member
Posts: 0
|
Post by Deleted on Dec 30, 2008 21:19:08 GMT
Doesn't it look nice when its new  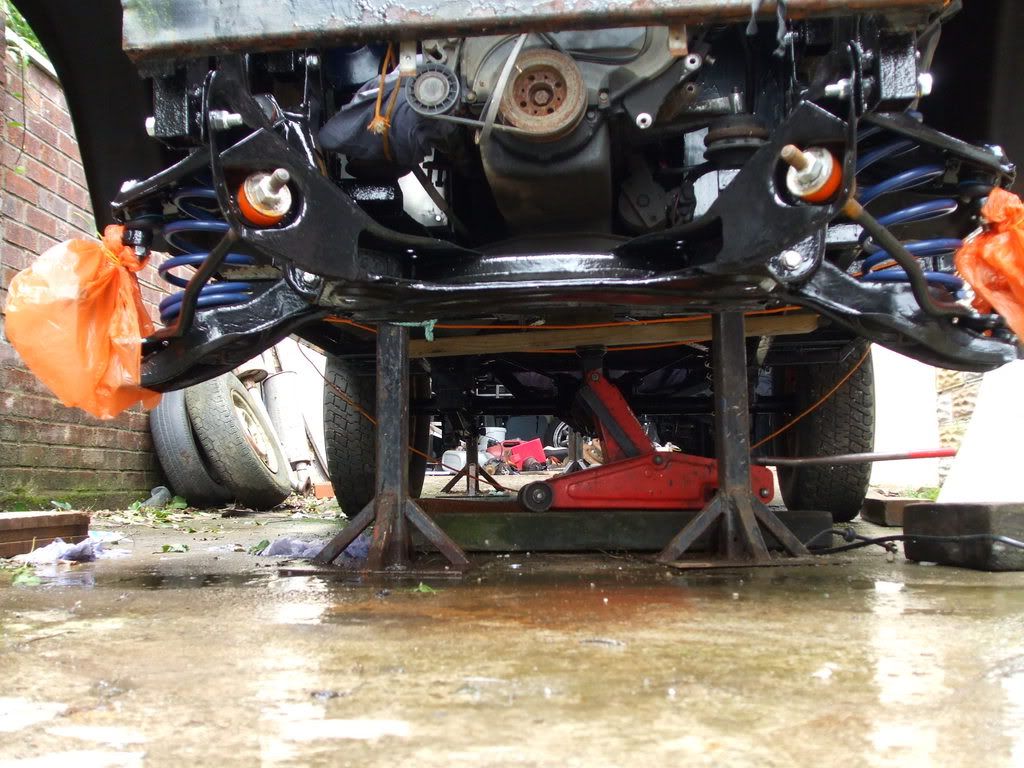 Hello again..........!!  I'm back on the engine mounts question. From this pic you can see the rhs engine mount which appears to be Sierra. How have you fabricated the lower mount and attached to the chassis? Your chassis must be different from Gary's Cortina one, (See the link in his post on this thread) where his mounts consist of a angle piece of steel plate attched to the main rails wil box section steel tube. Thanks in advance. Regards Chris |
|
|
|
Post by terryrob on Jan 1, 2009 11:35:19 GMT
Hi Chris, you are right they are righr they are sierra mounts, you have very sharp eyesight. Basically I just disc cut the old cortina mounts off and welded a piece of 80 x 40 channel ontop of the chassis rails where the old ones were, taking into account the distance from the gearbox mount. You can just see them in one of the pics in "my chassis mods" on page 4, but I will try and post up some better ones for you soon.
With the sierra td lump I have to modify the offside one again for the steering to clear the oil filter !,
|
|
|
|
Post by terryrob on Jan 1, 2009 12:53:17 GMT
|
|
|
|
Post by terryrob on Jan 2, 2009 19:48:42 GMT
Hi Chris (pelland) Here's a couple of pics of my engine mounts as promised,  one of them is not very clear. Cheers Terry 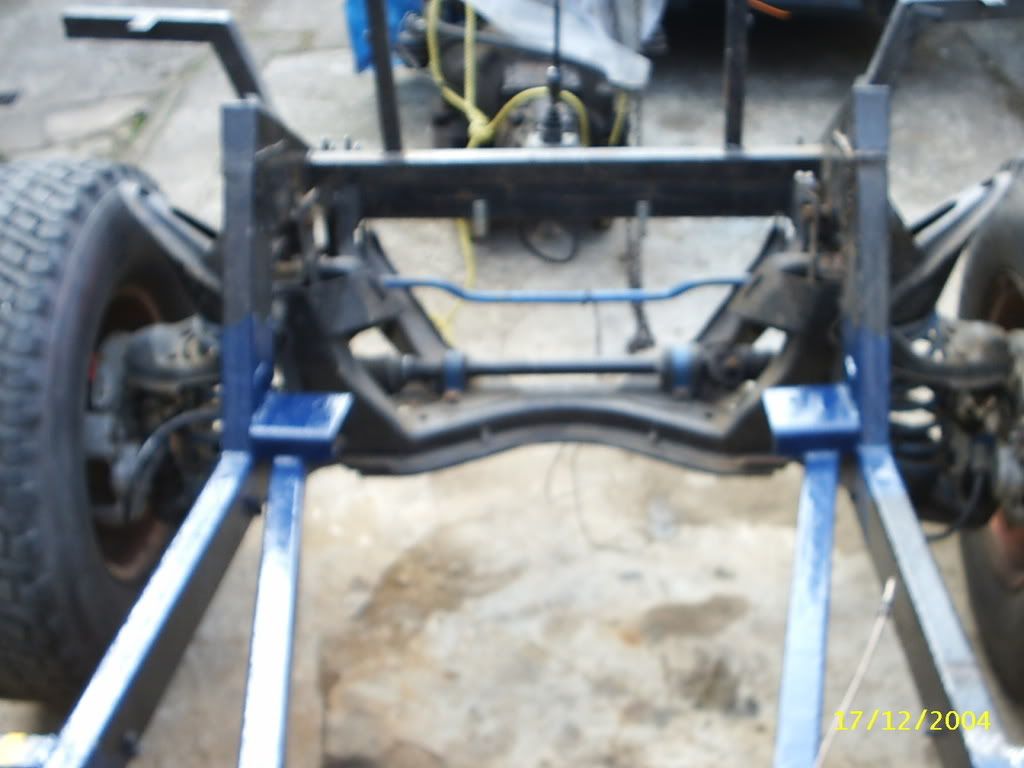 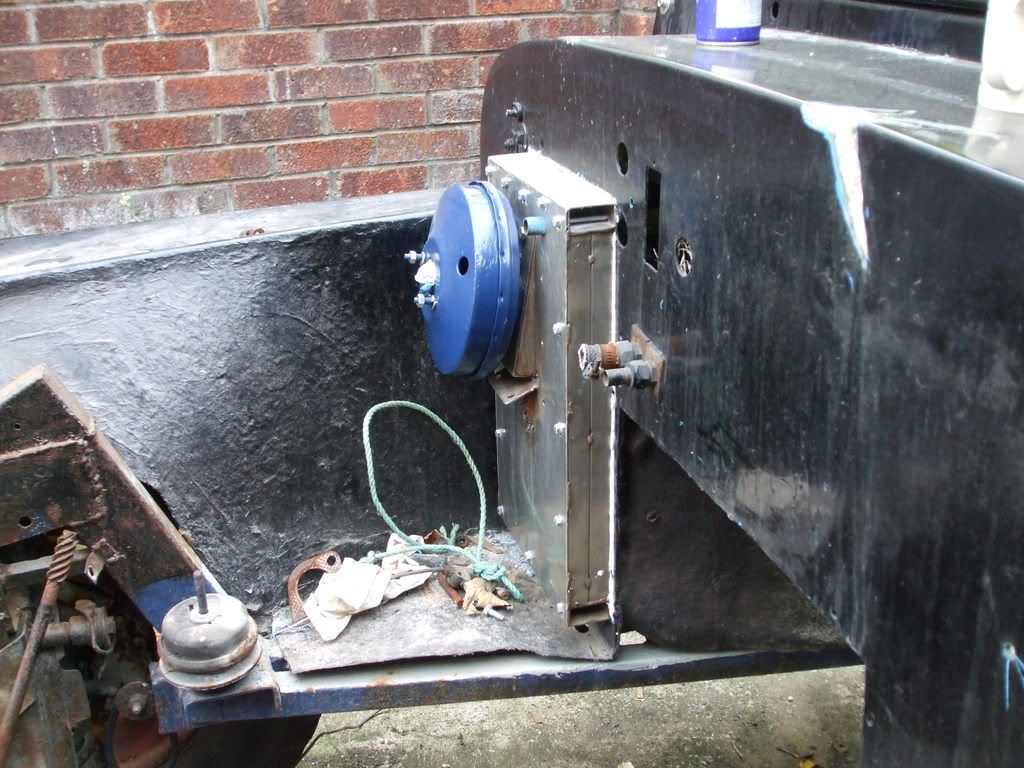 |
|
Deleted
Deleted Member
Posts: 0
|
Post by Deleted on Jan 2, 2009 22:23:26 GMT
Hey Terry ! That looks like a d**n handy Bit of garage extension (eh  carport ) that you got there mate! PS happy new year to all! Stu Still not been into garage for rad measuring , but wiil get it done! |
|
Deleted
Deleted Member
Posts: 0
|
Post by Deleted on Jan 2, 2009 23:27:39 GMT
Hi
Yeah its good to get some work done. I have now got both doors fitted, and am delighted with the fit. I noticed a large gap at the rear of your doors at the top, is this because the roof has been pulled back? or are the doors from a different batch to the roof?
By the way I recognised the RV from the old register, the red wheels king of give it away.
Bye for now.
|
|
|
|
Post by terryrob on Jan 3, 2009 21:01:55 GMT
Hey Terry ! That looks like a d**n handy Bit of garage extension (eh  carport ) that you got there mate! PS happy new year to all! Stu Still not been into garage for rad measuring , but wiil get it done! Cheers Stu, Seasons Greetings from me too |
|
|
|
Post by derekkitcar on Jan 3, 2009 21:11:41 GMT
you sould be nice an warm in your er carport when it' all finished Terr. um is that a sierra servo you have on your rv? what heater have you used? P.S. happy new year to all  |
|
|
|
Post by terryrob on Jan 4, 2009 18:26:39 GMT
Hi Yeah its good to get some work done. I have now got both doors fitted, and am delighted with the fit. I noticed a large gap at the rear of your doors at the top, is this because the roof has been pulled back? or are the doors from a different batch to the roof? By the way I recognised the RV from the old register, the red wheels king of give it away. Bye for now. You've don a good job there. There is a gap at the rear of my doors they just don't match my old hard top. I'm not sure if I will be using the hard top yet anyway I'l have to see how the rag top lines up. Cheers |
|
|
|
Post by terryrob on Jan 4, 2009 18:52:51 GMT
you sould be nice an warm in your er carport when it' all finished Terr. um is that a sierra servo you have on your rv? what heater have you used? P.S. happy new year to all  Hiya Derr, yes that is a sierra servo with its pedal box, Havn't got a heater yet anyone got any sugestions, the old mini ones are a bit scarce now  youl have to come down and see the car port. |
|
Deleted
Deleted Member
Posts: 0
|
Post by Deleted on Jan 5, 2009 16:19:45 GMT
Terry One of our Jagos has a home built unit, we didn't build it ourselves but Gary has had it apart  It consists of a matrix (out of some thing that fitted) housed in a MDF box with the associated pipes and vents fitted to it. I would recommend that if you were to build one like this then you should PVA (or similar) the MDF as ours sagged because of the damp (which is why Gary had it apart) It works far better than the mini one fitted into the RV and better than the escort ones fitted in any of the Jago's. When Gary has got the frame ready for the windscreen he has said that he is going to scratch build one for the RV possibly using the heater fan motor from a Polo.  |
|
|
|
Post by terryrob on Jan 5, 2009 22:53:07 GMT
Cheers Helen, I was thinking I might end up making one. One problem was what fan to use but you have answered that one for me, I will look at the polo fan. Matrix should be easy. Thanks  |
|
Deleted
Deleted Member
Posts: 0
|
Post by Deleted on Jan 5, 2009 23:23:25 GMT
Hi
I had a good look on ebay and there were plenty of complete heater systems about. if you go for something recent the matrix will be better and the blower motor more powerfull. I Got the rear heater from a VW sharan in great nick, I will hook it up as an auxilliary heater in the cab.
Cheers.
|
|
|
|
Post by terryrob on Jan 7, 2009 21:57:29 GMT
Hi I had a good look on ebay and there were plenty of complete heater systems about. if you go for something recent the matrix will be better and the blower motor more powerfull. I Got the rear heater from a VW sharan in great nick, I will hook it up as an auxilliary heater in the cab. Cheers. I had a look too but they all look a nightmare to fit, mini ones are reasonable and easy to fit but most are single speed. If you don't mind me asking how much was the sharran unit and does it have multiple outlets that would go to screen and interior. cheers terry |
|
Deleted
Deleted Member
Posts: 0
|
Post by Deleted on Jan 8, 2009 19:55:40 GMT
Mk2 Polo is the prefered choice with Cobra builders. Very efficient. 3 speed and easy to adapt  |
|
|
|
Post by terryrob on Jan 8, 2009 20:31:41 GMT
Cheers Chris,Any idea what years were mk2's were made.
|
|
Deleted
Deleted Member
Posts: 0
|
Post by Deleted on Jan 8, 2009 21:33:15 GMT
Cheers Chris,Any idea what years were mk2's were made. 81 - 94 Terry. They normally go for around £20 in the scappies |
|
|
|
Post by terryrob on Jan 8, 2009 21:52:08 GMT
Cheers again Chris, I will have a look around my local scrappies.  |
|
Deleted
Deleted Member
Posts: 0
|
Post by Deleted on Jan 8, 2009 23:18:54 GMT
Sharan one was about £25 I bought the control unit from the guy as well that was another tenner but had all the right wires already attached. the unit only has three speeds and a single vent, but it is narrow enough to fit in limited space.
I planned to fit it under the bonnet but changed my mind whed the original matrix was still working. I just fitted a new blower unit to force air through the existing matrix.
Cheers
|
|
|
|
Post by terryrob on Jan 9, 2009 21:59:26 GMT
thanks allyboy, looks like I,m going down the polo mk2 root though, looks ideal
cheers mate
|
|
|
|
Post by terryrob on Feb 15, 2009 20:44:45 GMT
Right, I have sorted my steering shaft problem. the line between the column end and the steering rack was right through the engine mount and the oil filter, not ideal ! A mooch around the scrappies revealed that the oil pump off a t.d escort has the filter pointing forwards instead of downwards, for £10 it was mine. this worked out ok and the shaft will pass easily. The engine mount was easy, jack up the engine and take out the mount. Take off th ally engine side mount and disc cut the old chassis mount off. I made up a new engine side mount which would clear the shaft line then made a new chassis mount which is simply a piece of 50mm x 12mm flat steel. A check with a dummy shaft confirmed all would be ok so out with the mig and weld it all up. Next job was to make a proper steering shaft ( the plastic overflow pipe not realy ideal ;D ), This is made up of the original cortina bit at the top, half an austin alegro shaft at the bottom and thick walled steel tube in between. Welded up, and fits fine. Dry it ma be, but bl**dy COLD  Dummy shaft and trial mount G'clamped in place 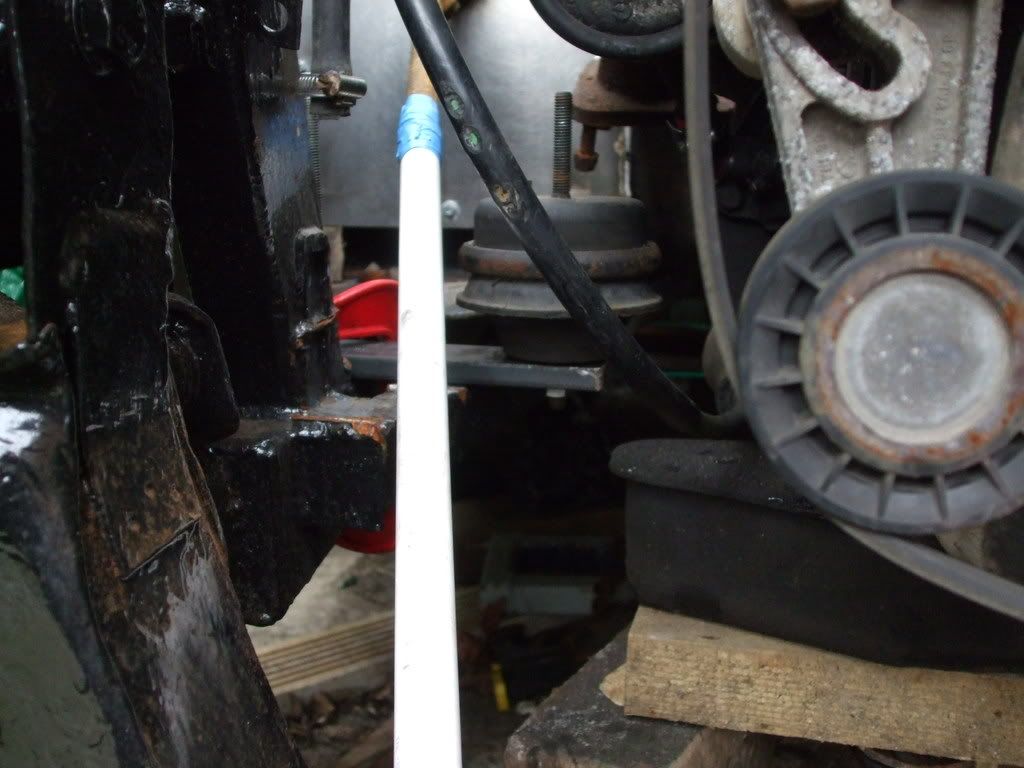 New engine side mount made up 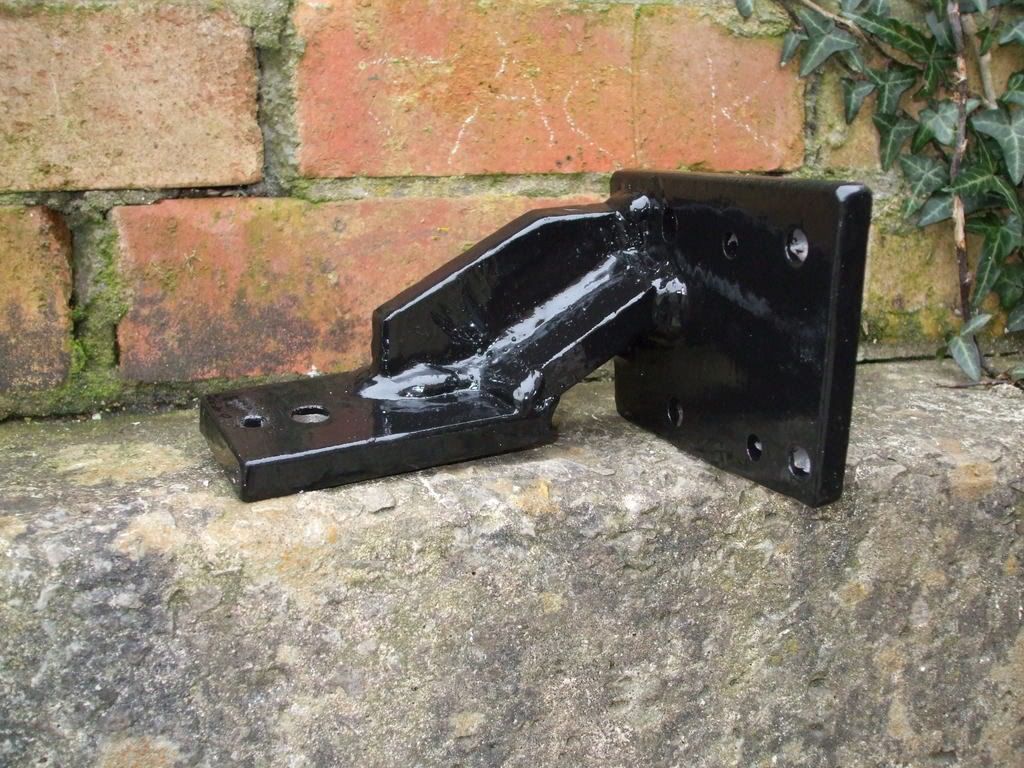 and bolted on 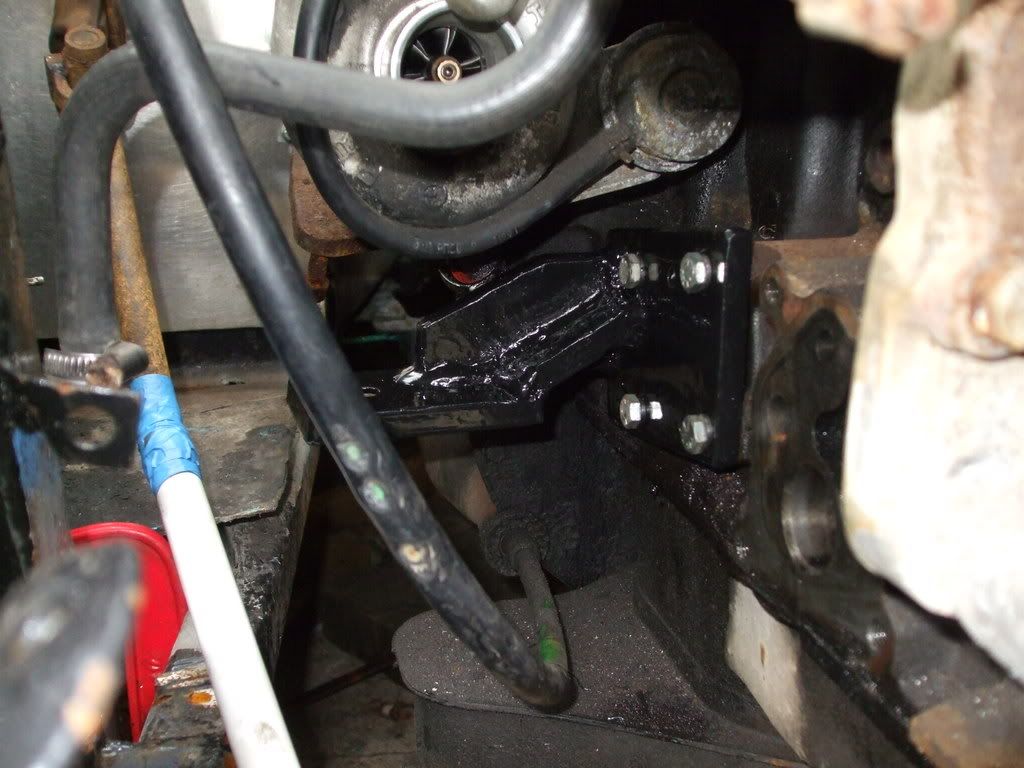 old oil pump, filter clearly in the way  new mounting completed 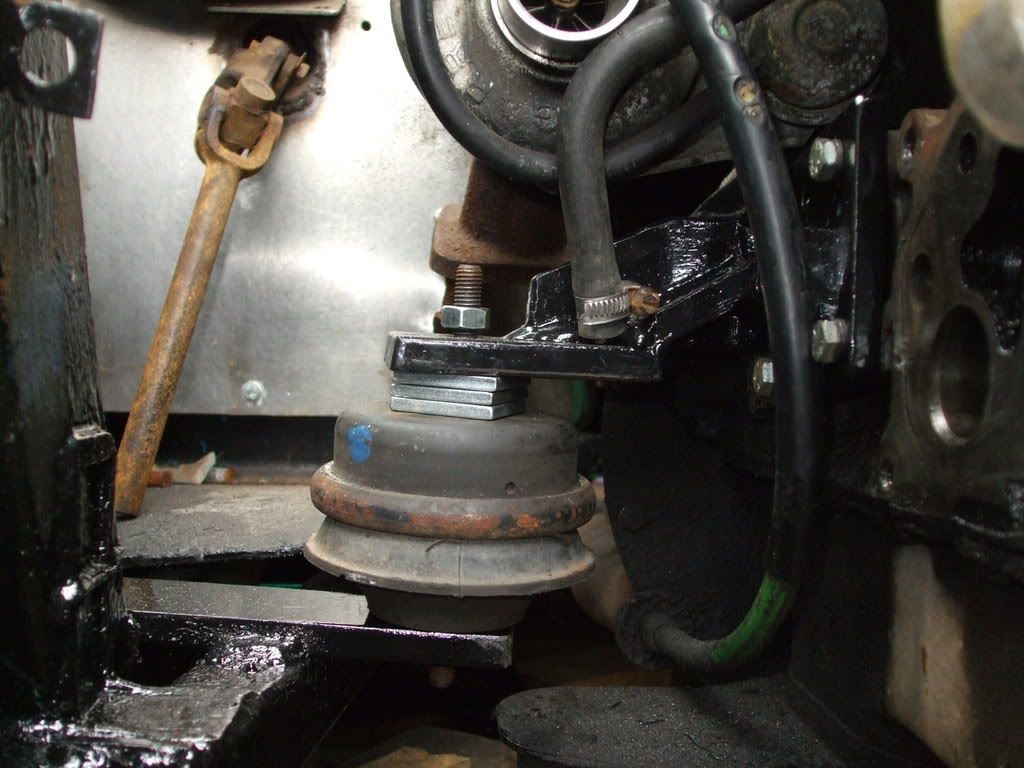 new steering shaft made, and below showing welds.    painted ready for fitting 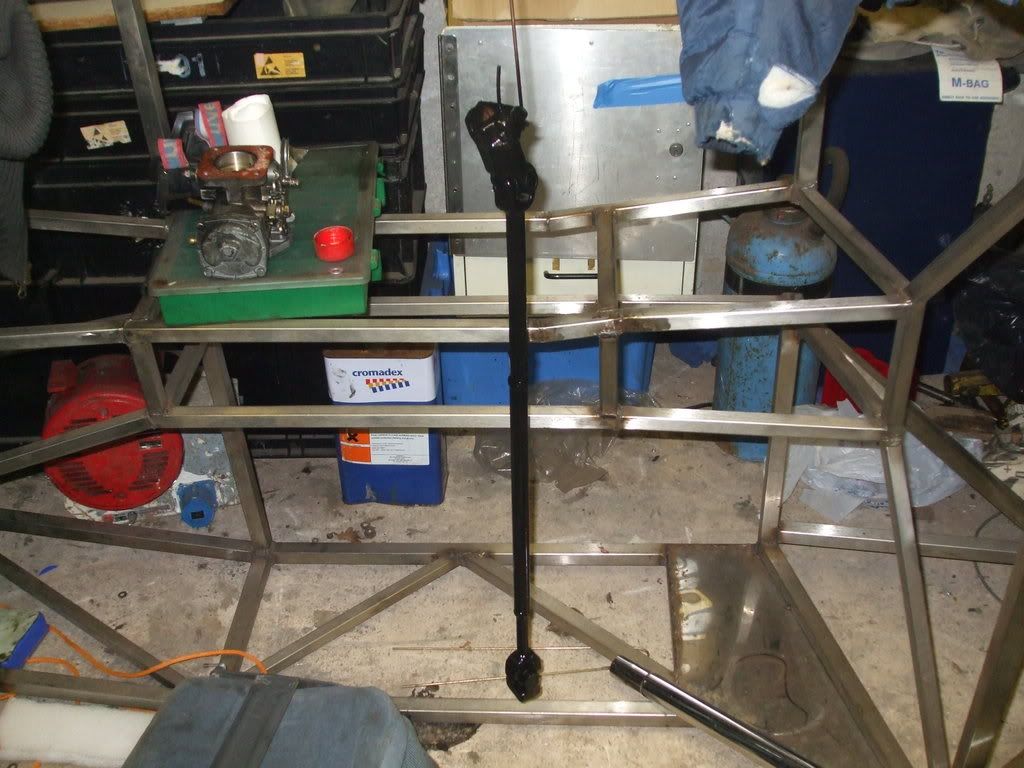 shaft fitted showing new oil pump and mounts with clearance. 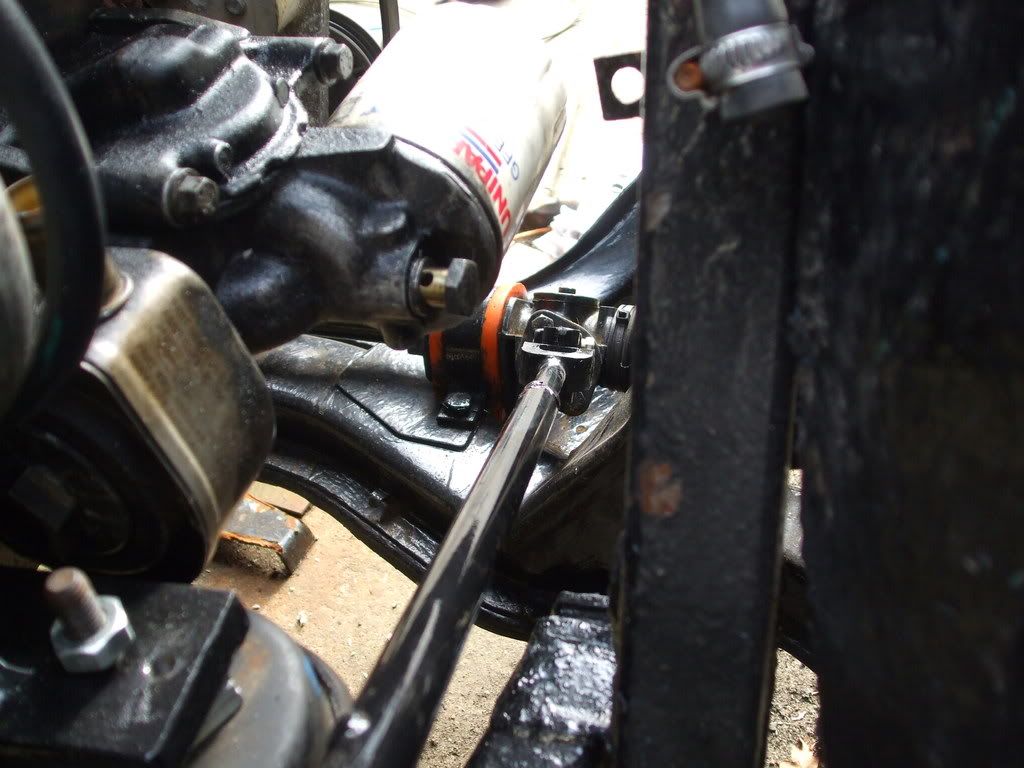 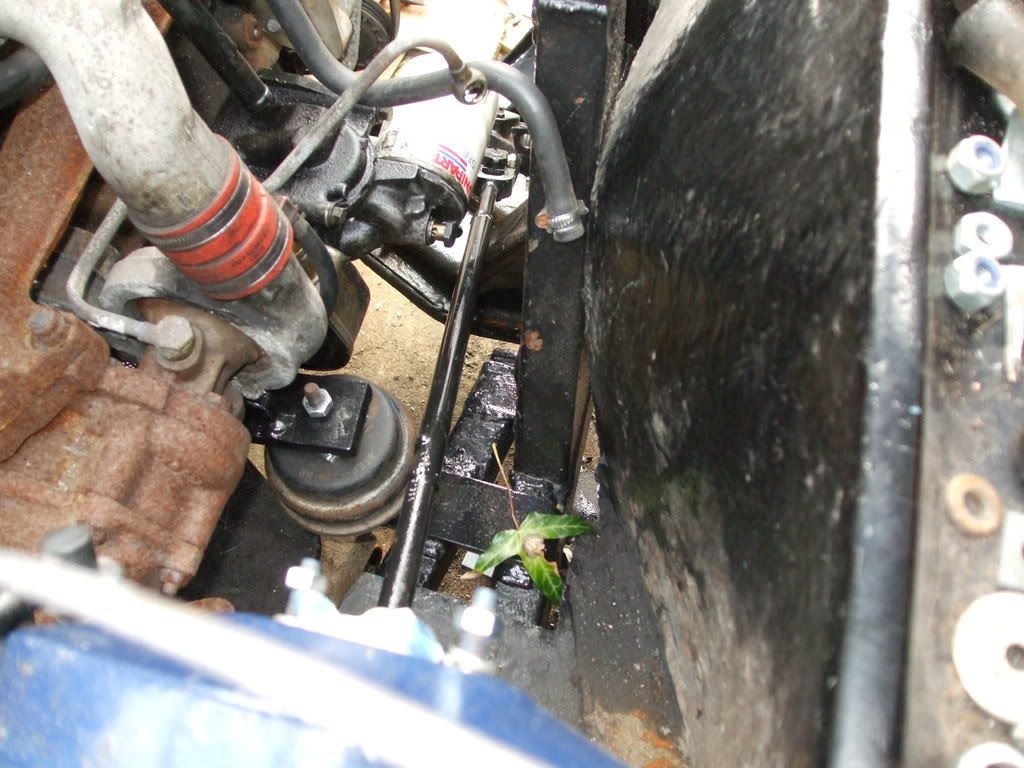 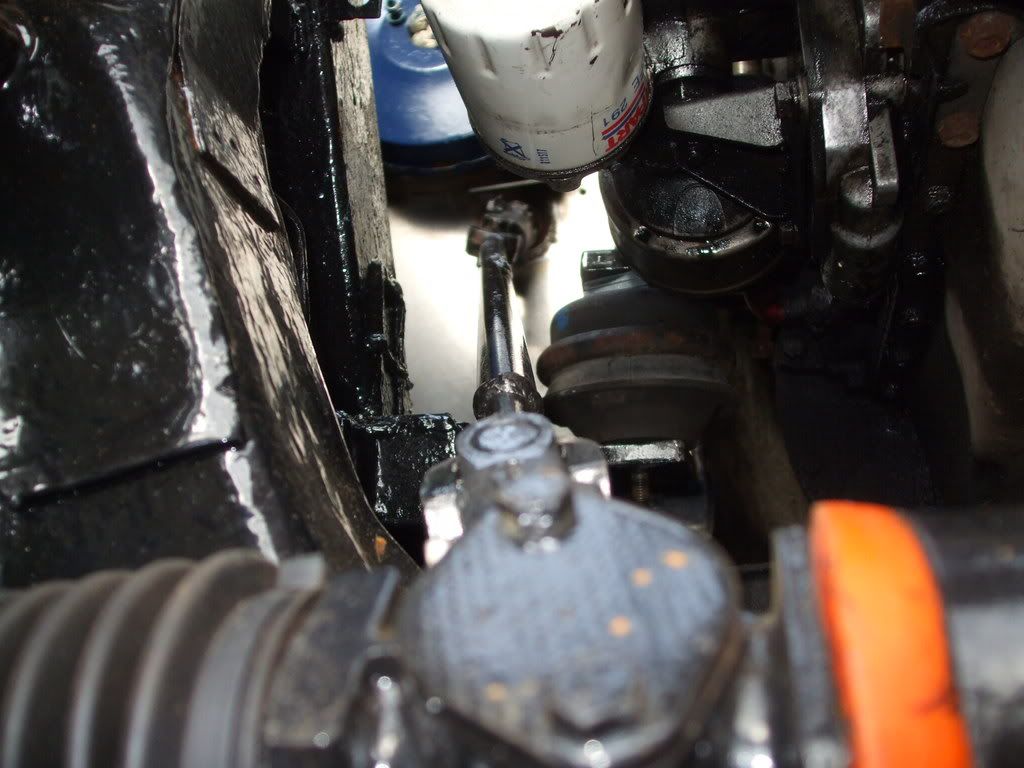 I REALY got to have a sort out in here ! 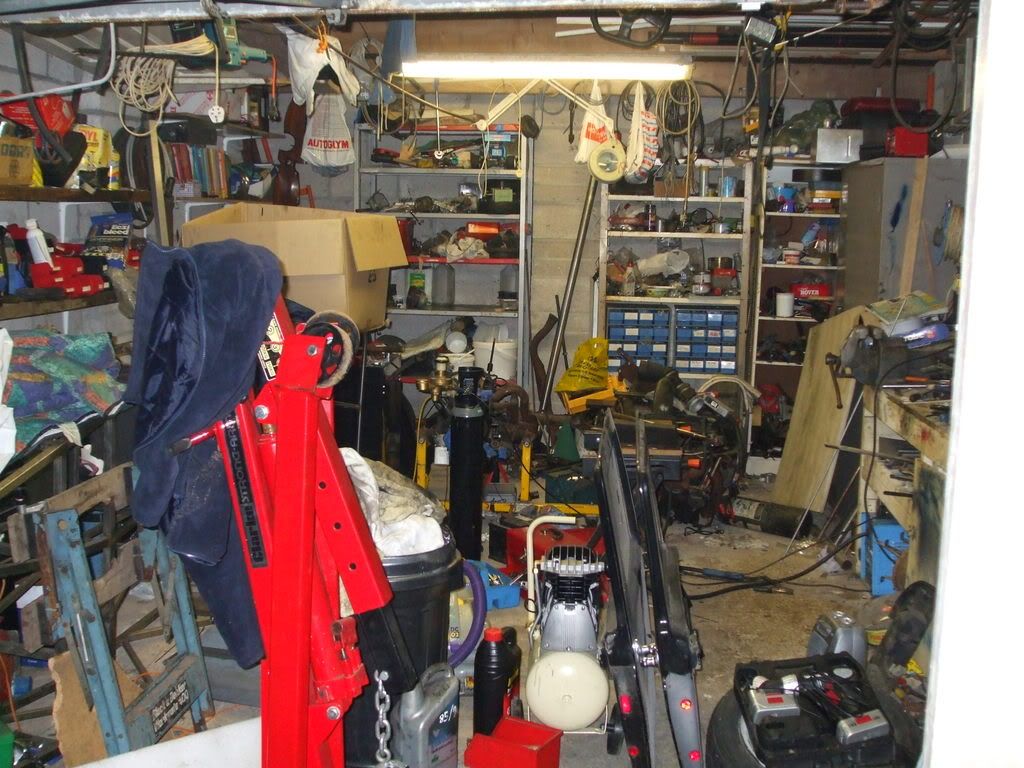 |
|
Deleted
Deleted Member
Posts: 0
|
Post by Deleted on Feb 15, 2009 22:21:47 GMT
Thats what Gary spent all last weekend doing  Tiding his garage that is not Terry's It seems to be worse in the winter because he never brings anything out side (he claims that it is too cold) so he just piles it up and moves it around  |
|
|
|
Post by terryrob on Apr 13, 2009 21:51:07 GMT
Just a quick update, over the weekend I got my front anti roll bar cleaned up, painted and fitted with new drop links. Also did some repairs to the scuttle where the bonnet hinges bolt on, also I cut some tapered peices out of the back edge of the bonnet where it curves down to the rear of he wings. I pulled the two edges back together then and put a few layers of fibre glass inside the bonnet then fillered it up. This gives a nice fit now against the scuttlewhere as before there was a large gap along the top. Will be putting a brand new prop shaft on this week, and need to get flexi hoses and unions for the brake pipes. I'l get some pics on next weekend.
Cheers all
|
|