|
|
Post by Peter on Dec 14, 2015 16:10:17 GMT
Today's shed time was mainly on son-in-law's BMW M5 with a change of belts and an ABS fault to find, (turned out to be a micro fracture in the wire from sensor to inner wing). BUT I did manage to get to grips with something that has bugged me for ages and that's the rough board I did for the door actuator and LED remote relays. I had a piece of the royal blue stick on flocked foam from the dash so I covered it in that and mounted the new mini fuse board and tidied up the wired a bit. All ready for the new programmable relays. as it was, YUK!  Also marked out a nice slab of 3mm alloy to make the deflectors etc to go in the 'A' shroud but I'm going to get an expert alloy welder to tack them in, I just don't have a MIG. The never ending saga of the center console is nearing an end and I'm pretty sure it is going to be finished finally by the week end, I just hope all the electrical connections work after it's all screwed in. It's been a loooong weekend with no post since Thusday, so no goodies, so I'm stalled on with finishing the wiring but a lovely 2 meter length of 63mm ducting did arrive Friday so I can make up the dash vent pipes onto the phylum box on the bulkhead, just need to figure out the addition vents for demist, possibly a center unit from a car mounted in the center slab of the console/dash . Onwards and sideways. |
|
|
|
Post by Peter on Dec 24, 2015 15:49:13 GMT
Trials and tribulations all week but finally getting a bit more done.
63mm ducting now in place for the dash vents and I'm thinking of demister vents now, probably old style Mini.
After the all singing and dancing radio DVD TV thingy went on the frizz I was very P****ed off to say the least and in my usual calm way, NOT, I busted the fibre glass fascia getting the bloody thing out, anyway, I fixed the radio, so those six months doing my A.R.E were not wasted.
I had to trim a lot away behind the radio to clear the support bar and electrics which left the horizontal part of the dash a bit weak so a pair of small shelf brackets later and all good again.
Made a new base for the fascia from STEEL, I still really hate GRP. Drove 50 miles to Malaga where the last remaining ribbed alloy sheet was located but they only had the largest size (500x1000) so 40€ later and a lunch with the wife who insisted in coming with me, at a stable out in the countryside, entertainment provided by watching a young lady fall of her first horse ride, I was back with enough to redo the dash, handbrake/armrest and door cards. All that done and recovered in virgin alloy I just need to cut out the holes for the switches in the alloy (already in the steel) and fit it all together, again.
Outside work got in the way a bit this week like like rebuilding a stripped heap of junk and getting it ready for the annual test (which failed on rear disc too thin) overhauling a pair of buggy carbs and some dust filled switches but all in all a good week, now of course, holidays get in the way and I'm off the UK for the new year/birthday celebrations but back on the 4th and I can't wait to get back in the shed.
I wouldn't mind Christmas so much if it was a reality but Jesus was born in the third week of September in Nazareth, no stable, no journey on a donkey, no Bethlehem and his father was Tiberius Julius Abdes Panthera, a Roman archer who died in Germany. All of which is a matter of written record. So, happy holidays for what ever reason, and a happier new year and may many more of our cars touch tires to tarmac.
|
|
|
|
Post by Peter on Dec 25, 2015 13:31:43 GMT
As far as I can see I have everything on the shelves or in the car now so it is 'just' a matter of time in 2016 to bolt it all in. I doubt I will ever drive it all the way to Stoneleigh as intended as time has flown by and at 70 it might be a bit too much to do a two day road trip each way, not to mention the cost and as a pensioner money is getting VERY tight. Just a few missis, from my photobucket smg.photobucket.com/user/Ukhozi/library/Ukhozi%20public/Did%20not%20make%20the%20cut?sort=3&page=1 |
|
|
|
Post by Peter on Jan 15, 2016 0:24:53 GMT
Another day and 5 more hours done. Phono plugs fitted for radio.  63mm ducts for dash vents fitted but it could use some 90° elbows as it is a bit tight under there but can't find them at the moment but I know someone does them.  Mounting brackets made and fitted for handbrake cover/box and front plate with M5 Rivnuts made -the two rear allen bolts on the gear shift ring pass through and bolt into the front of the rear section,- all wired up for accessory sockets in box and finally bolted in. Lower seat belt mounting bolt moved forward on both seats, seems I have put on a few (lot) pounds in 15 years. Made and fitted the alloy central T bar above the radio that fits between the fascia and the speedo screen and an extension for trip/ change (km/mile) button. I noticed that the ribs on the fascia are one out from horizontal. I MIGHT make a new one but I need what I have left for accents on the door panels. Made an fitted fuel pump guard, needd to make better brackets to move it away from the suspension top.  New 12 way connector block fitted to central board so I had better get stuck into that next. |
|
|
|
Post by Peter on Jan 17, 2016 16:27:22 GMT
Working on the idea of assisted actuators I scoured the internet and world patents for what I came up with, nada, nuffin' so i have a first, again.   |
|
|
|
Post by Peter on Jan 19, 2016 23:06:07 GMT
Bit of a mixed day in the shed today.
First thing I did in the shed was slip on something and do the splits. Now 40 years ago I did that for fun in karate class but at 70 it was no joke, buggered my right hip and pulled the ligament in my left knee, that's the replacement one, hurts like HELL! But I slogged on and it was OK until I had some lunch and when I went to get up, yowww, still, we will do silly things like leave plastic on the floor. MAJOR tidy up followed, three big bags of rubbish and half a dozen old batteries out. Back hone and morphine tablets are wonderful things, whey hey, tripping man .
Fixed the 19 way connector to the console and fitted the radio connector, so that's all ready.
Cut out the new speedo screen ready for curving.
Working out the number of teeth required to get the speedo to read near enough, the Astra has 29 teeth on the ABS ring which is where I am told it gets the pulses but others say it's of a gear in the gearbox. need to check that out. but I also have a bigger tyre so I need to work out how many at 740 Revs per Mile compared to an Astra wheel. Head ache already . Should be OK fitting a ring in the front hub behind the disc.
Refitted the engine shroud, not fitting defectors inside, I know I should but I'll just keep the revs down. also fitted the alloy alternator pulley kit. and the alloy HT lead tube.
Might be a day or three until I can walk let alone work so week end is looming.
|
|
|
|
Post by Gary on Jan 20, 2016 19:12:46 GMT
hope your knee and leg doesn't hurt too much, I am very busy at work at the moment so I am not getting any time for any thing KIT right now. But I do enjoy watching your progress.
|
|
|
|
Post by Peter on Jan 21, 2016 12:52:55 GMT
Thanks Gary, progress will be very slow over this month.
I spent over 5 hours in the hospital del Sol yesterday and ended up with x-rays, aspirated 100cc from my left knee and a full length leg brace for a week. Seems I tore my medial crucial ligament they also saw the fluid from my knee was "black" so not good and may need a scan.
Morel of the story is; KEEP TE BLOODY FLOOR CLEAN!
|
|
|
|
Post by Peter on Jan 25, 2016 10:57:39 GMT
Monday is upon us and I'm stuck indoors with this full length leg brace and still a fair amount of pain, can't wait until I can get stuck into the car again, must get the electrics finished, they seem to have taken a back seat a few times but are now at the top of the list.
|
|
|
|
Post by Peter on Jan 28, 2016 17:39:48 GMT
Busy couple of days, yesterday I went to the hospital for a follow up and x-rays and nothing vital busted so now waiting until March 15th for specialist and in the meantime a knee brace thing so I can at least walk with a semblance of normality.
Went to trafico, to change my licence from UK to Spanish as I was told I should have done so years ago. But when we finally get to the window the guy says, "you can drive on that UK//EU one for another 2 years, but change it for a Spanish one and you get another 5 years", so as we had already paid €40 for a medical certificate and there was no charge as I'm over 70 now, we went for that option, but what a performance! In the UK it's all on-line, takes 10 minuets, was FREE and was in my UK address in 5 days.
Work on Ukhozi is at a standstill at the moment but parts are still arriving including the 12v to 5v dropper so I could, if I wanted to, drive the ex-CD-ROM chassis for a pop up unit. Bloody Chinese lost my remote relay unit so a month waisted and another one has had to be ordered, from Hong Kong this time. Seems to a lot of stuff going missing before it gets on a plane in China theses days.
|
|
|
|
Post by Peter on Feb 3, 2016 15:14:00 GMT
Back in the shed for a few hours, easing back into it after the knee problem which is still ongoing. Got the plastic for the screen curved to fit only for it to crack on cooling, I thought the plastic was a bit old so I bought a new panel and bingo! All good and a new screen made, again.  3 Ply base for top cover made ready for covering as soon as I find that darn piece of black leatherette I have somewhere, maybe. Electrics and wiring in the doors finally done and ready to fit into the door cards when made, small 12v battery packs had to go on trickle charge though. Spent half an hour searching for the dash end 4 way connection extension before I realised I had already fitted them into the end panels  Thursday should see a few more hours and I really need to get the wiring finished.  |
|
|
|
Post by Peter on Feb 8, 2016 18:40:44 GMT
Quite a bit accomplished in the last 5 days or so, held up on Saturday as someone insisted I work for them. Extensions made for the dash pods and leather-cloth sourced and cut, top panel already covered but I need to work a bit more on the pods before I can cover them, like where I had to move the steering cowl 3cm. New plastic worked a lot better than the old stock I had and a beautifully curved screen has been made without and wrinkles, warps or flats, very pleased. 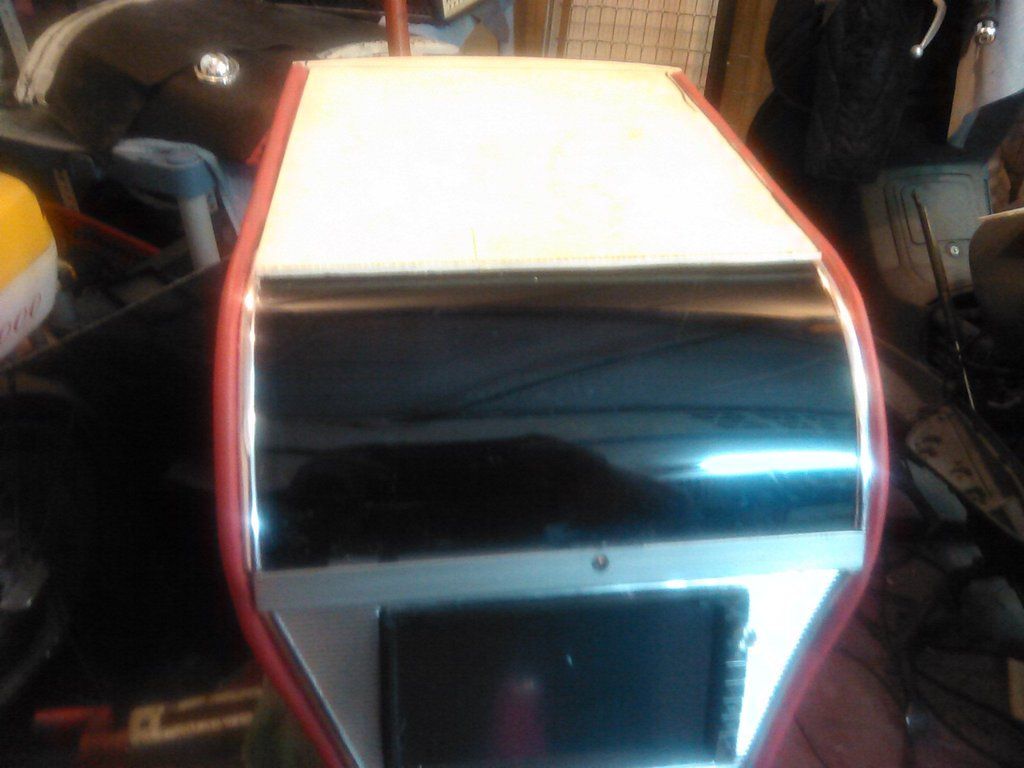 The electrics have made progress but still a lot to do, at least all the functions, well, function and apart from me omitting the wire for dipping the headlight relay and one from the reversing light to switch on the camera all is well, I just ran out of terminals, I though 36 would be sufficient, wrong! 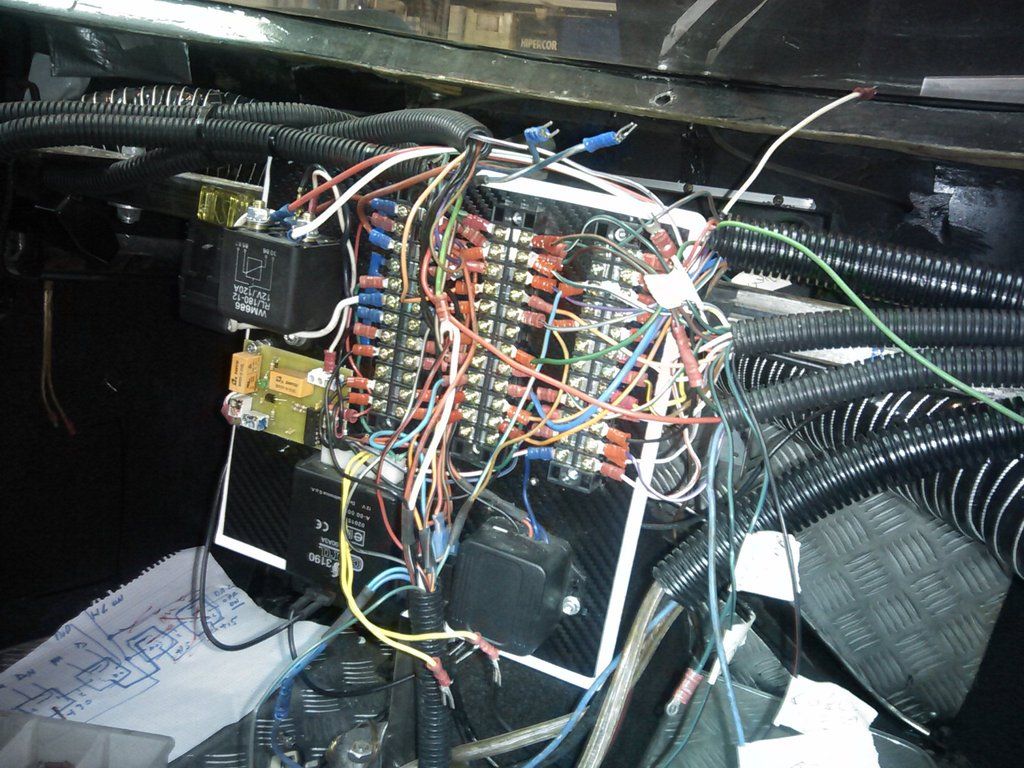 Door electrics all done and mini 12v battery packs now charged up. Engine finally reassembled and all electrics hooked up. 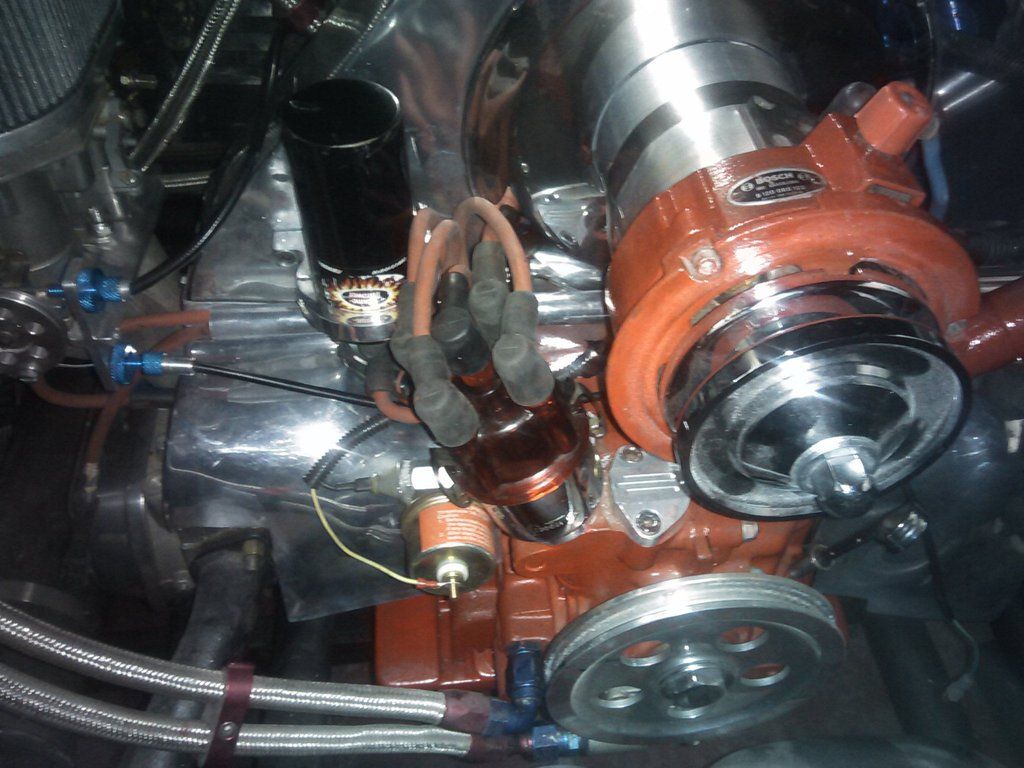 Relay pack for the LED display lights arrived and duly messed with, modified so the 12v is on the back rather than having loops of red wire showing, did the same on the door relay so that is all ready to install too.. 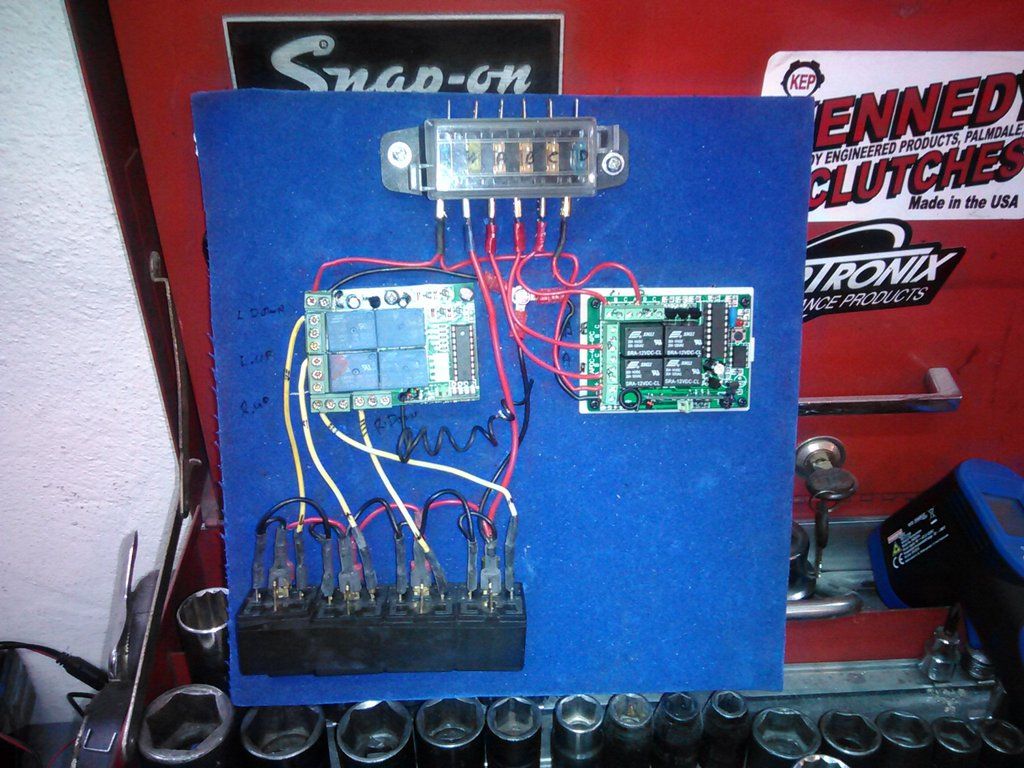 |
|
|
|
Post by Peter on Feb 17, 2016 13:12:17 GMT
Not much done so far this week, outside work got in the way, again.
Moved the components around on the connection board to make more connections, I thought 36 would be enough, wrong!
Managed to get the woodwork done on the dashboard side pods and they should be dry and ready for recovering Tomorrow when I'm helping my stepson change the strut tops in his 525 CDs BMW, again, dam thing eats them!
|
|
|
|
Post by Peter on Feb 21, 2016 20:29:51 GMT
Plan B, again. Had a brain wave, again, redesigned the bloody thing, again. Realised the board has TWO sides, so I can place another board in front of the metalwork with the boxes on the rear, leaving the front for FIVE connection strips, so I have two 10 way blocks on the way and I can make the board slimmer, higher under he dash too.   I have also started thinking about FAST hydraulics for roof/door struts. The power steering electronic pump on the Mercedes A-Class has gone PHUT! AGAIN, This time a relay will not fix it so onto Ebay, Again, and ordered a used one. BUT, as I was looking at the specs I saw they actually put out 72 bar, that's a lot. so I'm thinking as they are pressure controlled, somehow inside. I could use one of this pumps which are very quite, to power an accumulator and operate rams via electronic valve control from the constant pressure source. Also, rather than use a spring powered piston accumulator a simple cylinder with a nitrogen bladder inside would work just as well and no piston problems. Sketch to follow. maybe |
|
|
|
Post by trike on Feb 22, 2016 21:09:16 GMT
I was thinking exactly the same thing, using a citroen or peugeot pump as they are a simple 2 wire system,and possibly power steering rams as they are quite compact.70 bar is a lot less than i'm used to working with,but should be more than enough to lift the doors with the right diameter rams.Still messy when they go pop!
Plan B is to go for a pneumatic system if i can find a suitable compressor,Rangerover air suspension pump maybe?,not sure what pressure they put out, but would need to be around 8 bar to work properly
|
|
|
|
Post by Peter on Feb 24, 2016 12:37:57 GMT
Used to work with air rams back in '87 when making golf trolley bags, great on speed but crap on power and very 'on or off', hydraulics are the best and more powerful and controllable with no internal compression but as you say, messy. Using an accumulator eliminates the lag in providing pressure from the pump, it being fully charged and 'on demand' with the pump just topping up the pressure when needed. I'm sure an accumulator(s) could be added to existing systems to good effect on a 'T'. The power steering analogy is the one I am working on, a distribution valve with solenoid operation, (and remote function too) (pics from a quick Google search, I'm sure better, more suitable examples are out there.)  Sort of thing. Like www.ebay.co.uk/itm/FLOWFIT-DOUBLE-ACTING-CETOP-3-NG6-SOLENOID-CONTROL-VALVE-12VDC-F5-02-3C60-D1-/281379611603?hash=item41838823d3:g:dFsAAOSwh6xTvUma www.epe-uk.com/accumulators.html www.epe-uk.com/accumulators.htmlSeen them as low as 30.00 on Ebay, Ex-MoD. I think roof systems work like this but never having had to do one,,,,, One of my infamous 5 minuet doodles. (yeah, I know, arrows wrong on blue returns ).  Shown with accumulator and safety bypass valve. Of course, in my case I would need two valves, one for each door with both working on what are now buttons 'C' & 'D'. |
|
|
|
Post by Peter on Feb 25, 2016 12:12:11 GMT
Pumps arrived, so off to fit that, what has that to do with my build you may ask? Well, I use the Merc' to go to the 'shed' 35 miles away as it sips fuel, so no Merc' = not many trips in the BMW. Also Looking at the compact size, remote electric fitting and ease of fitting both the pump and the rack I would seriously consider this as a PAS conversion for the VW chassis, the track rod ends are long and bendy which when replaced by normal ball joints would bring the whole thing into size, also easy two hole mountings and only one pressure pipe (and a low pressure return), battery, earth and alternator connections are all that's needed, no ECU crap and 100 quid the lot.   With shorter ball joints to make 110cm  EDIT; Mercedes rack is wrong type being in front of the axle. dam. ![cursing[1]](//storage.proboards.com/658221/images/cfTn3T5UL4wuItbNCxN1.gif) So need a behind the axle rack with same fittings and short. |
|
Deleted
Deleted Member
Posts: 0
|
Post by Deleted on Mar 2, 2016 0:15:24 GMT
every time I see the progress I am filled with wonder and admiration, my respect Thanks Luc, ![blushing[1]](//storage.proboards.com/658221/images/GOct95b4P66OwHKPxg2q.gif) Loving your new workshop, ![love[1]](//storage.proboards.com/658221/images/WB905yHTE4BG54DShTfw.gif) nice lift and a spray booth too. I trust the essentials have been done too, like heating, coffee machine and a comfy 'thinking' chair. I could really get some serious stuff done in there, sharing my workshop with half a house of junk 'stuff' and furniture, a Suzuki Bergman and a bicycle means I am cramped a bit but much better than the old one in the house basement where I was very restricted by the 'boss' as to what noise and smells I could make,, but it was 37Km less driving each way , strangely I didn't seem to get any more work done, probably less ![hmmmm[1]](//storage.proboards.com/658221/images/XKN5ScdKR1O8cJ3IeDgW.gif) . I had to undo all the wiring on the central connection board to fit the new 56 way connectors, so a lot of rewiring to do and I know I will need to lengthen many wires by a few centimetres but it will be done properly and out of sight, I had better buy a new roll of solder and more shrink sleeving . |
|
|
|
Post by Peter on Mar 12, 2016 11:28:41 GMT
Bitmore done on the SS, busy day in the 'shed' apart from the SS I managed to fix the problem with fitting later model rotor blades to my helicopter's new alloy rotor head and then strip down the Mercedes electric power steering pump. If I can get the four ICs I can repair it. but I think I would be better in bypassing the PCB and fitting an 80A relay along wit the capacitors.  New dash side pods finished.  And remote control board finished and installed, cover can go on now.  Started on the new, improved Central connection board now the two 10 way strips have arrived for the power and earth connections. Finding getting in and out of the car a pain, literally ![frown2[1]](//storage.proboards.com/658221/images/4RoFPGAE9cs9iByWQb34.gif) , without the seat in so I can sit on the floor and get close the the CCB to connect and solder. I have done away with the crimp on fork connectors and gone for soldering the wire ends, less chance of coming off and a lot neater. On the major connections I have had to use them but with a dab of solder as the wires are too big to fit under the screws. |
|
|
|
Post by Peter on Mar 12, 2016 11:30:39 GMT
New CCB. with seperate board at the back for the relays and fuses etc.  Old CCB with everything on the front.  |
|
|
|
Post by Peter on Mar 16, 2016 9:11:19 GMT
One would think 56 connections for 112 wires would be enough, well only just it seems, I have had to fit two wires under a screw in places, such as door switches, side lights and indicators and reduce he number of links for voltage and earth. anyway, it is now 90% done, need to find out what that green wire is for that goes to the fusebox run a wire from radio remote board to the front for cabin LEDs and then just check everything does what it is supposed to and I seem to have lost the wire from the alarm to bonnet switch under the heap of cables.  Thinking of adding a grab handle over the base of the handbrake to give me something to push on when getting in and out as the arm rest isn't up to being lent on. Seen a couple of body areas I need to finish from ages ago, left rear wheel arch smoothing off and left scoop intake need finishing but apart from that I am now looking to start the door cards next month, so copious amounts of paper standing by and a few large size corn flake packets which provide superb template material. |
|
Deleted
Deleted Member
Posts: 0
|
Post by Deleted on Mar 17, 2016 9:16:17 GMT
Seen a couple of body areas I need to finish from ages ago, left rear wheel arch smoothing off and left scoop intake need finishing but apart from that I am now looking to start the door cards next month, so copious amounts of paper standing by and a few large size corn flake packets which provide superb template material.  that's hard to understand, and translation is certainly like chinese |
|
|
|
Post by Peter on Mar 17, 2016 9:24:41 GMT
Google my friend, Google Gezien een paar delen van het lichaam moet ik geleden ronden leeftijden, linker achterwiel boog smoothing uit en verliet scoop inname nodig afwerking, maar afgezien van that ik nu op zoek naar de deur kaarten beginnen volgende maand, zodat grote hoeveelheden papier staan door en een paar grote omvang maïs vlok pakketjes die uitstekend template materiaal te verschaffen. Is that any better |
|
|
|
Post by Peter on Apr 14, 2016 9:36:26 GMT
Bit more of the build blog.
All three road cars now tested, insured and road legal for another year, so that's one thing out of the way, just broke the piggy bank that's all. Apart from the little jobs that still need doing like the gear change light on the E30.
On the SS I have finally cut an 122mm hole in the rear wing and flushed the filler in, took a while as the wing isn't quite flat, so a bit of filling and sanding went on, basically I glued a panel under the hole for the cap to sit on then filled it in with a thin, smooth paste, covered it in cling film and pressed the filler onto it, then removed it, after a few minuets I was able to remove the cling film and refit the filler, smoothed it off, did a bit of sanding and filling until it was spot on and gave it a coat of black, looks good so far. Problem one, the 50mm x 40 x 230 curved filler pipe from a ?? is perished and cracked so I am looking to replace it, a couple of silicone sections seem to be the way so far, 51mm to 40mm reducer, 40mm x 40mm 45degree elbow and a 40mm connection tube.
Wiring is all done at last and it all works, so far, going to be interesting when I hook in the battery and connect the console though.
The headlight lifter micro switches, some 5 years old 20 years ago are cracking up so new ones to hand and I have finally done the polyurethane mounting plates for the beam to stop the darn thing rattling in the fibre glass, I will mount the switches to those.
The areas where the filler had fallen off the wheel arch returns, due to me demonstration the impact qualities of the body too often, have been filled and smoothed.
|
|
Graham Wood
E.O.C. Chairman
Webmaster
User name = RAM
Posts: 531  Location, Town please: Southport, U.K.
|
Post by Graham Wood on Apr 14, 2016 20:06:50 GMT
Wiring is all done at last and it all works, so far, going to be interesting when I hook in the battery and connect the console though. November the 5th may come early then ? but hope all goes well. |
|
|
|
Post by Peter on Apr 15, 2016 23:27:24 GMT
Today's shed time was taken up initially by fitting a new receiver to my helicopter, so that's sorted, resisted the urge to fly it and got on with the SS. Spent some time getting dimensions for the fuel filler tube, quite complex, 50mm top, side steps 50mm in the middle and at the other end a 45° bend and reduced to 45mm, not exactly off the shelf. Fitted the poly headlight bar mounts, great, no more rattles and with a bit of silicone lube nice and smooth, I fitted the left one under the wing out of sight but the right one had the micro switches on so I did half in and half out, even then I had to move the lifter motor inboard a bit the make sure there was clearance. Attachment DeletedAttachment DeletedFiller looks good too. Attachment Deleted |
|
|
|
Post by Peter on Apr 25, 2016 20:55:12 GMT
Another six hours and some great jobs done. Fuel filler neck modified with my Lumiweld kit and a proper 13mm (1/2") breather connector fitted and old hole filled in.   Looks better after a couple of coats of enamel. Just need the two silicone pipes for the filler now. Boot lid. Now there was a job. Initially I had intended to cover it completely in CF wrap but after I had spent half the afternoon polishing the thing it looked really good so I just did the centre and I think I did the right thing, it looks a lot better. Well I think so.    Even managed to get both headlights vertical. Might be a bit Lax on the SS shortly as I have Buggy work coming in and a new firm to service, even worked Sunday afternoon for heaven's sake, couldn't fix the problem, case of f**ked was f**ked cylinder wise. |
|
|
|
Post by dickdastardly on Apr 26, 2016 19:56:24 GMT
Peter I have noticed you have the same wheels as me good for the biceps the wheels at low speeds lol
|
|
|
|
Post by Peter on Apr 27, 2016 9:52:53 GMT
But I have R&P steering. no problem. I was considering power steering but I don't think I need it. Two options, electric column as per Opal Corsa or hydro-electric as per Mercedes/Porshe and hydraulic rack.
|
|
|
|
Post by Peter on Apr 30, 2016 20:34:57 GMT
Looking at gaskets for the filler neck, quite for what they are, I bought two cork table mats for £2, and 3mm thick, enough for 6 gaskets.
|
|


![cursing[1]](http://storage.proboards.com/658221/images/cfTn3T5UL4wuItbNCxN1.gif) So need a behind the axle rack with same fittings and short.
So need a behind the axle rack with same fittings and short.![blushing[1]](http://storage.proboards.com/658221/images/GOct95b4P66OwHKPxg2q.gif)
![love[1]](http://storage.proboards.com/658221/images/WB905yHTE4BG54DShTfw.gif) nice lift and a spray booth too. I trust the essentials have been done too, like heating, coffee machine and
nice lift and a spray booth too. I trust the essentials have been done too, like heating, coffee machine and ![hmmmm[1]](http://storage.proboards.com/658221/images/XKN5ScdKR1O8cJ3IeDgW.gif) .
.


![frown2[1]](http://storage.proboards.com/658221/images/4RoFPGAE9cs9iByWQb34.gif) , without the seat in so I can sit on the floor and get close the the CCB to connect and solder. I have done away with the crimp on fork connectors and gone for soldering the wire ends, less chance of coming off and a lot neater. On the major connections I have had to use them but with a dab of solder as the wires are too big to fit under the screws.
, without the seat in so I can sit on the floor and get close the the CCB to connect and solder. I have done away with the crimp on fork connectors and gone for soldering the wire ends, less chance of coming off and a lot neater. On the major connections I have had to use them but with a dab of solder as the wires are too big to fit under the screws.


 that's hard to understand, and translation

