|
|
Post by Peter on Jul 30, 2013 12:09:22 GMT
Very nice...never seen a combined radio/camera system before. Strange you haven't as 99% of all 6.5 and 7" screen radio/DVD units, including single DIN pop-up screens, feature a camera input. most also have a TV function as mine has but as it's analogue one needs a digital converter as well, RDS radio, AV out for headrest screens, second AV input, GPS and Bluetooth, full RCA out and Aux in and sub out are also pretty much standard on all units too from £110 up. All function units with digital TV, iPod/iPhone, Hi-res DVD (or even Blueray), GPS, etc are about £140 (Chinese) to £350+ for Japanese brand names. The reverse camera is fed it's 12v from the reversing light which in turn turns the display from whatever function you are using to reverse view. Handbrake on also stops TV and DVD being watched on the move by the driver but AV out to the rear means the kids in the back can watch a DVD whilst Dad has the radio or GPS on. |
|
|
|
Post by Peter on Jul 30, 2013 12:15:21 GMT
Picture of your car in Kitcar today Peter Got my copy today, already put them right re the club name, it's NOT the "All car Club". and web page is http:// not www. but apart from that not a bad write up, at least we get a plug TWICE in the mag. As they say, "Never let the truth get in the way of a good story". |
|
|
|
Post by Peter on Jul 30, 2013 13:55:36 GMT
Comments from across the pond have given rise to plan C, (or is it P ![hmmmm[1]](//storage.proboards.com/658221/images/XKN5ScdKR1O8cJ3IeDgW.gif) ) Attachment DeletedAttachment DeletedThinking is to extend the smoked speedo screen down to the switches with or without a divider, wadaya fink? |
|
|
|
Post by Gary on Jul 30, 2013 20:44:13 GMT
With the divider it looks a little more refined "Factory even" Just my opinion do which ever your happy with  |
|
|
|
Post by Peter on Jul 31, 2013 7:32:05 GMT
Opinions are very important to me, even yours Gary  only kidding  much respect- I agree and I think that will be the route to go, just got to play with my bits of wood and sticky back plastic until I get it right. |
|
|
|
Post by Peter on Aug 7, 2013 13:29:51 GMT
Currently working on option two, meant stripping the dash and speedo cover down, pulling the front corners in about 1/2" so it matches the console, I then have to strip the 10mm alloy square tube that forms the curve and make it a 'L' so the glass and chrome strip reach the 3mm outer panel which will be recovered in the new red stuff. Then I need to cut a new Perspex panel for the top of the console as in type two and paint the back black and a new speedo cover and trim with chrome edging. Then I need to remove the dash 'wing' coverings, add a bit to the ends to give them a rearwards curve to wards the door panels and recover, then after tea!!!  Attachment Deleted Attachment Deleted |
|
|
|
Post by Peter on Aug 9, 2013 13:36:07 GMT
Got most of the above done Friday but as usual one thing leads to another  and I had to make a new centre section for the dash top as I had made the sides slimmer and binned the 3mm foam padding so it was too narrow. I cut away the frame where the speedo cover goes to make it blend with the slimmer console sides so then the glass didn't fit and I had to cut a new one. Removed the alloy centre stuff down as far as the switches but not sure if to cover the top of the console in plastic to go with the speedo cover or black grained leather cloth to go with the dash.  thinking leather cloth, maybe ![hmmmm[1]](//storage.proboards.com/658221/images/XKN5ScdKR1O8cJ3IeDgW.gif) |
|
|
|
Post by Peter on Aug 9, 2013 13:41:35 GMT
With the divider it looks a little more refined "Factory even" Just my opinion do which ever your happy with  Gone with option two and the divider idea has expanded to be a 10mm 'T' section alloy extrusion which I will polish to a high bling and will wrap around the join to meet the dash. |
|
|
|
Post by Peter on Aug 9, 2013 13:49:38 GMT
Picture of your car in Kitcar today Peter Got my copy today, already put them right re the club name, it's NOT the "All car Club". and web page is http:// not www. but apart from that not a bad write up, at least we get a plug TWICE in the mag. As they say, "Never let the truth get in the way of a good story". Apart from prattling on about vultures which was a bit superfluous and confusing, getting the club's name wrong, deciding I named the car Ukhozi 'cause I lived in Spain when it was actually a South African doctor friend who named it, (but he didn't ask me) and saying there was no sign of it being finished, which is almost right as our projects rarely are but I am a lot nearer than I was a year ago, despite moving house and leaving out a load of stuff he could have put in about seats, he nearly got it nearly, almost right. I did write to the editor who said he would correct the clubs name in the next issue, be interesting to see if he does. And, we got FOUR references, if not accurate but good all the same. |
|
|
|
Post by Peter on Aug 10, 2013 9:10:37 GMT
If only I was a 'proper' graphics artist  . anyway this my rendition of the final design which is well under way. should be a done job by end of the month, wife and jobs permitting.  Minor set back, having modified the speedo to have a green LED voltmeter set in the top of the idiot light section it flash twice and blew!, so all aprt, DEAD, new one ordered, speedo in bits.  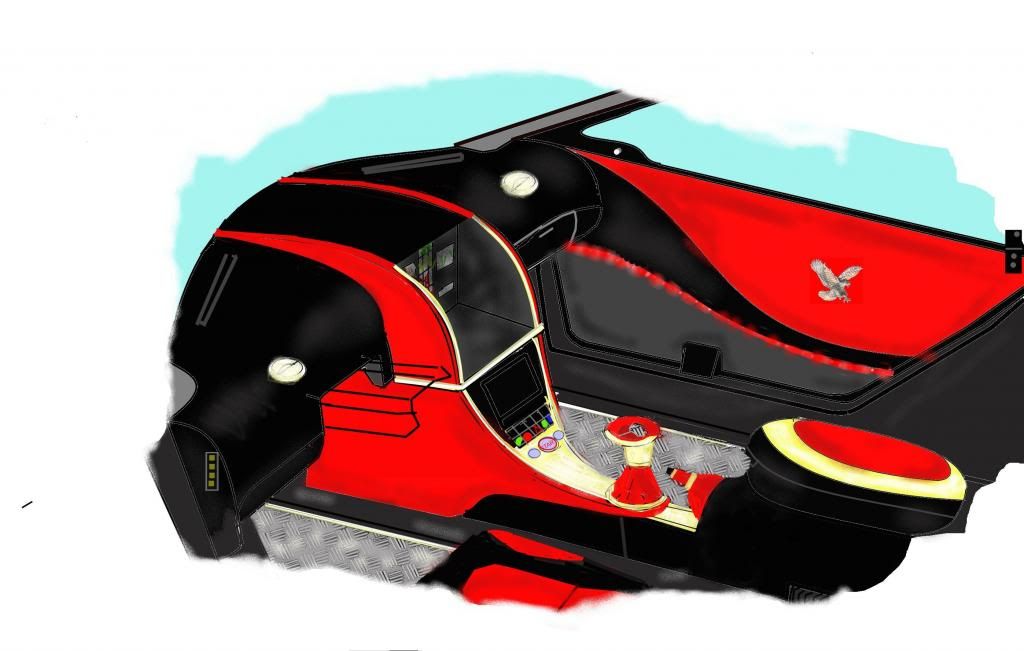 Already done the back part 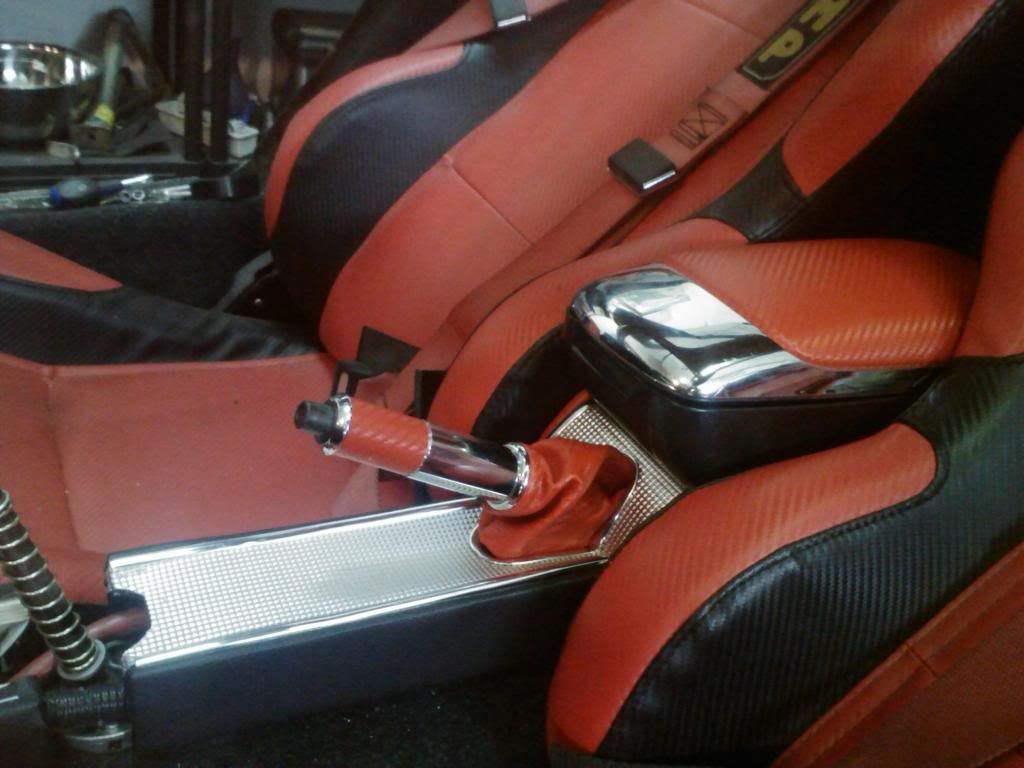 and main part well under way 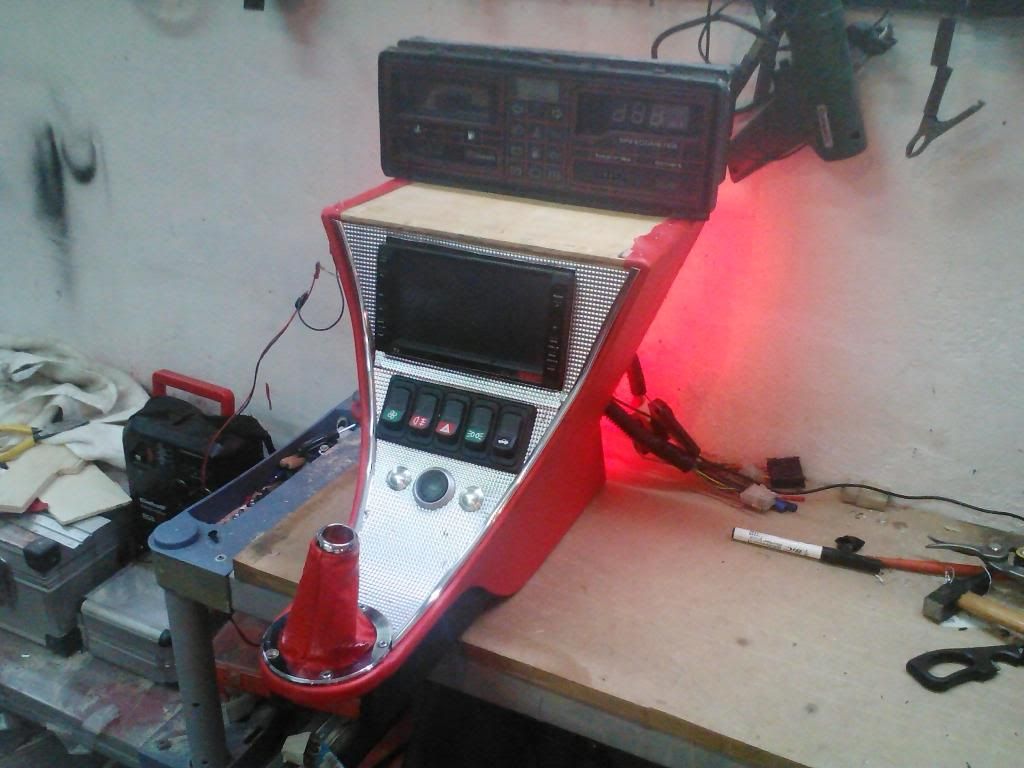 |
|
|
|
Post by Gary on Aug 10, 2013 21:55:34 GMT
Looking good.
|
|
|
|
Post by Peter on Aug 12, 2013 8:42:31 GMT
Like you know it would, da da dada dah, ![rock[1]](//storage.proboards.com/658221/images/WwlTZGzEzqS029BPkumN.gif) yeah |
|
|
|
Post by Peter on Aug 14, 2013 16:20:50 GMT
|
|
|
|
Post by Gary on Aug 14, 2013 20:45:34 GMT
Nice! I like that. Going to be stealing some idea from here ![angel[1]](//storage.proboards.com/658221/images/XtuH5rwyBaS0gOkAn3Cd.gif) Does the bent screen at the top cause any reflection problems? |
|
|
|
Post by Peter on Aug 15, 2013 8:37:14 GMT
Nice! I like that. Going to be stealing some idea from here ![angel[1]](//storage.proboards.com/658221/images/XtuH5rwyBaS0gOkAn3Cd.gif) Does the bent screen at the top cause any reflection problems? Not if you bend it right. I clamped the lower 2cm between plywood in a vice then gently applied a heat gun over the whole central area before pushing the top back with another piece of ply to get the correct curve then just hang one until it cools. Top edge has another piece super glued under it to fit under the black top, the top 6cm will be blacked out from the back and a 1cm black 'edge' applied to the top edge, the bottom fits behind the alloy cross piece that also holds the sides in place. When the two halves finally met as a unit I spotted the difference straight away, the top red sides are wider than the main console so the chrome strips don't line up, I am going to add about 3mm width to the inner part of lower red side part, about 4cm, to take it to the same width as the top. I had to buy some longer 4mm allen screws on the gearshift ring as they hold the two halves together. I also have to fit the bracket to the rear section which then holds it rigid and change the rear of the three bolts holding the top onto the gear shift lever for a stud and long nut so I can fix the front of the rear part, then the bracket holding the top of the console has to be altered as it doesn't fit the slimmer console. apart from that all done. Talk about one thing leading to another.  |
|
|
|
Post by Peter on Aug 15, 2013 8:46:56 GMT
Note, I was only able to get this layout because the gearshift is nearly a foot further back in the handbrake position and I could only move the handbrake by using a Volvo one on top of the tunnel, yep, one thing does lead to another. 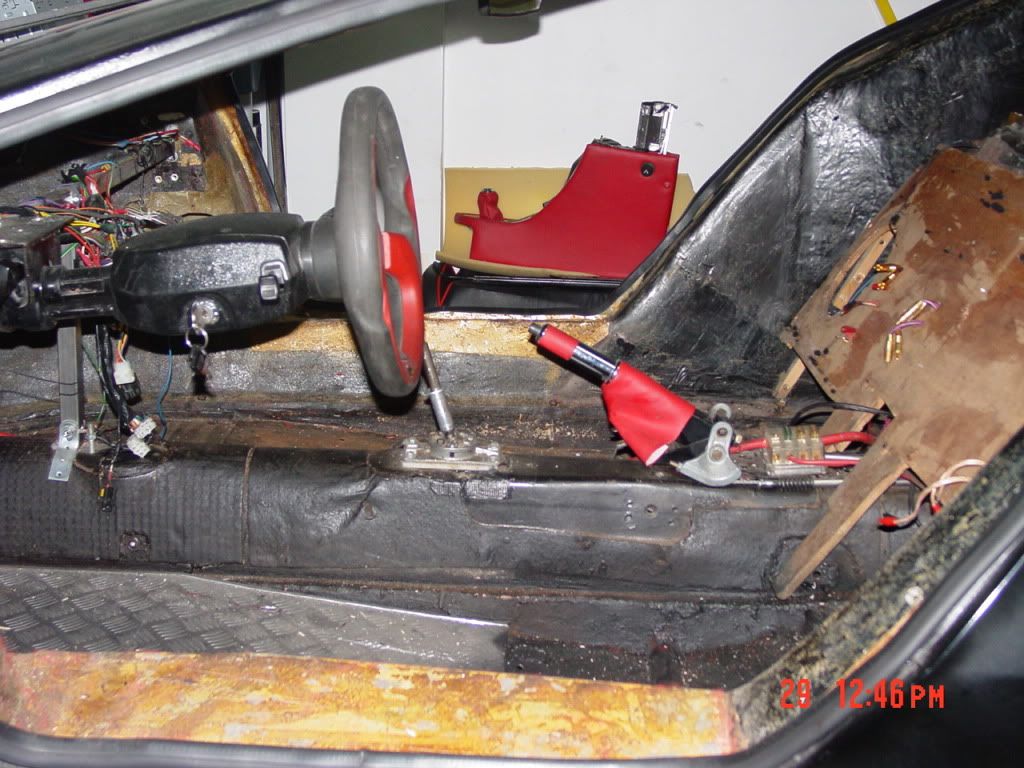 |
|
|
|
Post by Peter on Aug 16, 2013 16:05:23 GMT
Heat not withstanding, it was very hot and my garage is underground, phew!  . had to remove the steering column as it was sloppy, circlip had popped out of the groove so I cut it deeper and job's a good 'un. Whilst it was out I shortened the huge loop of AN piping I had from the throttle pedal to the pipe in the tunnel to a reasonable length. De-seized the carb' end piston and overhauled the hydraulic piston and spring unit as well, wishing all the time I had used a cable set up. Now home and two hours gone and I'm very much in need of a hot shower and a cold beer. cheers. |
|
|
|
Post by Peter on Aug 17, 2013 11:42:17 GMT
|
|
|
|
Post by Peter on Aug 27, 2013 7:49:33 GMT
Another couple or three hours in 'the shed', this time attention was on the throttle, the carb' end `piston was still sticking which would make putting my foot down interesting to say the least as the dual carbs suddenly popped full open, so I scrapped the whole system and decided to return to cable again. One job I was not looking forward to was pulling the 2 meters of brake line out of the throttle cable tube in the chassis as it had been a pig to put in but with a short length of cable tied around it and the other end on the Mercedes tow hitch it came out no problem. Managed to get the throttle pedal off the bracket assemble and out without any bother and cut off the foot pad, welded up the hole for the hydraulic fitting and welded a 'L' shaped flat bar to the pedal that now passes near the tunnel just in front of the cable exit to take the cable Z fitting, (photos to follow asap). Attachment DeletedWhy did I grind off the foot pad? I wanted a roller pedal, the answer came from Ebay as usual in the shape of an off-white skate board wheel for about a fiver so a 8mm allen bolt and nylock nut and it will be a good 'un. VW T1 throttle cable on Ebay for a tenner and a bit of outer cable from the bits bin and I will make a roller end fitting for it as seen on, yep, Ebay but I'm not paying 44 quid for it, I'll make my own. Basically a block that bolts through the firewall takes the outer cable in the front and passes the inner cable over a small roller on the engine side so it can go 90 degrees to the carb linkage, that will complete the job, something like, Attachment Deletedjust need to figure out the cable fitting to the carb linkage, probably keep it simple with a clevis and nipple fitting rather than a ball joint as now. More from the 'shed' soon. |
|
|
|
Post by Peter on Aug 27, 2013 13:26:04 GMT
Update, managed to get over to the workshop, which with the manic holiday traffic is no mean feat. Fitted the throttle pedal back on and it fits and lines up with the cable tube, result ![rock[1]](//storage.proboards.com/658221/images/WwlTZGzEzqS029BPkumN.gif) Attachment Deleted Attachment Deleted |
|
|
|
Post by Peter on Aug 30, 2013 9:34:46 GMT
The roller throttle came to mind when I was sitting in the car and discovered the 'none slip' surface of the pedals was sanding away the underside of my Crocs  and yes, much nicer to use. The roller cable tube is a good idea and looks well made but me being me I like to make life hard and make my own, anyway I have a 90 degree angle to go and I think my design would be better at it, much the same with the roller in a block but the incoming tube will be a M12 stud with a 6m hole up it, opening to 10mm for the outer cable from the chassis to sit in it. A nut will hold it to the fire wall. using the linkage across the rear I just need to hook the cable to the lever with a clevis and nipple set up although for a smoother feel I am considering a 3" pulley attached to the lever. Something like this Attachment Deleted Attachment Deleted |
|
|
|
Post by Peter on Sept 1, 2013 12:29:54 GMT
After kicking the pulley idea around on the Stirling forum with Leterman7 I am now thinking an all pulley system might be better. so.... anyone know of a pair of 2" to 3" throttle pulleys, (preferably two nipple type), anywhere?
|
|
|
|
Post by scooby on Sept 1, 2013 23:48:39 GMT
Um, hang on... (pats pockets to check...)
|
|
|
|
Post by Peter on Sept 2, 2013 15:49:49 GMT
Um, hang on... (pats pockets to check...) Love it  But you never know, if you don't ask..... Seem to have it sorted in my best MvIver fashion. Fowardmetals on Ebay will slice me 4 8mm discs in alloy for £1.40 each inc VAT plus a slab of 1/4" for the brackets. can't say enough about this guy David, answered my question on a SUNDAY within a couple of hours and has been over the top helpful, I would say if anyone wants some alloy or steel get in touch, they are great! ![cheers[1]](//storage.proboards.com/658221/images/HTahwjnPNRnE0X3XkViD.gif) tinyurl.com/kr5yrhn tinyurl.com/kr5yrhnDid a quick sketch and it seems to work out. Attachment DeletedBit of old school skills and a day in the 'shed' should see it done. |
|
|
|
Post by scooby on Sept 2, 2013 19:44:37 GMT
Blimey...  |
|
|
|
Post by Peter on Sept 5, 2013 18:21:23 GMT
I managed to get some Eagle time in whilst sorting out son's 525 beamer, anyone would think it was a Rolls Royce the way he goes after every little noise and creak. Pedantic springs to mind. Anyway front sidelight/indicator/fog light units are in and working at last so now I can concentrate on the rest of the wiring tidy up. I am quite pleased with the way they fit in, not quite 100% the same curve as the nose but near enough, even for me. 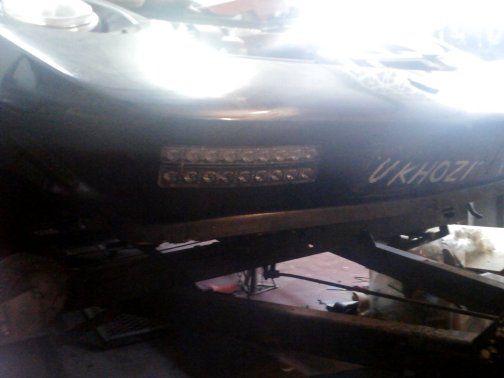 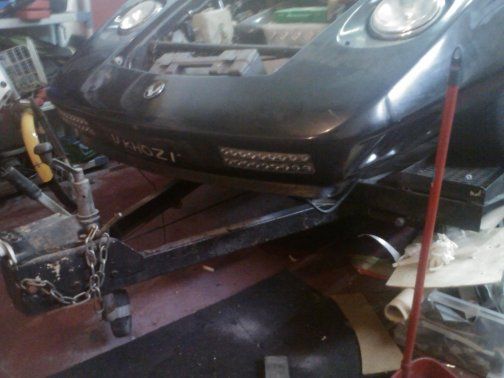 Throttle cable was here when I got home so as son wants another session of super quite BMW tomorrow I can get that fitted ready for the `pulley throttle system and the 60mm stainless jubilee clips for the tailpipe trims too.. |
|
|
|
Post by scooby on Sept 5, 2013 18:45:29 GMT
No, I'm not planning to stick these on the front of my RV, but I am very curious about them all the same  These are combined LED lamps? How does this work - is each one multi-colour, or do only a few of the right colour light up as required? Very neat... |
|
|
|
Post by Peter on Sept 6, 2013 17:05:19 GMT
All wired up , they will see me coming for sure Two different units, one on top of the other, one 9 x LEDs BRIGHT on the bottom row for the fogs and above one row of 9 LEDs plus 9 amber LEDs for side / indicators (3 wires) Attachment DeletedAttachment Deleted |
|
|
|
Post by Peter on Sept 9, 2013 11:38:41 GMT
No, I'm not planning to stick these on the front of my RV, but I am very curious about them all the same  These are combined LED lamps? How does this work - is each one multi-colour, or do only a few of the right colour light up as required? Very neat... Two types; Lower row is 9 LEDs for side lights and 9 amber surface mounted ones for indicators, (three wires), so four way connector, (Earth, indicator, side, fog). upper row is 9 BRIGHT LEDs for the fog lights. they actually fit in the other way up. In the 'gills' are two rows of 9 LEDs each side for DRLs via relay that switches them off when the headlight comes on. If you search Ebay for "daylight running lights" and side light indicators" it all comes up, there are several different designs. I thoroughly recommend DRLs as a safety measure, too many SMIDSYs . |
|
|
|
Post by Peter on Sept 9, 2013 11:47:26 GMT
Jose Carlos, El step-son, did it again which really buggered up my Eagle time just as I was getting the underside finished so I get it off the trailer this week  , He managed to knacker his BMW 525 ignition lock, result of having way too many keys swinging on it, told him for the past three years to take them off, did he? no, so know it's 190€, thank you. I spent ages trying to get the cylinder out after removing the lock part, in the end I managed to jam the steering lock open and get the switch off of the back so we could drive it onto a breakdown truck. Still managed to get all the front end lights working and relay in for the DRLs and throttle cable run and outer in place, had to cut a bit out of the tunnel cover but thank heaven I have an osculating saw. Red 60cm LED strips arrived for the doors but it will be a while before I get them under way. But, a bit more done. |
|