|
|
Post by trike on Jul 5, 2016 19:21:36 GMT
Well, first attempt at making carbon fibre panels didn't quite go as planned  Epoxy resin sticks to glass no matter how much release wax applied, finally managed to get the panel off, but virtually destroyed it in the process  Experimented with some small test pieces and normal polyester resin works ok, not as strong as proper epoxy but as the panels i'm making are only decorative , will do the job. Either that or the stickyback plastic stuff....YUK! |
|
|
|
Post by trike on Jun 28, 2016 18:55:56 GMT
Quick measure up shows 520mm to center, minimum is 500mm so all legal  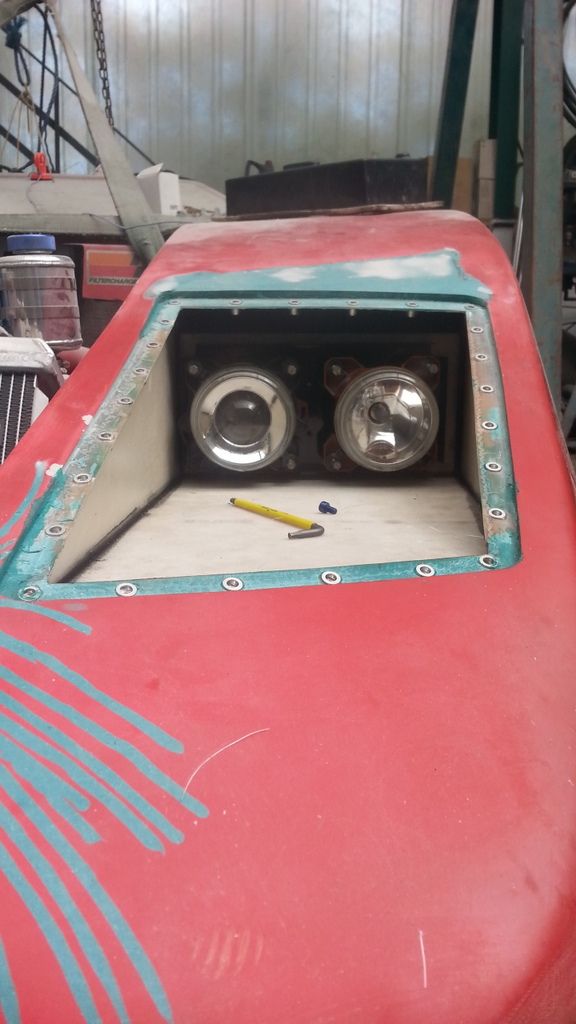 However to get the height I've had to mount them as far back as possible (access to bulbs, adjustment etc. is via a removable panel in the wheel arch. This means they are quite deep set so the sides of the enclosure will have some effect on beam pattern, they certainly won't illuminate the road for the first 30ft or so. However once sitting in the car you can't see the road or nearside kerb for about 25ft anyway!. Talking of sitting, given a seat from a Smart car today, only 450mm at the widest point, so would easily fit. Unfortunately its a passenger side which isn't reclining so will need two drivers side. I've also got some individual rear seats from a Citroen Picaso, these are even narrower at 400mm but not very sporty looking and don't recline very far ( angle grinder'll soon sort'em out )  |
|
|
|
Post by trike on Jun 27, 2016 19:24:16 GMT
Slow progress at the moment, been making up some foam cored glassfibre panels that i'm using for the headlight units. 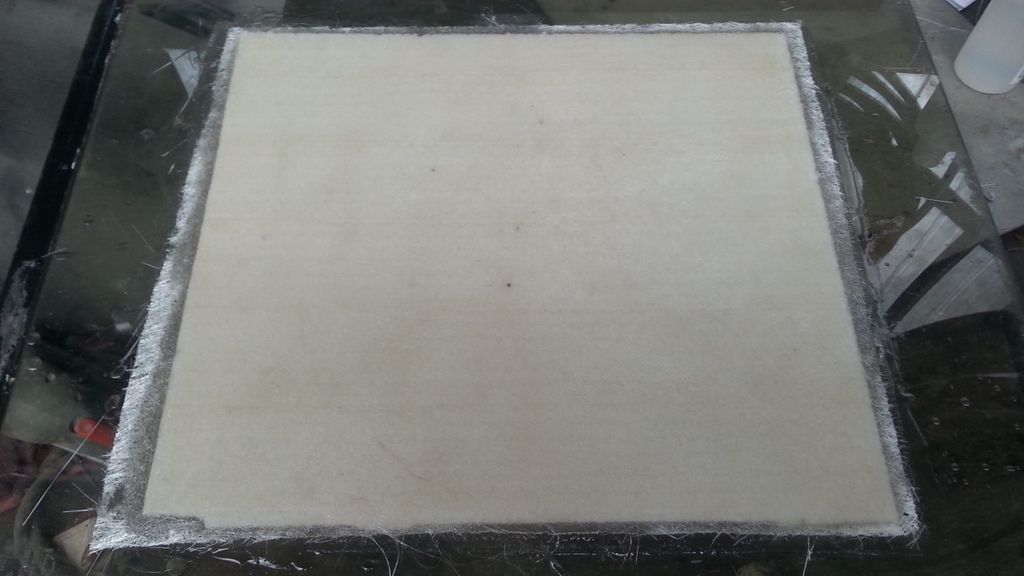 Headlamp mount 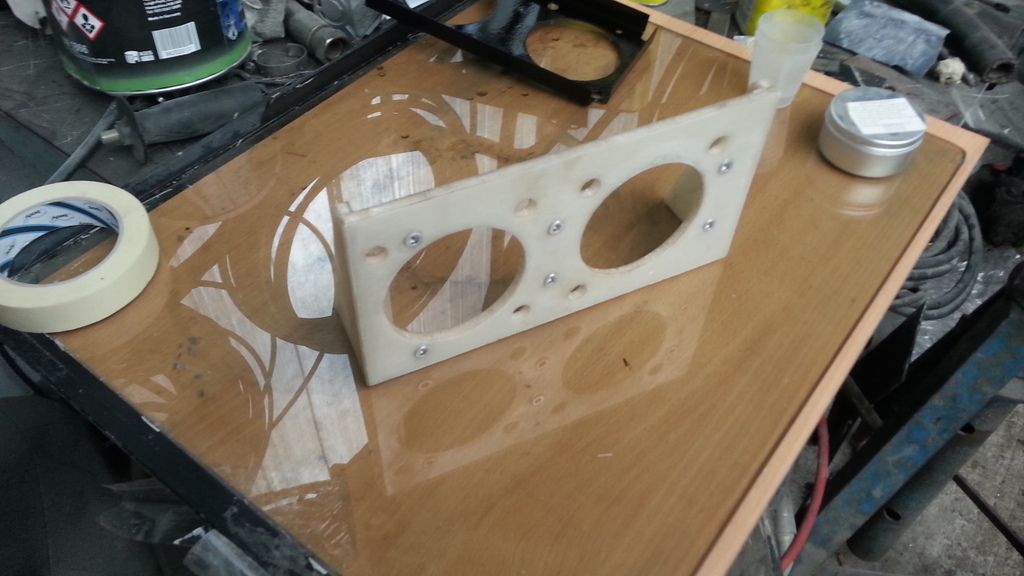 One side nearly finished 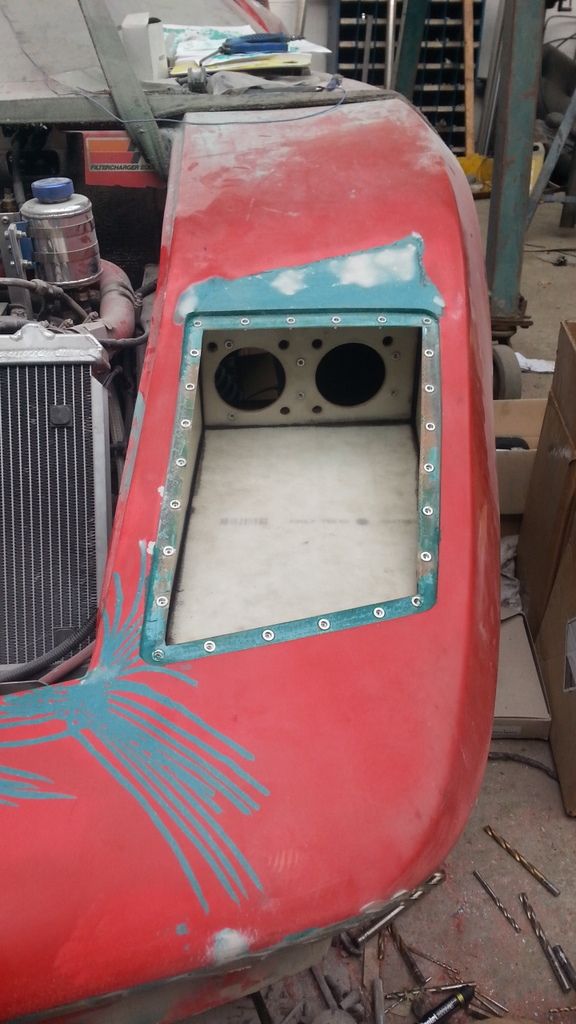 I'll be having a go at making some carbon fibre panels for the headlight surrounds, same process just different materials |
|
|
|
Post by trike on Jun 18, 2016 20:34:12 GMT
EAGLE |
|
|
|
Post by trike on Jun 14, 2016 6:22:21 GMT
|
|
|
|
Post by trike on Jun 12, 2016 19:16:45 GMT
Started to repair some of the gel coat cracks and cleaned up the headlamp cutout. Grinding out each crack one at a time with a carbide burr in a die grinder then building up with glassfibre paste ( NOT filler )is somewhat time consuming but in the long run, a hell of a lot easier and quicker than removing a large area of gel coat then trying to fill it in and sand it all back in to shape  Flanges for mounting headlamp covers in place ready for sanding down and drilling out for rivinut inserts, around 30 for each cover , so should keep me busy for a few minutes.  Got some 4mm polycarbonate sheet for the covers , once cut and shaped for a nice fit, allowing 2mm or so clearance all round to allow for the paint and any expansion, I can use one as a template for cutting out the hole on the other side. Once the covers are on and screwed down access to the bulbs and beam adjusters will be from the rear via a removable panel in the wheel arch. I seem to have amassed a collection of headlamp adjustment motors so I might see if I can include a couple of these in the headlamp bracket, just need a couple of ball & socket type mounting bolts. Slight alteration underway to the rear boot lid to fit flush mounted LED strip brake light 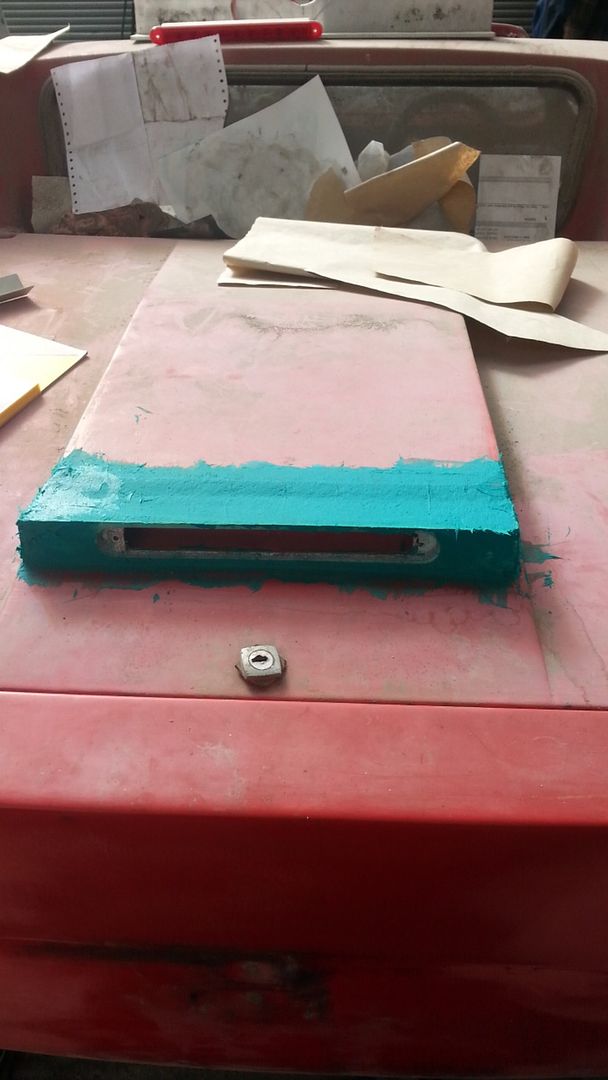 I'll make a start on the headlight pods when the GRP materials turn up...seems to have joined Peters fuel hose in the 'E-bay triangle'...  ... |
|
|
|
Post by trike on Jun 7, 2016 19:53:24 GMT
Rear end is shaping up nicely ,all the hard work done 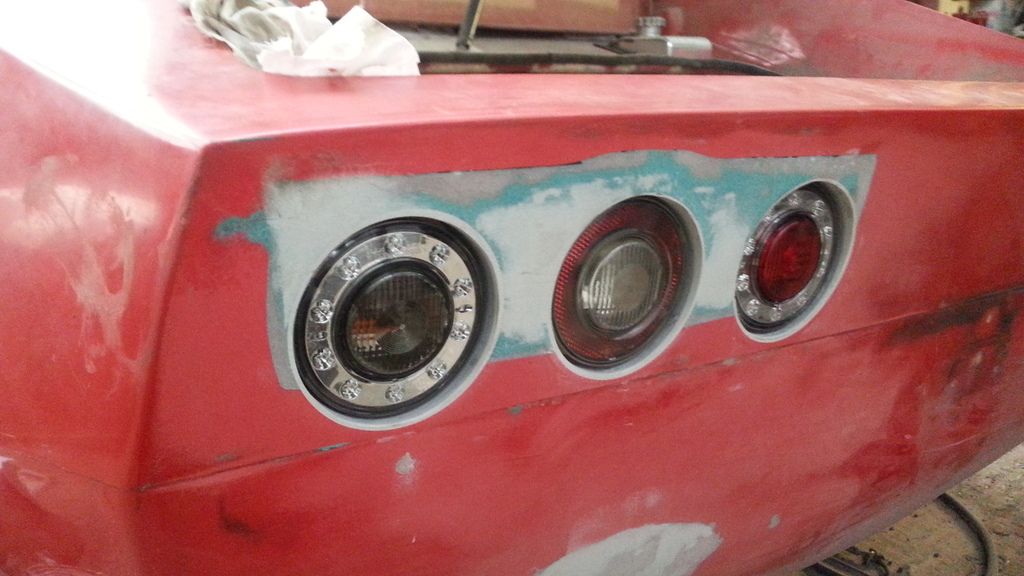 Unfortunately not so good at the front , the fiat coupe headlights have quite a curve to the lens which means in order to fit flush with the body work from the under side (as opposed to just bolting them on top ,yes, I have seen it done ),means a lot of reshaping the top of the wing to suit which I don't really want to do. 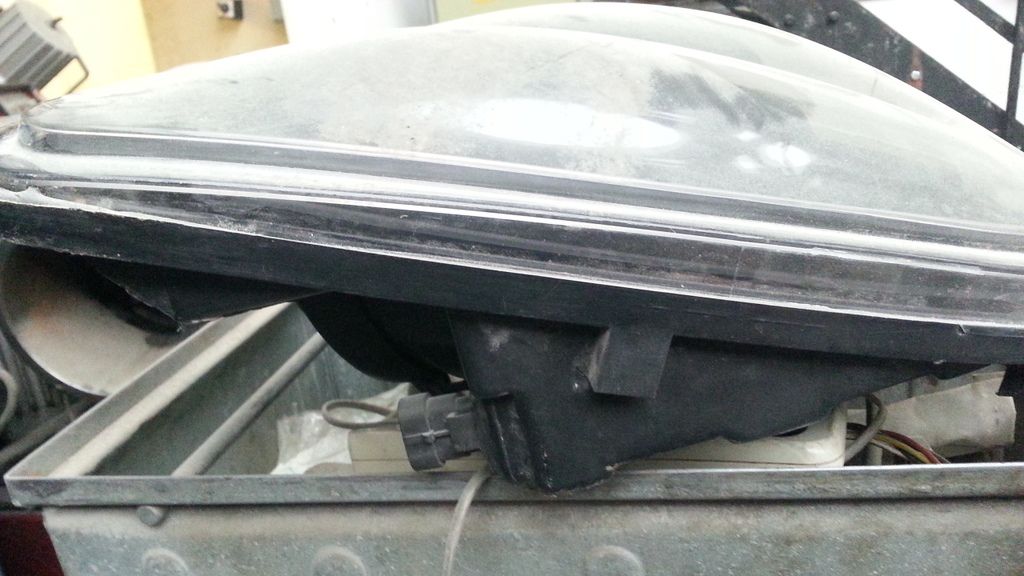 So plan 'B' is now in effect.... 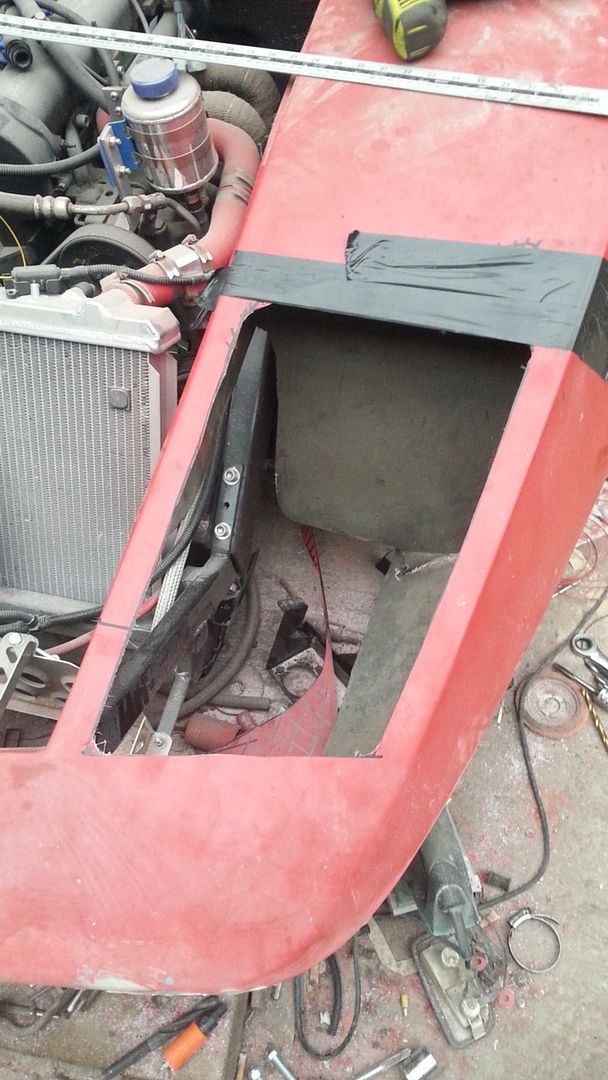  Just waiting for some more GRP supplies to turn up so I can make the headlight enclosures , tidy up the edges , them make up some flushfitting polycarbonate covers. |
|
|
|
Post by trike on Jun 7, 2016 19:33:18 GMT
7 seconds for 8" stroke isn't bad, still toying with idea of air rams on mine but just having fitted a 4" actuator on a machine at work to replace a wonky canbus throttle control on an auxiliary engine (cheaper than than £1200 for a new node and £450 for a new actuator), electric seems the way to go.
|
|
|
|
Post by trike on Jun 7, 2016 19:21:12 GMT
It's looking like a winner to me, I wonder where that filler idea came from ![hmmmm[1]](//storage.proboards.com/658221/images/XKN5ScdKR1O8cJ3IeDgW.gif)  . Being that little bit further back looks better. I'm sure it will look better than mine. I am still waiting for the silicone hoses to make up the dog leg filler hose, tracking for 5 weeks and counting, seems it was posted 30 April and to board a plane in Shanghai on the 5th May but hasn't been scanned since, so I'm thinking it might have been stolen between scanning and boarding, it happens. View AttachmentI would have preferred it further forward but due to the bracing on the under side its the only place it will fit. I'll also be fitting one on the other side and connecting via a T-piece so can fill up either side at the pumps |
|
|
|
Post by trike on May 30, 2016 20:02:42 GMT
Not much mechanical work done since fitting the tank, but haven't been totally idle. Made a start on the bodywork, roughly filling the holes left by the rear lights 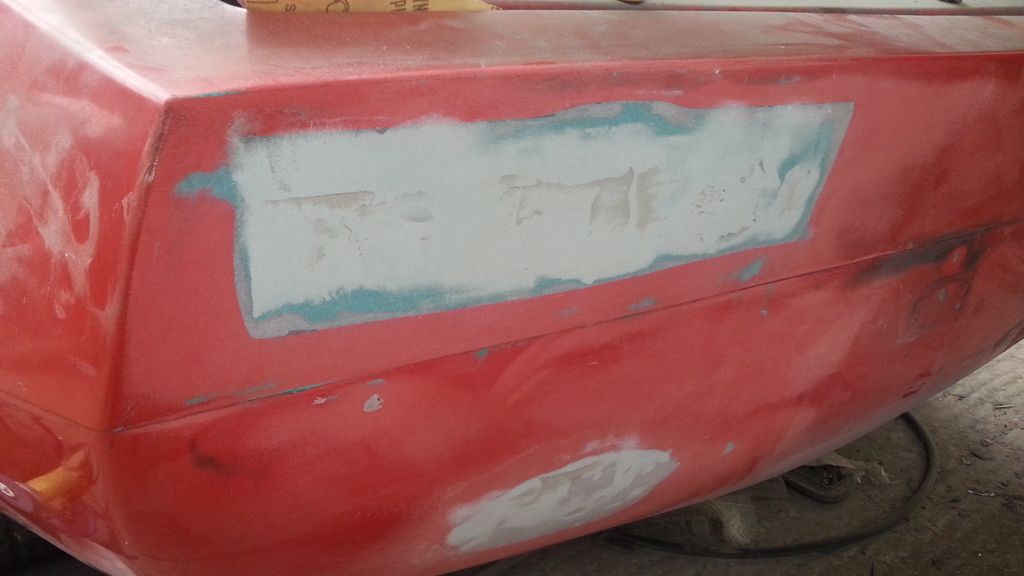 And drilling a few small holes 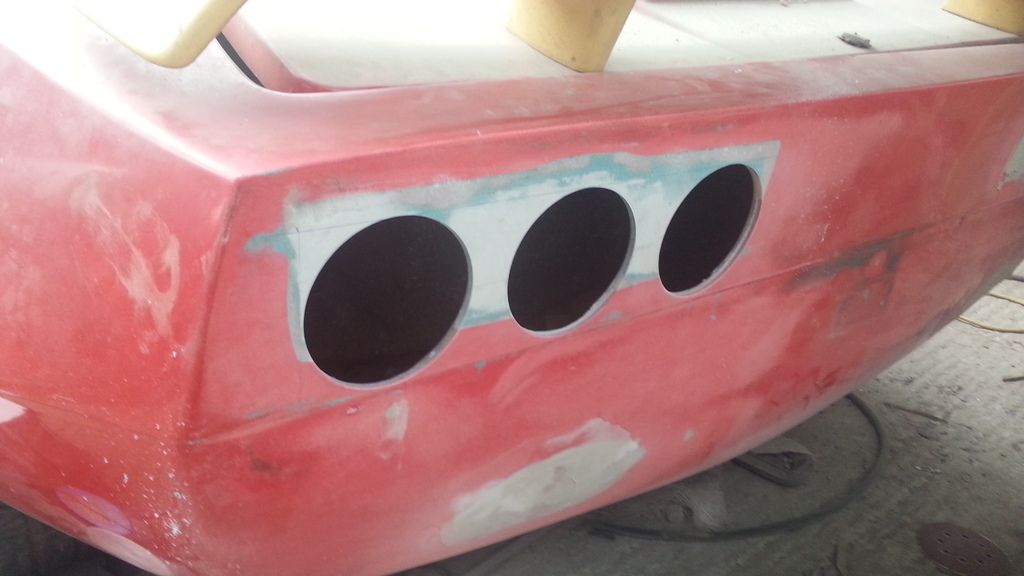 A bit more glassfibre work 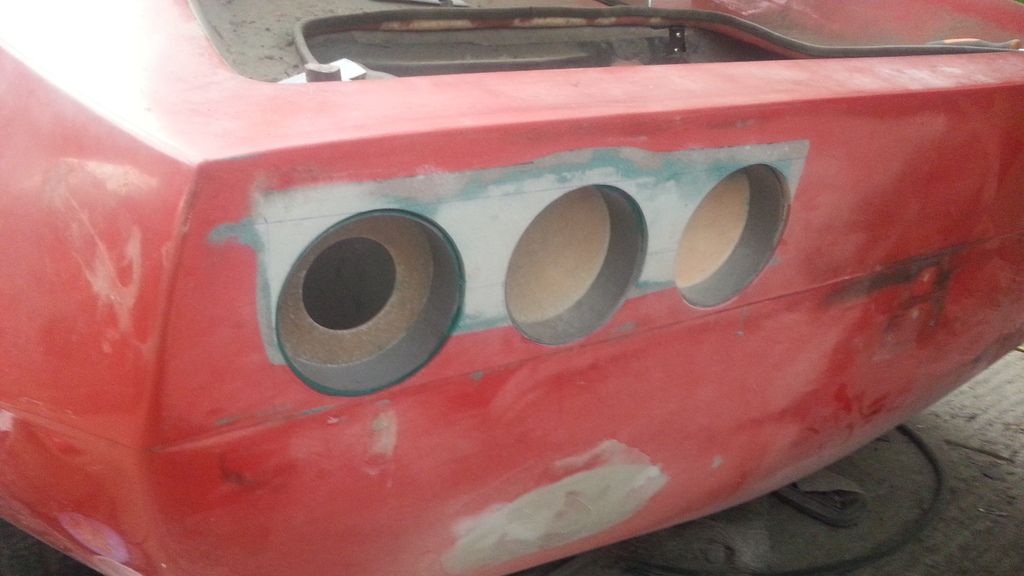 And rear end starting to take shape,bit more filling and rubbing down then attack the other side. Started on the mounting for the flush fitting fuel cap 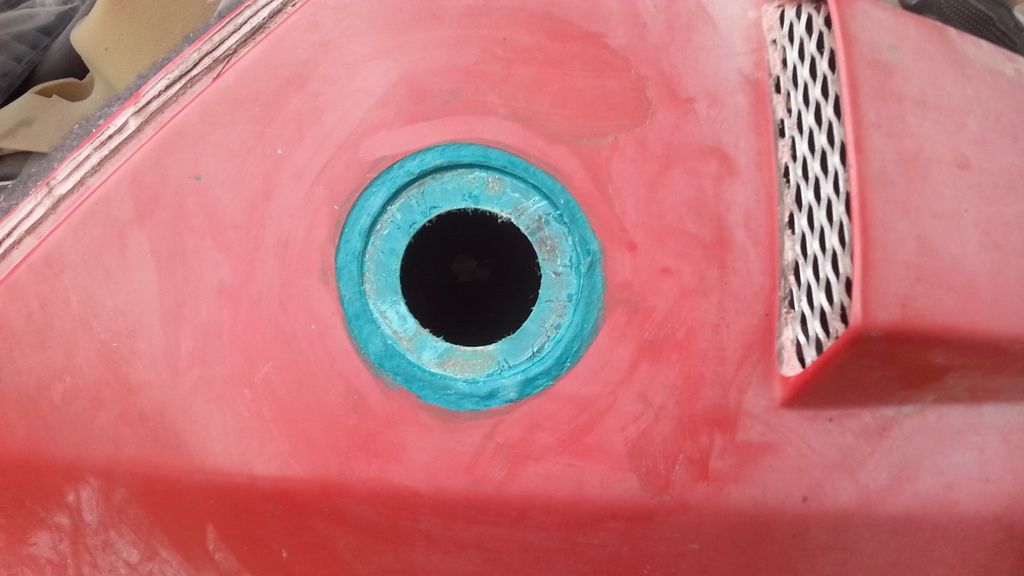 The gel coat damage at the front is going to take some serious work , the cracks go right through the gel coat and in to the laminate ( and out the other side in places  )  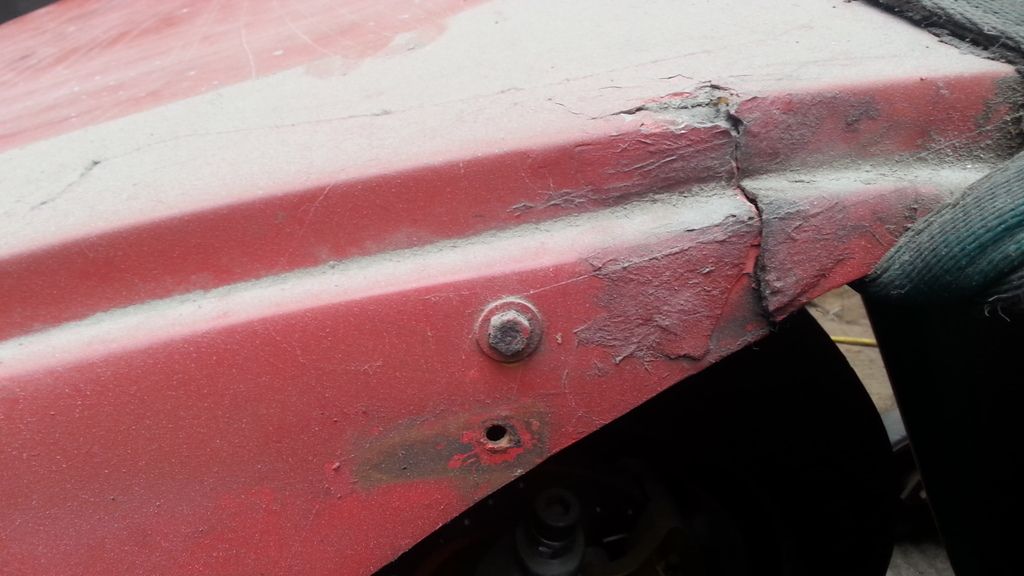 Too big an area to do in one go, so i'll have to treat each crack one at a time, chase it out with the die grinder then fill with monofill grp paste (much finer and easier to work with than P40 ).Also be easier to rub down without altering the body line. Then reinforce the underside adding some bracing, polyurethane foam strips glassed in, to stop any flex. |
|
|
|
Post by trike on May 17, 2016 20:45:02 GMT
Fuel tank finally finished & fitted 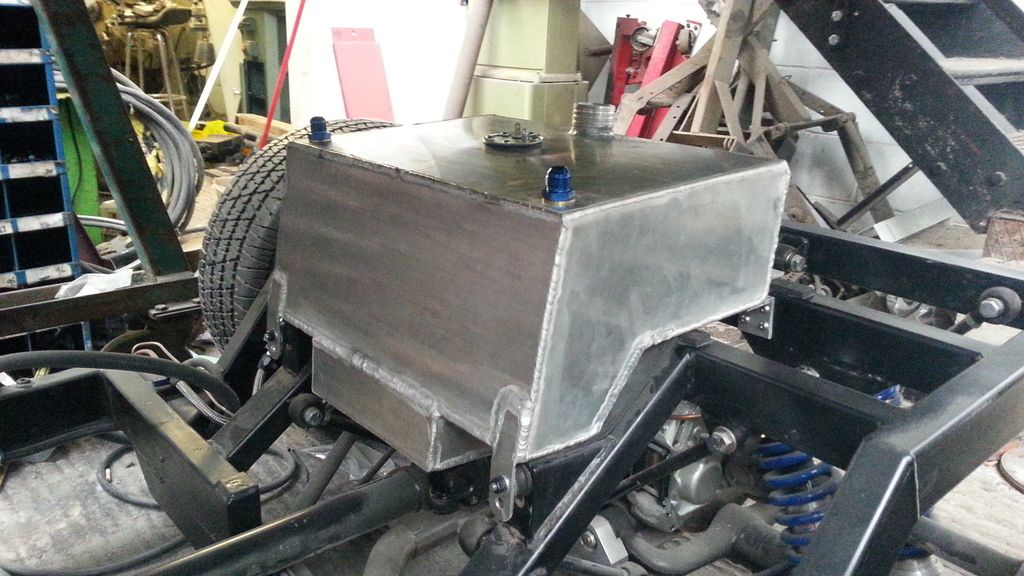 |
|
|
|
Post by trike on May 12, 2016 20:56:46 GMT
What with Stoneleigh and a little 500 mile round trip last weekend up to north yorks to pick up a horsebox (camper),Yep another project...I haven't got much done on the car. Still trying to finish the fuel tank. Just can't seem to successfully weld the last few pin holes. So.... I've decided to use one of the liquid tank sealers (POR15)on the inside, just waiting for it to turn up and give it a go. Picked up a few bits and bobs at the show, including some LED rear lights, so spent the last few evenings making up some mounting pods,6 in all, that will be recessed in, corvette stingray ? style. 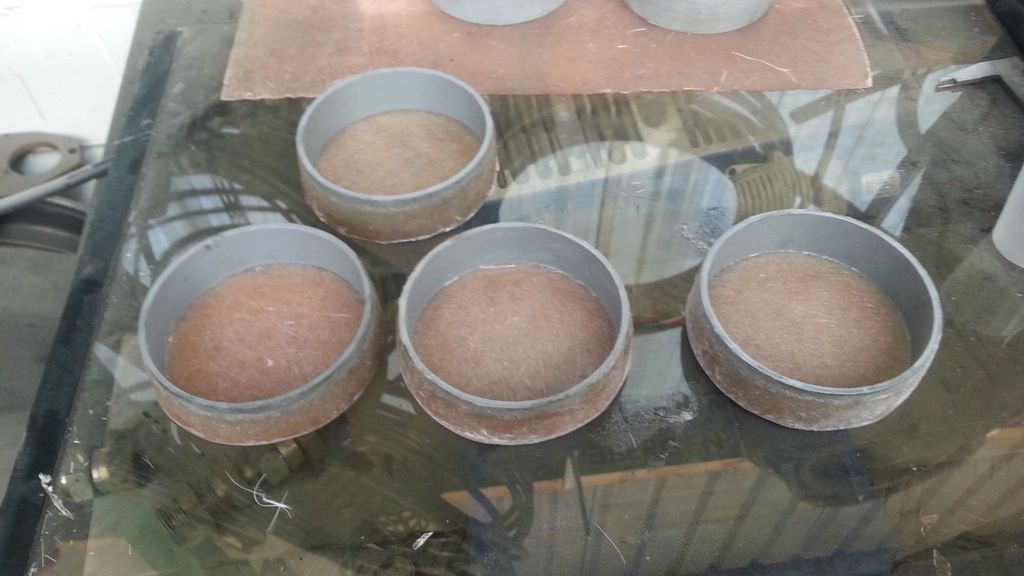 |
|
|
|
Post by trike on May 12, 2016 19:34:06 GMT
Was a great show will be back next year with a tent lol . For Neilsmith temperature controller is ebay number 131101201417 its £7.68 easy as pie to fit works brilliantly . Speedo is item number 261399706841 £45.13 GPS sender is number 261671313265 costs £47.21 ,I also went for the rev counter to match look fantastic and works brilliantly . Really nice to meet you and others at the show be interesting to see trikes ss next year hopefully ! My SS will definitely be there next year, one way or another. No tents for me though, picked this up at the weekend. Full living accommodation and workshop in the back Just got to fit a tow bar and find a suitable trailer 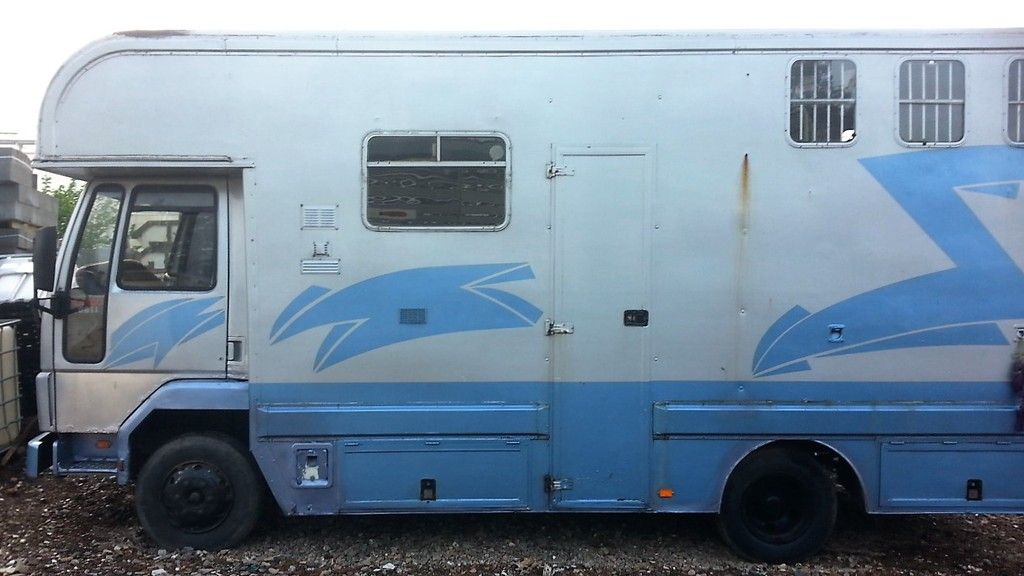 |
|
|
|
Post by trike on May 3, 2016 20:39:12 GMT
Hi terry. Glad to see you've found your way back here. |
|
|
|
Post by trike on Apr 24, 2016 19:39:43 GMT
Fuel tank almost finished. Waiting for the fuel sender to arrive so I can figure out the mounting hole position before welding the top on. 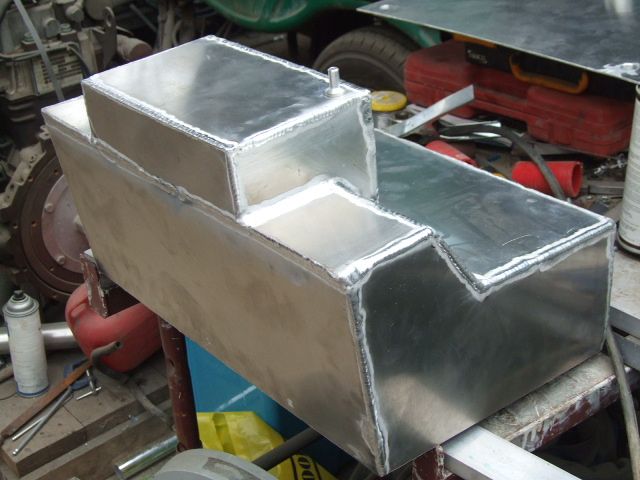 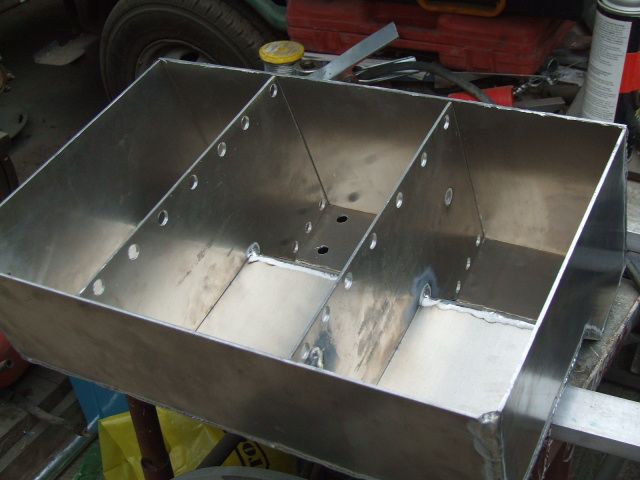 As the exhaust runs quite close to & under the passenger footwell, some heat shielding fitted to stop things getting a bit too 'toastie' Ended up doing the whole bulkhead to make it look neater, a right PITA job to glue on, and as the floor pans extend down either side of the exhaust,i'll have to add shielding there as well. Probably end up doing the whole tunnel. The two pieces of ally angle either side are there to fix the rear of the inner wings. It really bugs me to be able see through the wheel arch and straight out the other side (common kit car issue) and just dosen't look right.  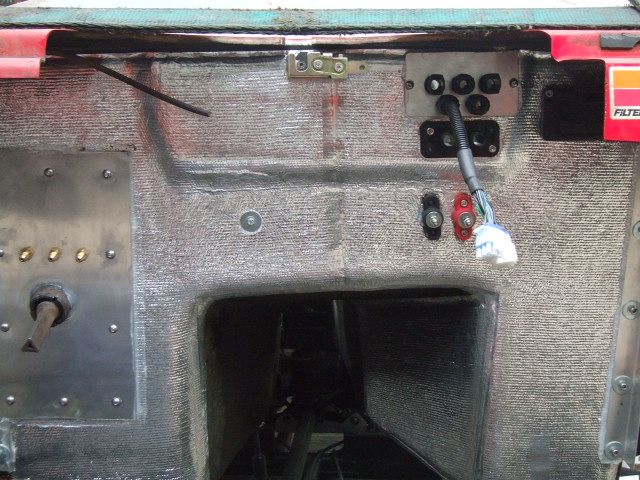 |
|
|
|
Post by trike on Apr 13, 2016 17:04:14 GMT
Already booked my tickets for both days. |
|
|
|
Post by trike on Apr 10, 2016 20:49:36 GMT
Quite a bit done over last few weeks. Steering column had to shortened at the bottom and lengthened at the top to get it all in the right place. 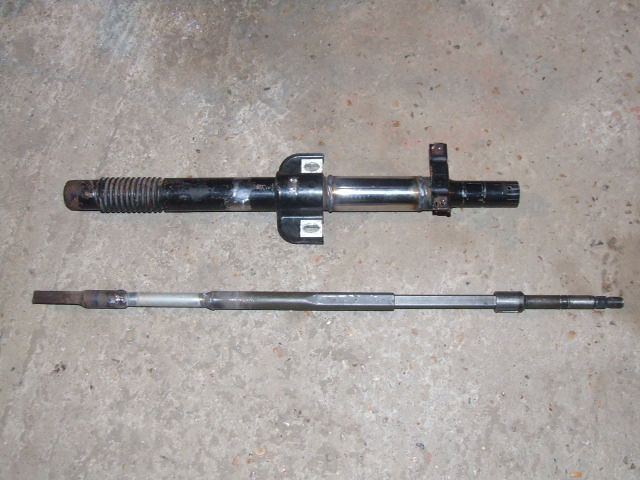 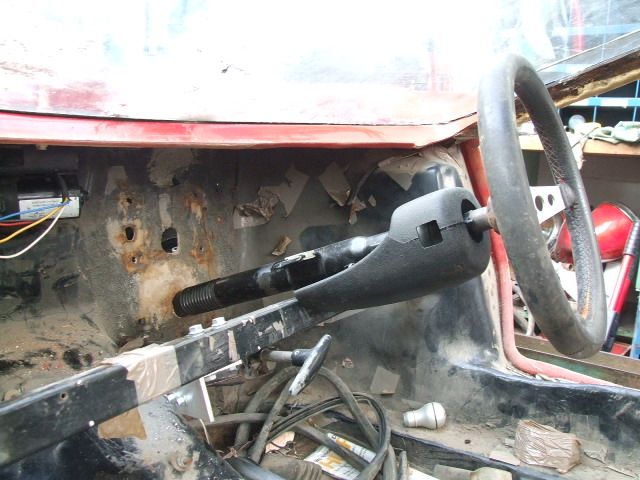 Handle under the column is the pull type handbrake temporarily in place. Steering linkage made, Ford transit U/J at the top & Subaru U/J to match the rack. 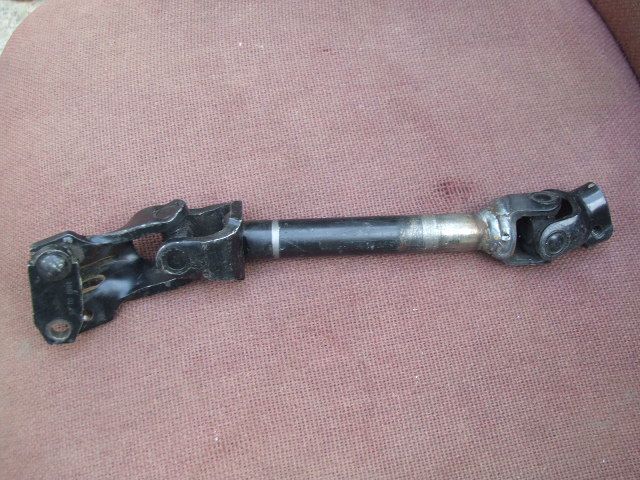 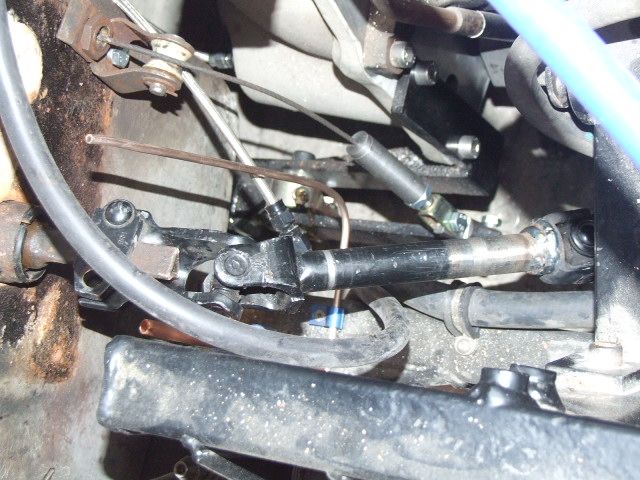 Made a support strut for the carbs which also came in handy as a mount for the coil pack & breather tank 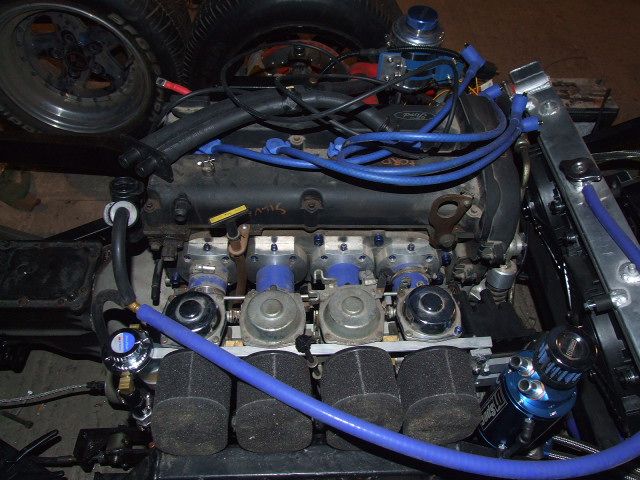 Engine wiring looms all made & ready to fit. Discovered the original wiper motor is only single speed, probably from a rear tailgate so replaced with something better, 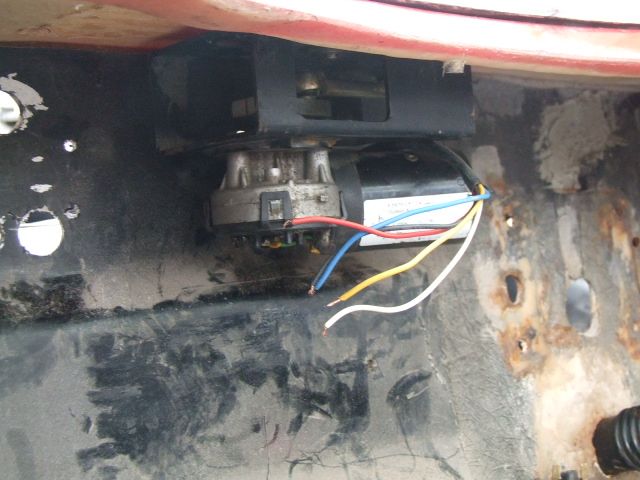 and pantograph system 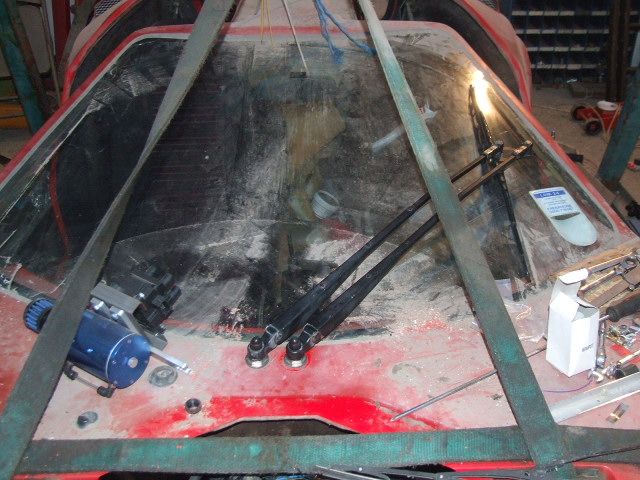 Both arms had to be shortened to get it to fit & the bottom arm is adjustable so i can alter the wiper blade angle to match the windscreen pillars as opposed to straight up & down. Haven't powered it up yet so not sure of the sweep angle but can easily alter the linkage to get it correct. |
|
|
|
Post by trike on Mar 19, 2016 23:09:27 GMT
Got a few bits done over the last few weeks.Mostly plumbing, fuel lines , brake pipes, steering hoses etc. Had to make up a manifold to match the hoses to the ford A/C compressor 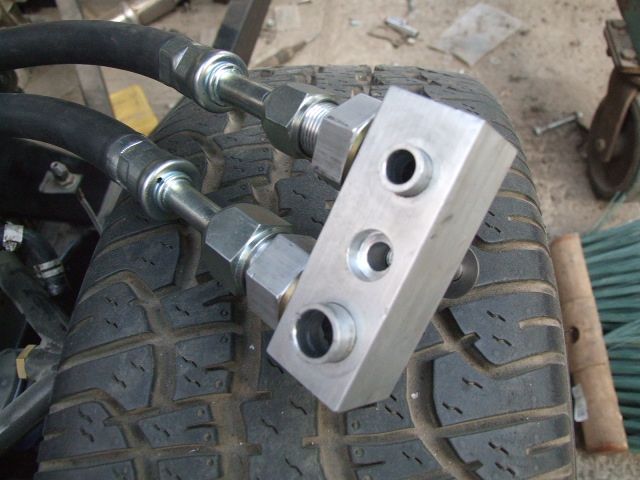 However a slight miscalculation meant the hoses were going straight up, right where the carbs should be ..DOH! Quick re-design got it sorted 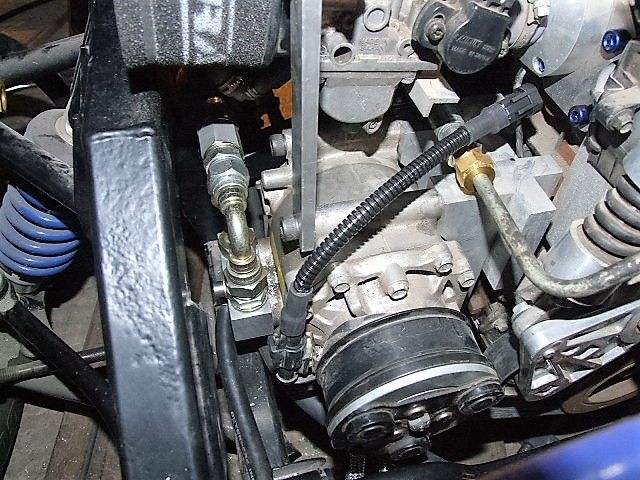 Finished the handbrake cable & made up the handbrake relay  Once the body is on I can figure out where to mount the handle, an old school Daimler dash mounted item. I was hoping to hide it away under the dash to one side but doubt if i'll have room. May have to fit in the center of the dash or console and make a feature of it. Remote oil filter fitted 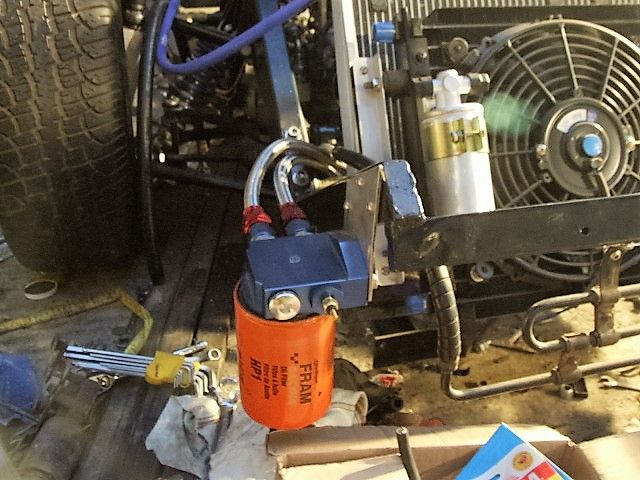 Apart from a few hoses, heater etc. and electrics, its all there. Coil pack, power steering reservoir, fuel regulator, will have to mount on the inner wing once the body is on. Starting to get a bit tight spacewise 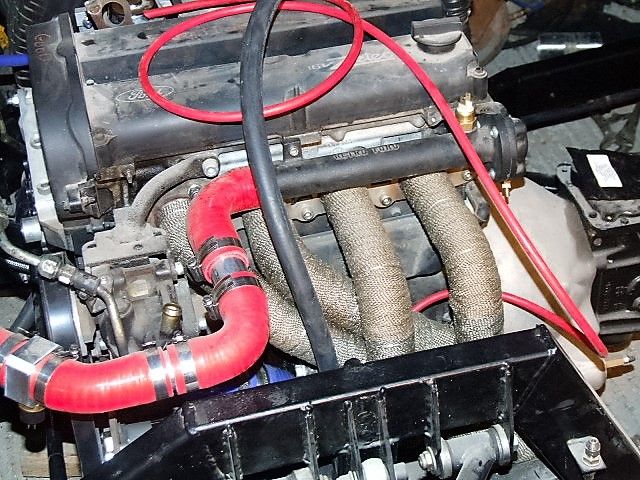 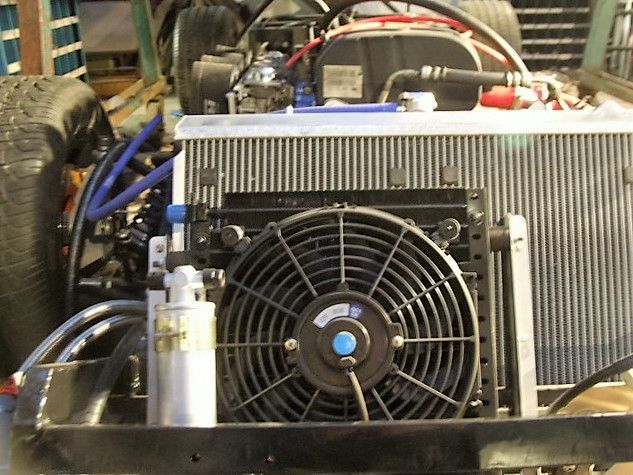 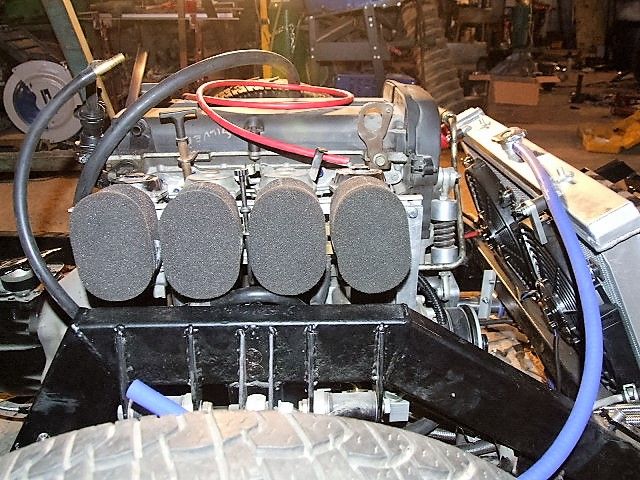 Next job is to finish the exhaust and make a start on the fuel tank |
|
|
|
Post by trike on Feb 22, 2016 21:09:16 GMT
I was thinking exactly the same thing, using a citroen or peugeot pump as they are a simple 2 wire system,and possibly power steering rams as they are quite compact.70 bar is a lot less than i'm used to working with,but should be more than enough to lift the doors with the right diameter rams.Still messy when they go pop!
Plan B is to go for a pneumatic system if i can find a suitable compressor,Rangerover air suspension pump maybe?,not sure what pressure they put out, but would need to be around 8 bar to work properly
|
|
|
|
Post by trike on Feb 13, 2016 20:33:26 GMT
Been busy last few weeks making the front subframe to support the nose as it was a bit droopy,resulting in some nasty cracks between the front wheel arch & headlight recess 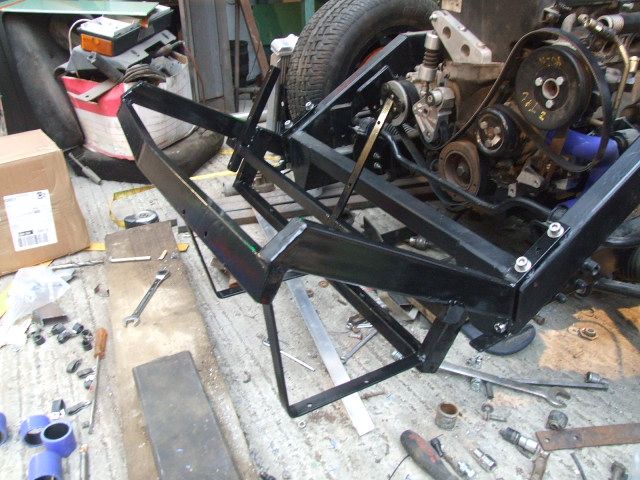 Radiator in place. Top radiator mount(not in picture)bolts on between the inner arches once the body is in place.Made from aluminium bar,i was quite pleased with the result as i've never TIG welded ally before.Given me the confidence to make the ally fuel tank myself.This will be wedged shape to fit in low down behind the rear bulkhead ,ahead of the rear wheels rather than the usual position perched on top of the chassis above the axle. 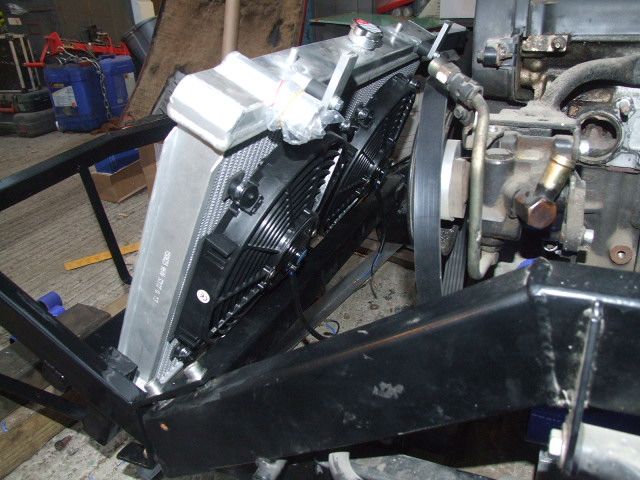 Air con condenser & battery tray. 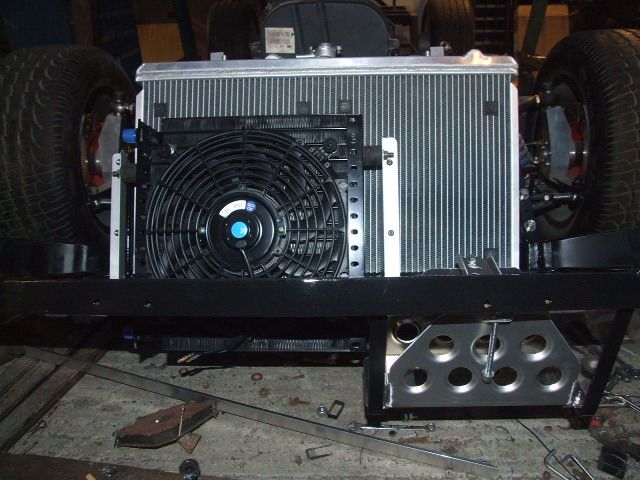 Camera angle makes it look a lot lower than it actually is,about 6" from the ground at normal ride height. Started on the plumbing,no room in the engine bay to mount the header tank high enough to work properly,so will have to fit it at the rear in the 'dead'area just behind the rear window under the boot lid as that's the highest practical position.Bleeding the system should be interesting 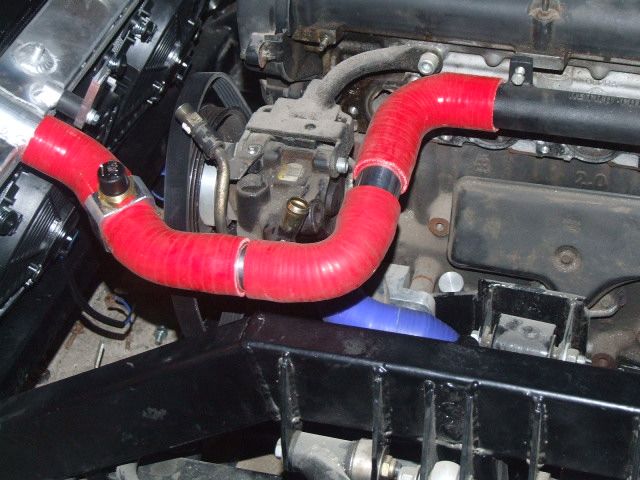 |
|
|
|
Post by trike on Dec 31, 2015 21:08:39 GMT
Making up the stainless exhaust system 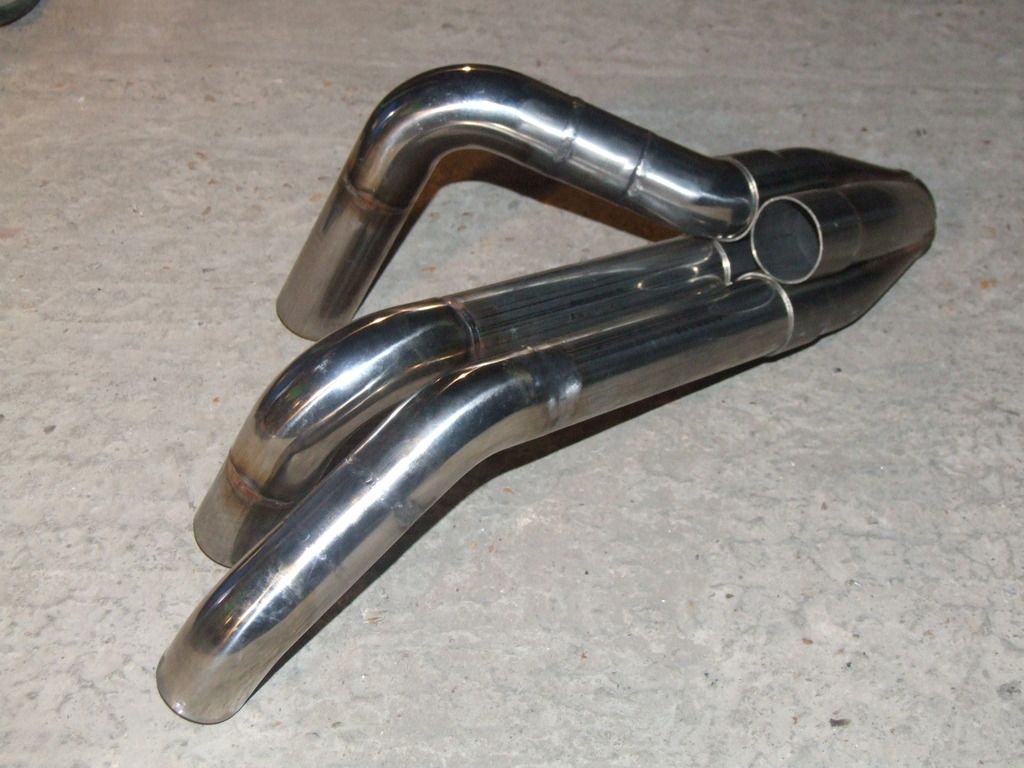 Tight fit but just enough clearance for some exhaust wrap. 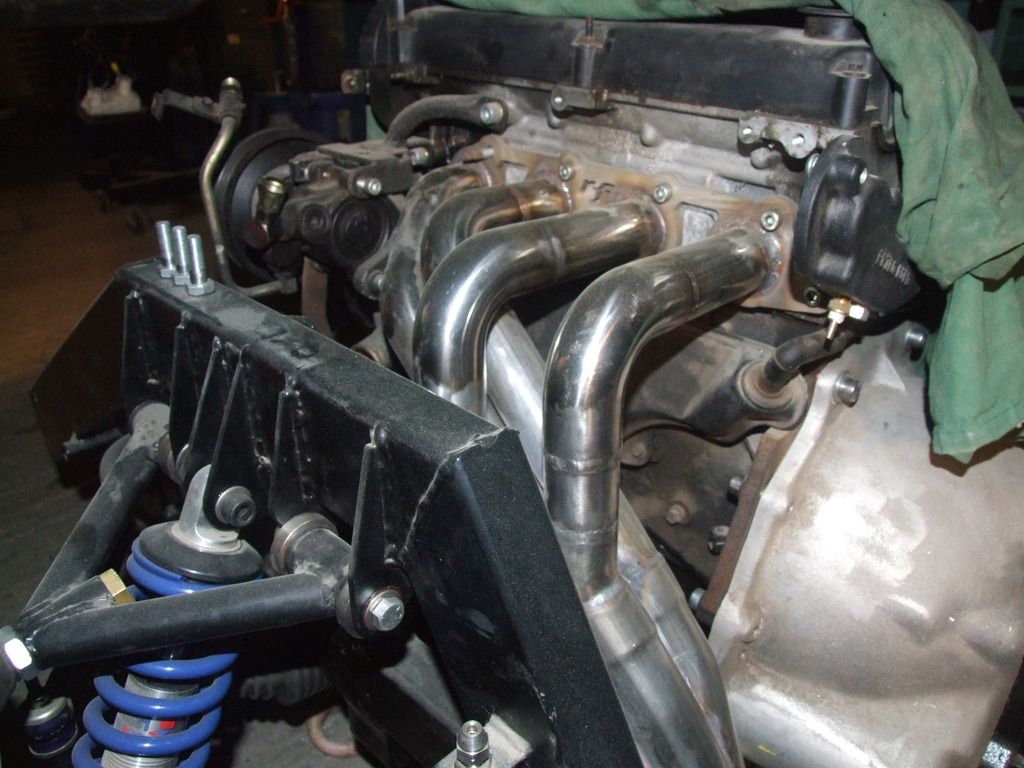 |
|
|
|
Post by trike on Dec 31, 2015 21:01:22 GMT
Clutch cylinder in place and connected up. 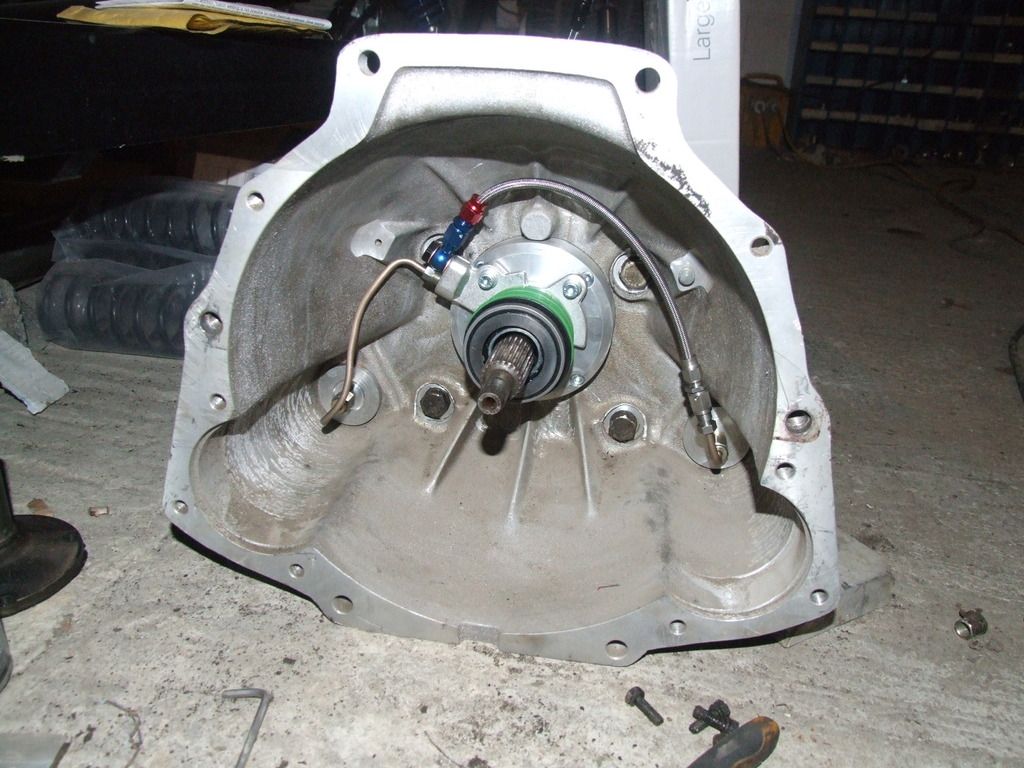 Clutch bleed nipple mounted where it's easy to get at  Trailer brake cables modified to fit.At around £15 each,a lot cheaper than having them made. 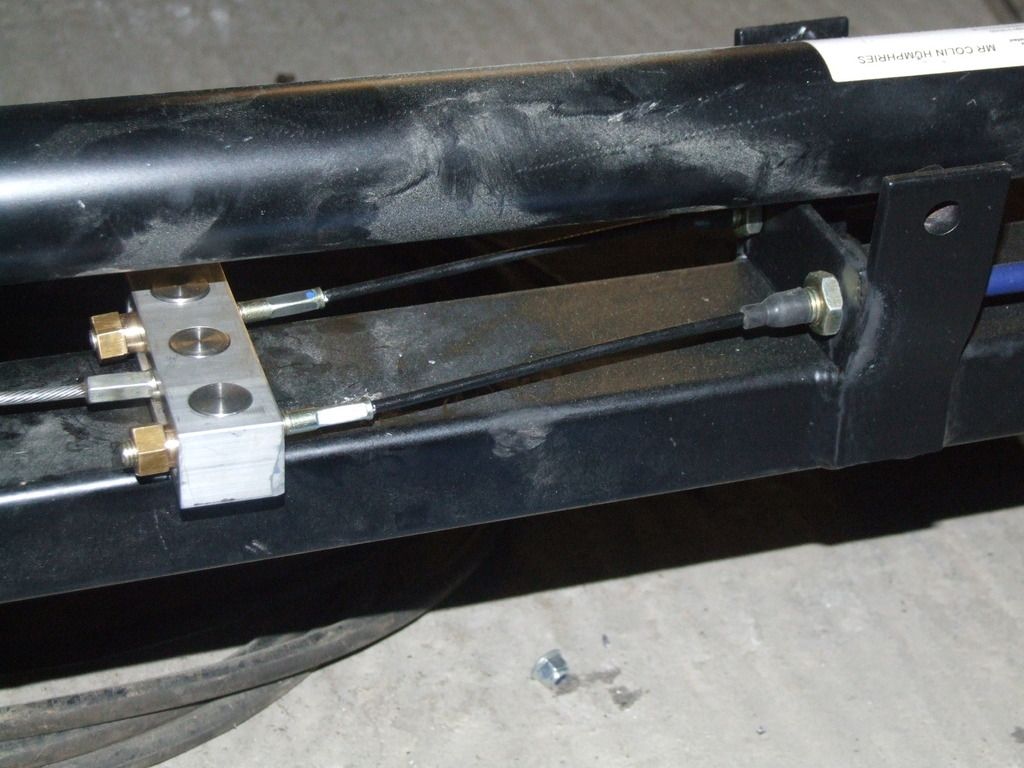 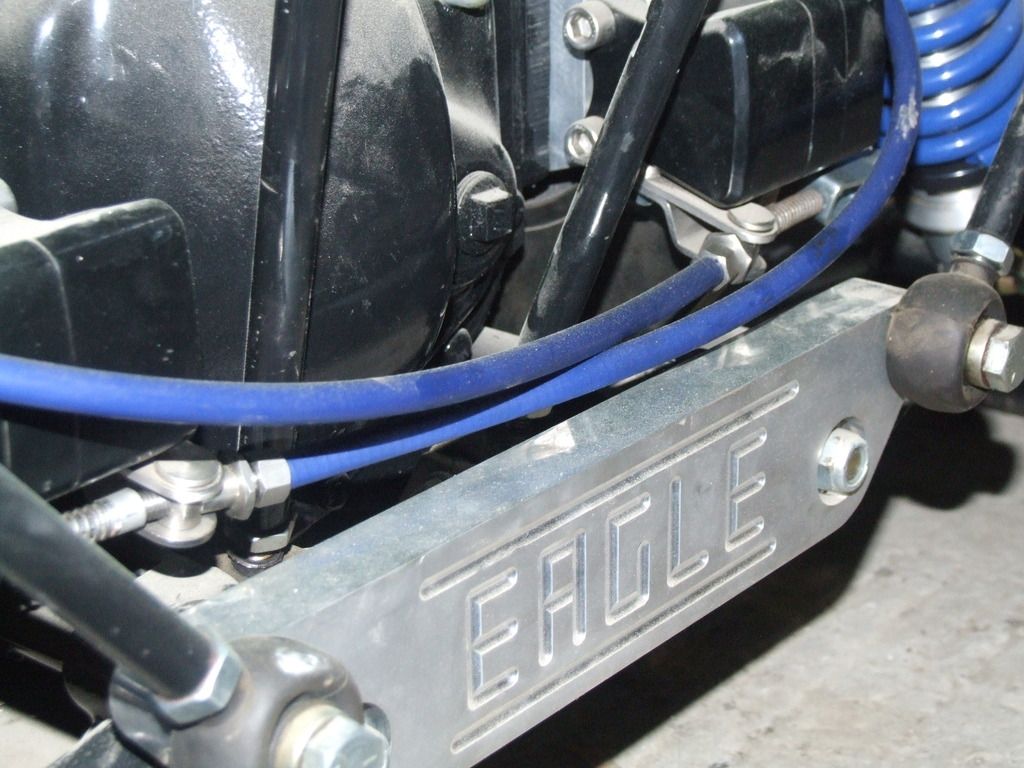 |
|
|
|
Post by trike on Dec 29, 2015 21:16:32 GMT
Hmmm..I thought the forum was going 'read only', didn't realise could still post.Hell of a job getting here though,all links lead to euro-nova???
Still ,got plenty done over the last few months...suspension,steering,brakes,propshaft all sorted,concentric clutch cylinder & billet steel flywheel fitted,engine & gearbox in (again!).
Spent a couple of days making the stainless steel 4-1 exhaust manifold/system,all tig welded although had to gas braze the last bit where the headers go into the collector,just no way to get the tig torch in between the pipes.
Picked up the body from my garage,so that's dangling overhead ready for fitting so i can measure up for the fuel tank (ally?)and front subframe to support the nose/rad etc.
Will post some pics soon.
|
|
|
|
Post by trike on Sept 7, 2015 11:19:28 GMT
SS body on ebay item no. 281791307931
|
|
|
|
Post by trike on Sept 6, 2015 16:56:09 GMT
|
|
|
|
Post by trike on Aug 14, 2015 19:44:21 GMT
Looking good
|
|
|
|
Post by trike on Jul 27, 2015 14:57:11 GMT
Electric fan should work fine, just make sure the little air deflectors between the barrels above the pushrod tubes are in place(always seem to go missing). As the beetle engine relies on the oil for cooling as much as the air from the fan, a remote oil cooler,with its own fan & thermostat is a good idea.(Not chinese e-bay ones though). Easy enough to fit a temperature switch into the oil line (before the cooler )to control the main fan,possibly even a two speed setup. As the vw fan takes a fair bit of horsepower (about 10% on stock engine) getting rid of it will make a noticable increase in performance,and in theory,as the engine hasn't got to work so hard,run cooler anyway. In the past i've run vw lumps in trikes & bikes with no fan or housing whatsoever,no problem. |
|
|
|
Post by trike on Jun 28, 2015 19:05:11 GMT
Looking at it that way I guess its not too bad,(apart from the door tops), at least its all there. Interior is definitely past its best,but the dash & clocks appear ok. No sign of the reg plates. How much have I spent on mine so far? Err...Lots Last few days spent over £500 just fitting the back axle and its still not fully in place yet!  |
|
|
|
Post by trike on Jun 27, 2015 20:35:21 GMT
Yep! that's the one. No idea who's selling it, but £800 ? Ok,its got a good screen but the rest is too far gone. |
|
|
|
Post by trike on Jun 7, 2015 19:57:45 GMT

Chassis finally in its new home,now to get stuck in putting it all together. |
|


![hmmmm[1]](http://storage.proboards.com/658221/images/XKN5ScdKR1O8cJ3IeDgW.gif)
 . Being that little bit further back looks better.
 )
)


