Deleted
Deleted Member
Posts: 0
|
Post by Deleted on Oct 30, 2013 20:16:17 GMT
hi, one of the jobs id like to do on my rv when it arrives it sort the dasboard out.... its a 2.0 pinto powered rv and as such has the old cortina clocks mounted oin the middle of the original fibreglass dash panel...
now whilst it doesnt look to bad, it does look a little dated to say the least,, and id love to update it, so im after some inspirational pictures/sugestions !!! ive seen the one done with a sierra dashboard and liked the look of that, so has anyone else done/seen any other ideas and maybe have pics to go with it???
thanx in advance... dave
|
|
|
|
Post by Gary on Oct 30, 2013 21:34:16 GMT
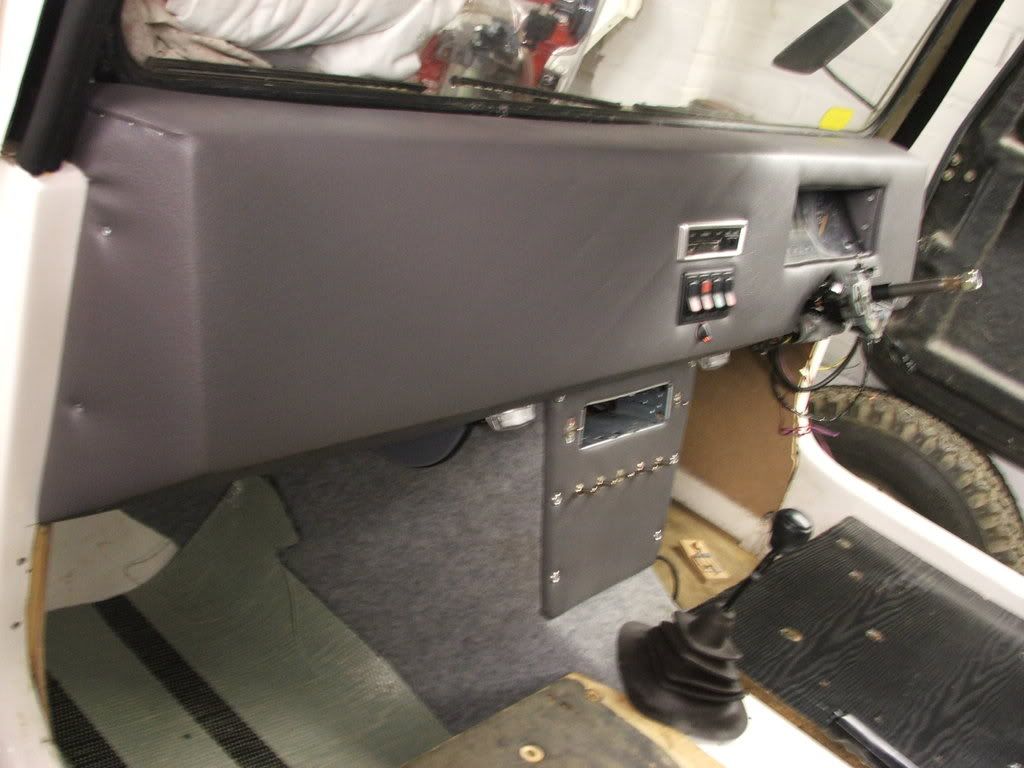
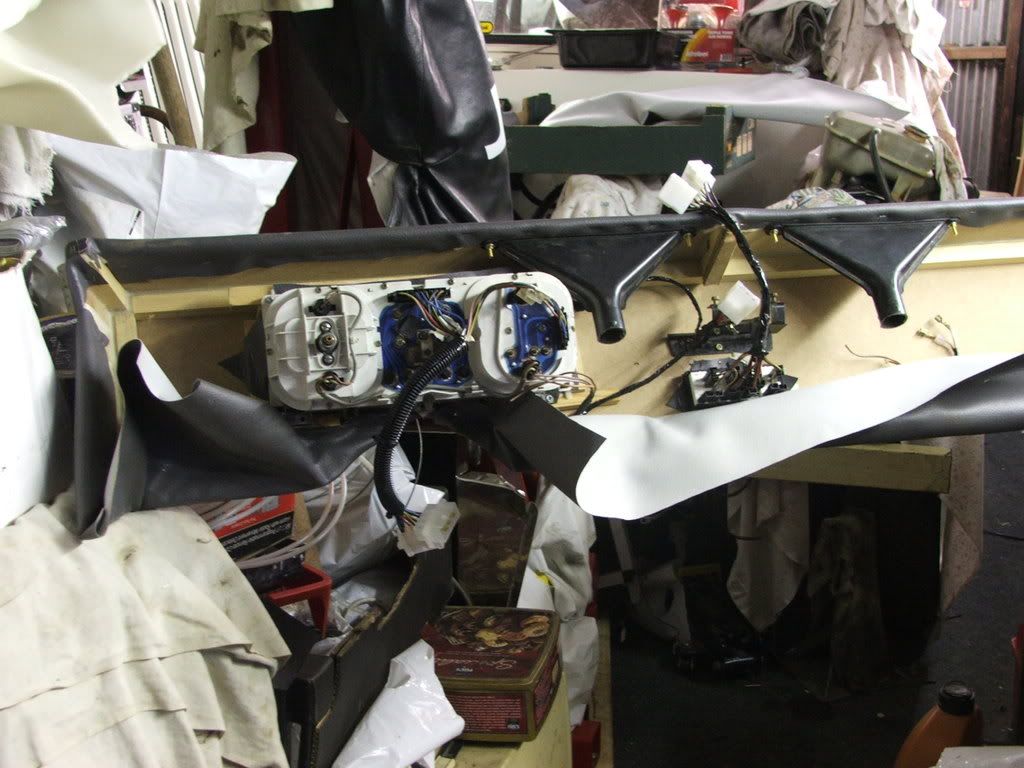
I made one up using the dash out of the donor and some MDF and vinyl. This picture shows the second attempt, I have just changed it again there are now a set of chrome surround MK2 Cortina clocks on a separate panel where the old dash was "covering up" the hole that was left when I removed the Cortina dash.  I really should get some more photos on here. |
|
|
|
Post by Peter on Oct 31, 2013 7:57:41 GMT
Hi Dave,
Unless you want and are able, to get into some pretty heavy glass fibre or woodwork you will always end up with a slab across the car with a lid on and a triangle below as in the above as on 90% of RVs I have seen or a complete OEM one from a suitable donor of the correct width.
What ever clocks, (round, rectangular, digital) you fit will make a difference to the look, as will switches, vents, and trim.
Any ICE will need to be removable or pop off face as the RV is totally insecure. Weather is also a factor to consider unless you have a hardtop.
Although on a SS, my dash and console is way removed from the original SS dash just using 3mm and 10mm plywood, vinyl and plastic.
On the Stirling forum there are some truly amazing Nova/Stirling ones, but that's the Yanks for ya.
I would also advise you to design 100 times on paper before even doing a first attempt. Take a photo of your dash area and then play the hell out of photo shop,(or Paint Shop Pro/Coral Draw), then make a totally new dash, wiring, etc. leaving the old one in place until you are ready to swap over rather than rip it all apart and have the car immobile for ages as something will ALWAYS pop up to stop you finishing it.
Whatever you decide to make or buy try to make it look like it was meant to be there, not just plonked on.
Peter
|
|
Deleted
Deleted Member
Posts: 0
|
Post by Deleted on Oct 31, 2013 14:07:45 GMT
hi,, cheers for that, think ill be scouring the local salvage yards by us with a tape measure in hand and see what can be modified to fit. ill keep you all informed with my progress... now then,, is it sunday yet?   ?? its just not coming round fast enough !!! cant wait to get my hands on it,,,lol |
|
|
|
Post by Peter on Nov 1, 2013 9:26:47 GMT
Oh, one thing, In order to avoid a birds nest of wiring should you need to remove the dash at any time, make it a 'plug in' with multi connectors rather than direct to the car so you don't have to disconnect all the instruments, switches and clocks.
|
|
|
|
Post by Gary on Nov 1, 2013 20:34:46 GMT
Oh, one thing, In order to avoid a birds nest of wiring should you need to remove the dash at any time, make it a 'plug in' with multi connectors rather than direct to the car so you don't have to disconnect all the instruments, switches and clocks. I would second that the first one I made was a nightmare seemed OK when I did it but when I went back behind it "A different story" So I put multi plugs on every thing this time, even the little switch panel in the centre of the dash can be removed without all the dash coming out. ![cool[1]](//storage.proboards.com/658221/images/pc95quoFVbDqiqqHkukY.gif)  |
|
|
|
Post by Peter on Nov 2, 2013 10:18:22 GMT
That's the way to do it, nice!
|
|