Post by Deleted on Apr 5, 2008 20:33:11 GMT
Nigel’s
Eagle P21
Restoration Project
Phase 2
Back from Stoneleigh
Eagle P21
Restoration Project
Phase 2
Back from Stoneleigh
Following the first major kit car show of the calendar, Stoneleigh. I learn a lot and saw a lot that gave me a multitude of ideas. During the show I had purchased one or two goodies and although keen to fit the glossy bits, progress dragged out as now the car was road worthy, I wished to enjoy the pleasure of using the car for what it was build ’DRIVING’.
In truth with the exception of some relatively simple modification, wing mirrors that allowed me to see behind (recalling, I almost had an accident on a roundabout coming back from Stoneleigh), meaty horn, auxiliary lights, new stereo with bigger speakers and new number plates, not much was mechanically done until after the Newark Show.
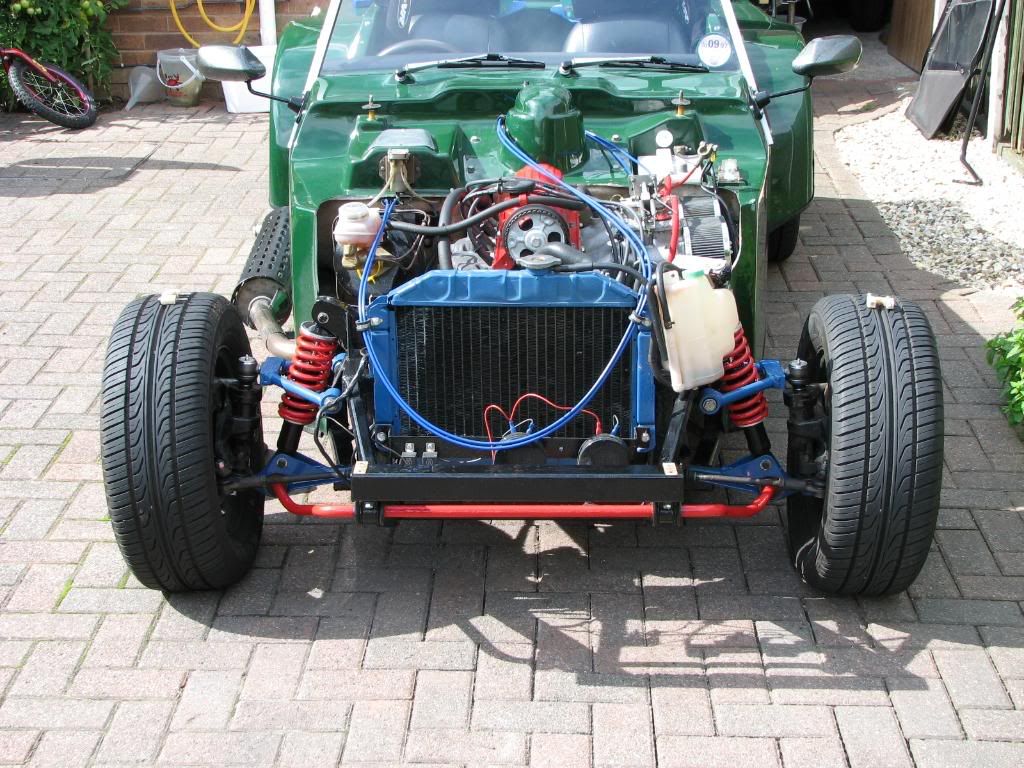
Having now restored the propulsion system it was time to turn my attention to the suspension, knowing this to be an area requiring address I had been lucky enough to be given some tremendous advice while at Newark by Roger not only a fellow P21 owner and an original builder but a track day enthusiast as well.
The Suspension - (July 2007)
Following a general review of the suspension I had found it wanting. The car was pulling slightly to the left, the car was not sitting level at the front and not only was the rear suspension bottoming out, but the prop shaft was also bottoming on the gearbox under severe suspension travel.
Suspension - Front
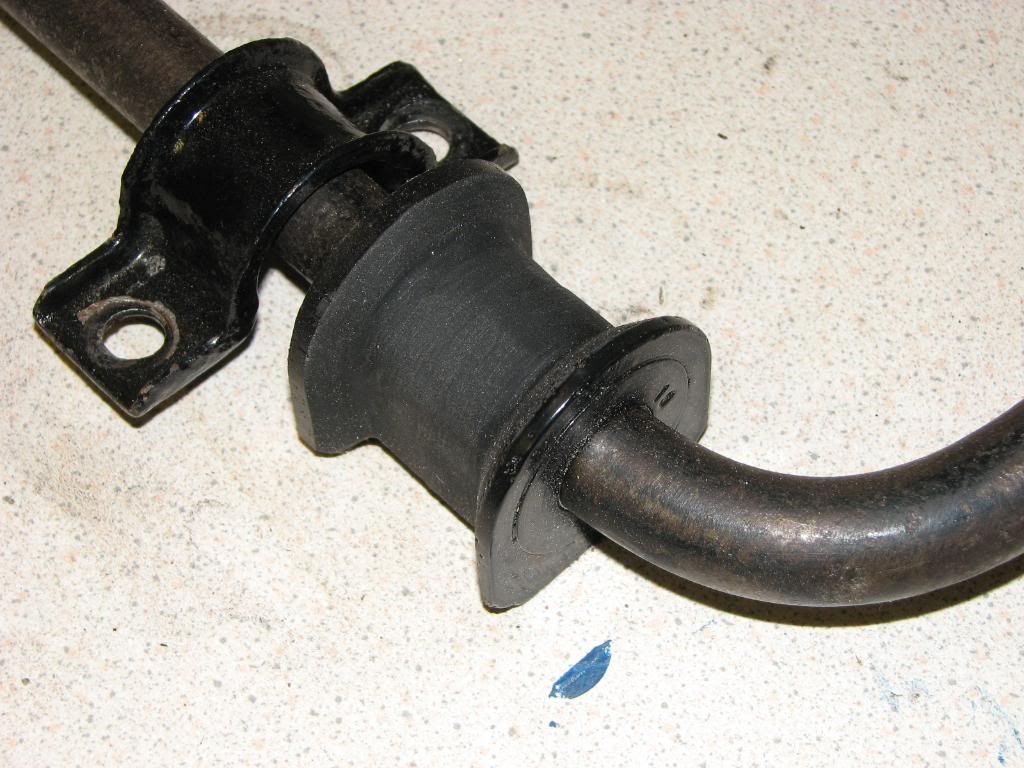
I was pretty sure that at sometime in the cars past that the near side front suspension had sustained some damage and the track arm had been replaced. This had been done in such a way that the track arm shock locations were out by as much as 10mm. I managed to acquire a pair of new ones while at Newark for £20, and set about there modification.
Pic. 18 & 19 - The car’s front suspension prior to strip down
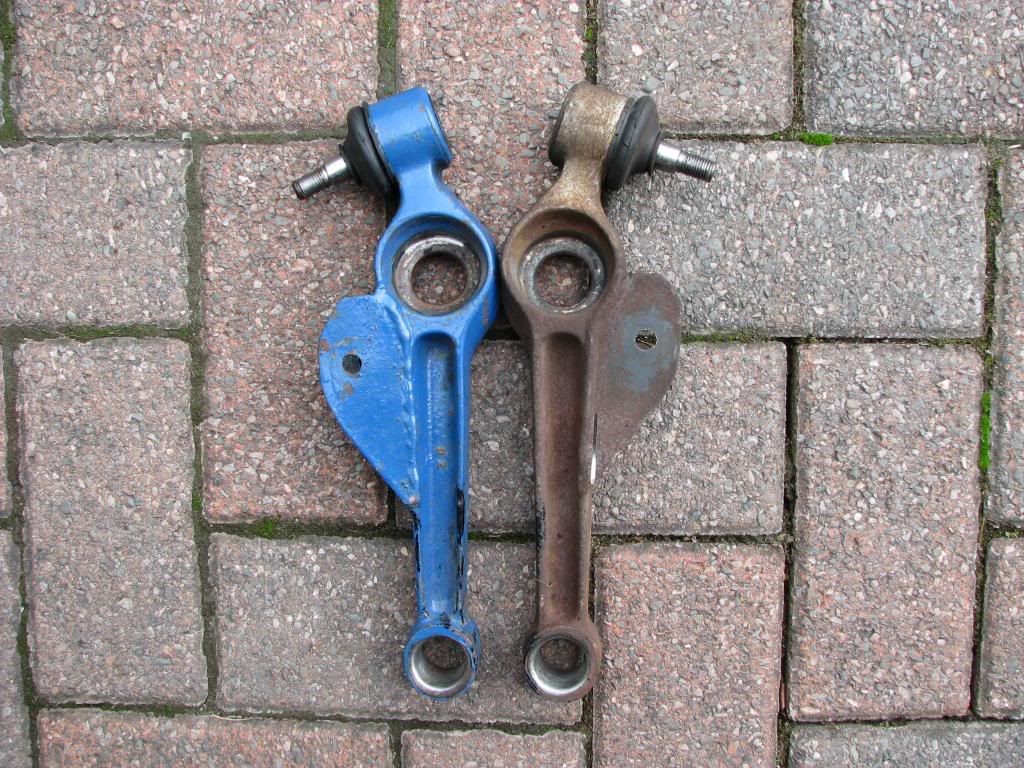
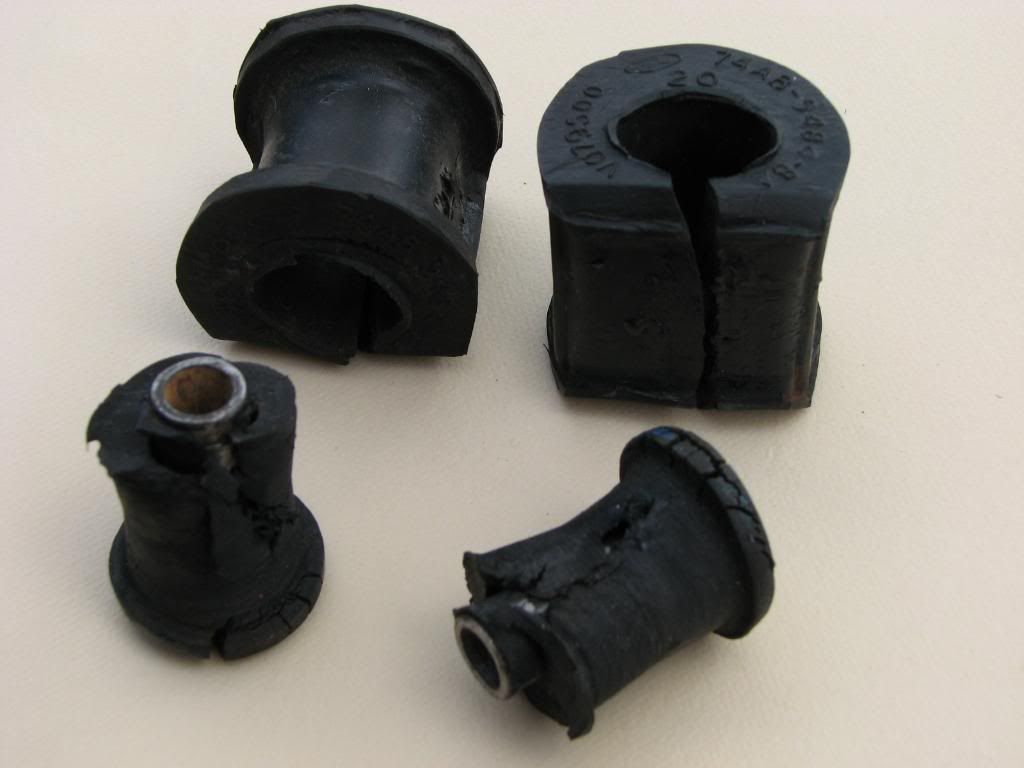
Pic. 20 & 21 - The old arms ‘note the uneven positioned gas shock mounting holes and the much worn old bushes
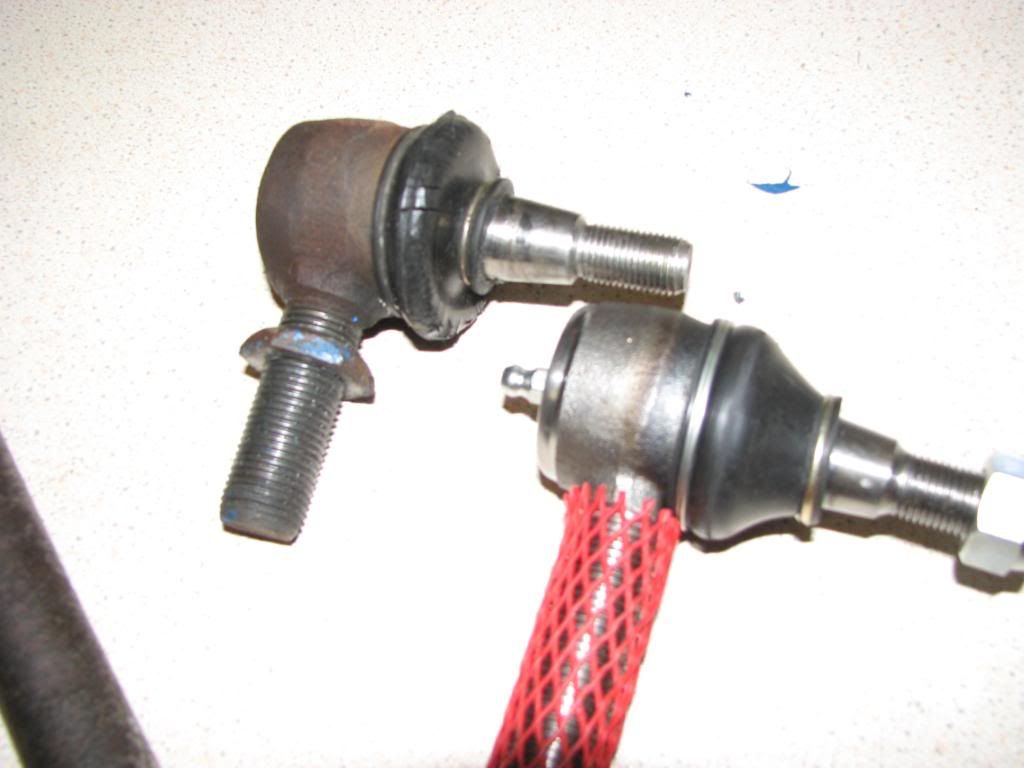
Could I really have been driving around on these excuses for bushes! Twenty pound paid for a full set of soft Polly bushes from ‘Flo-Flex’ new arm plates were made up and mig welded to the arms. Roger had very kindly provided me with the Unipart Number GSJ152 for the Landrover steering ball joints (2 right handed threads required), so a quick visit to my local Land Rover dealer sourced these parts for £8 each.
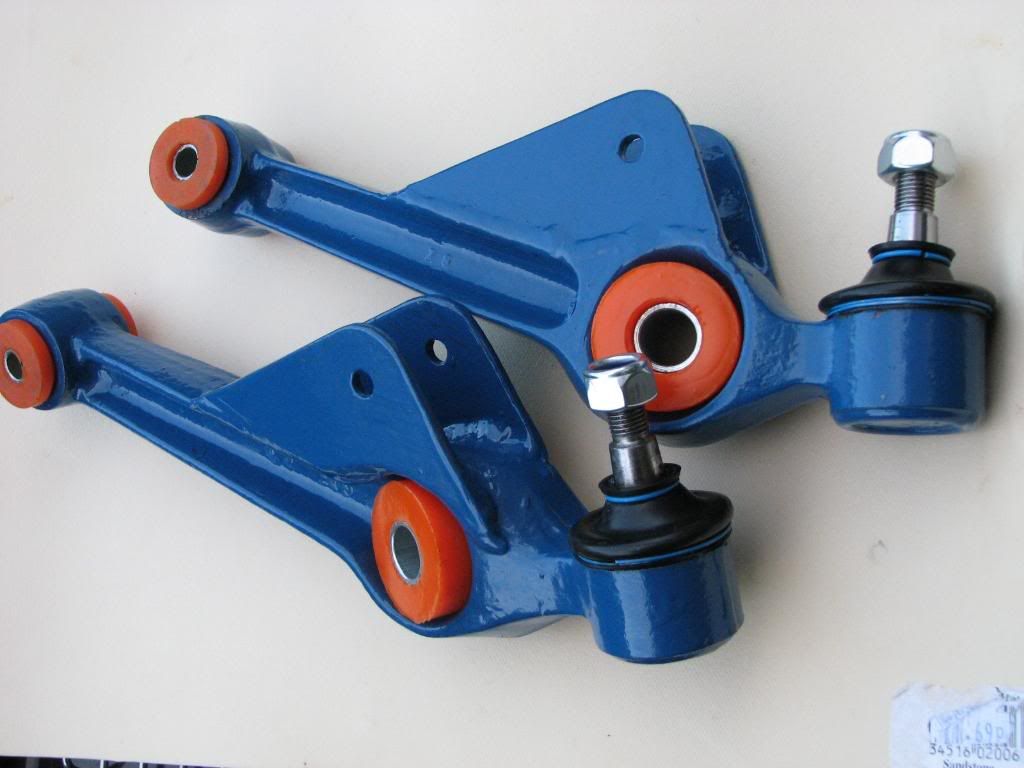
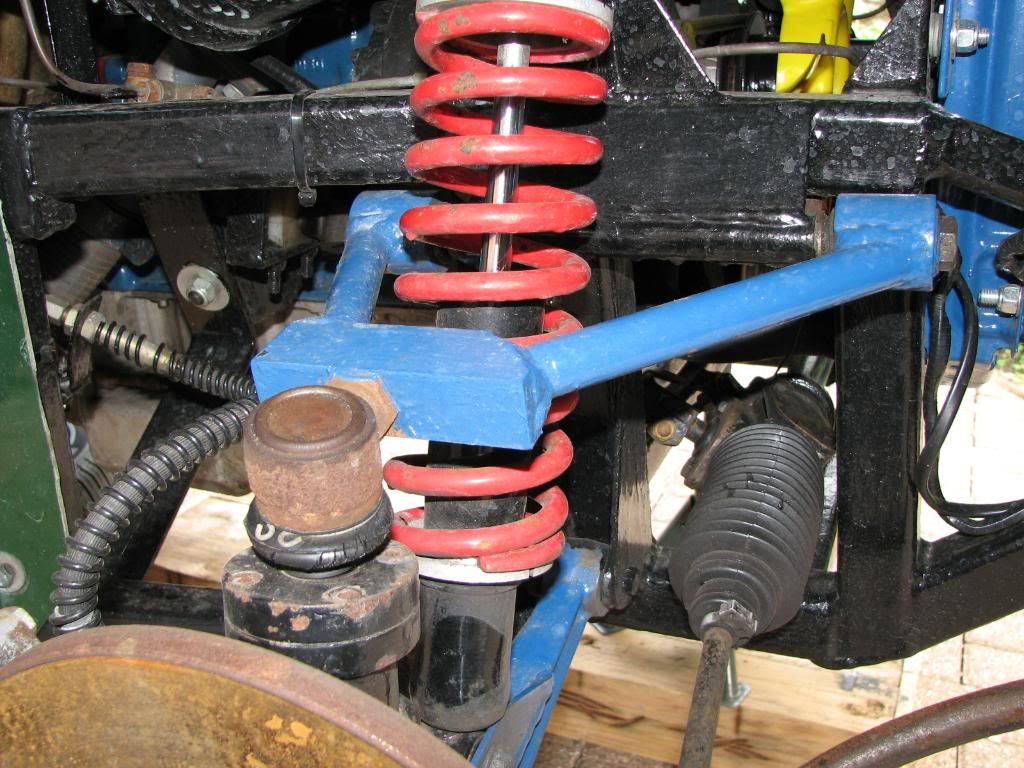
Pic. 22 & 23 - The HD British newly modified arms fitted with new Polly bushes and old verse new Land Rover 90 top ball joints (with grease nipples)
The spring and gas shocks were stripped, I was fortunate to be able to use a local garages spring tester to ensure the springs were of equal rating, I was now getting close to rebuild and so set about priming the suspension prior to paint. I had managed to obtain some hard RS2000 Roll bar Polly bushes but they did not fit my standard cleats, and as I was unable to source some RS2000 cleats, I set about modifying the bushes to fit. (The beauty of a power file)
During the reassembly of the front suspension, I found that the nearside arm was forced back off true buy the installation of the role bar, hence the extreme wear on the old bushes. It was then that I recalled Roger telling me at Newark (must remember not to drink so much beer when discussing important issues) a story about the factory jig alignment holes for the front role bar being out by about ¾” and how he had plated drilled and threaded new ones on the chassis.
Thus I set about with renewed vigour to do the same.
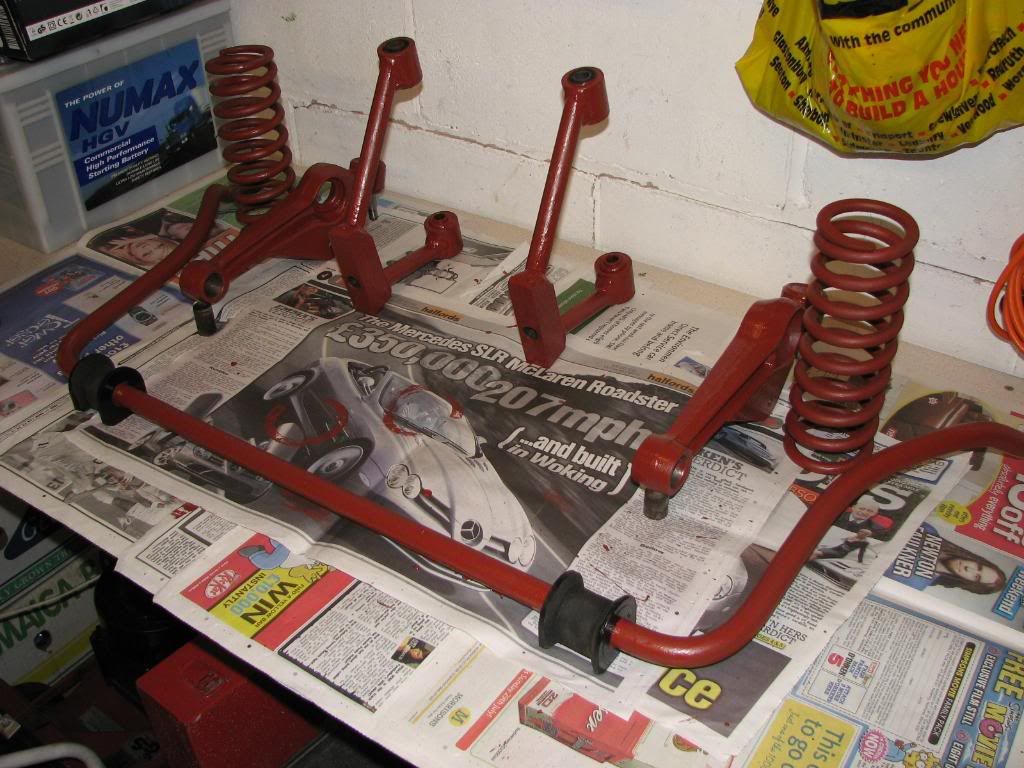
Pic. 24 & 25 - Suspension components primed and ready for final paint and Capri 3lt Role bar with Modified RS2000 Polly bushes, Standard Escort Cleats
The reassembly was relatively straight forward, and having sorted out the role bar positioning all the other items sat squarely and ran true and free.
It is issues, such as the role bar location points, that brought home to me the value of joining an owners car club and not being afraid too ask, what may appear at the time to be stupid questions. ‘suck other builders brains, and make your renovation as easy as possible’.
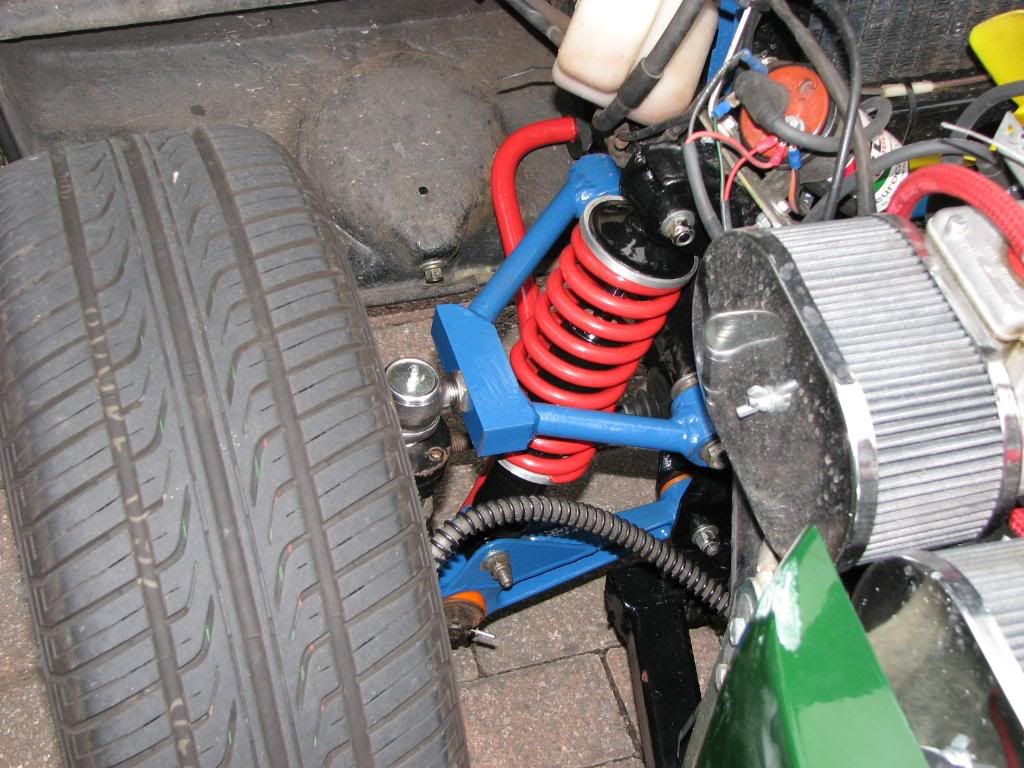
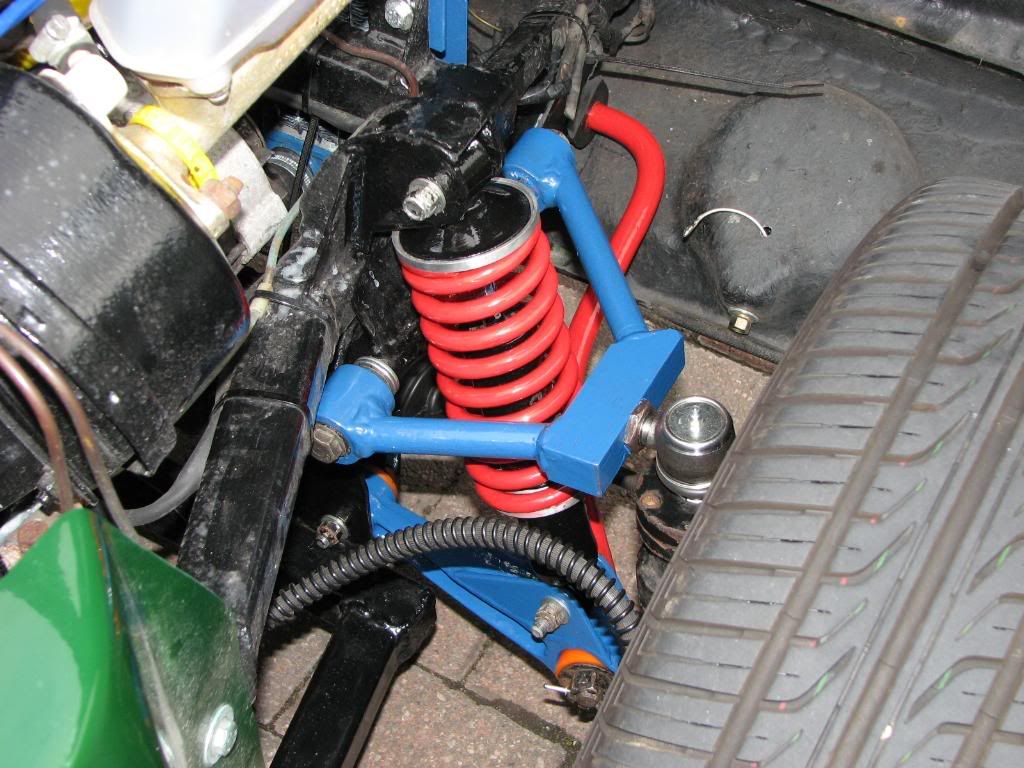
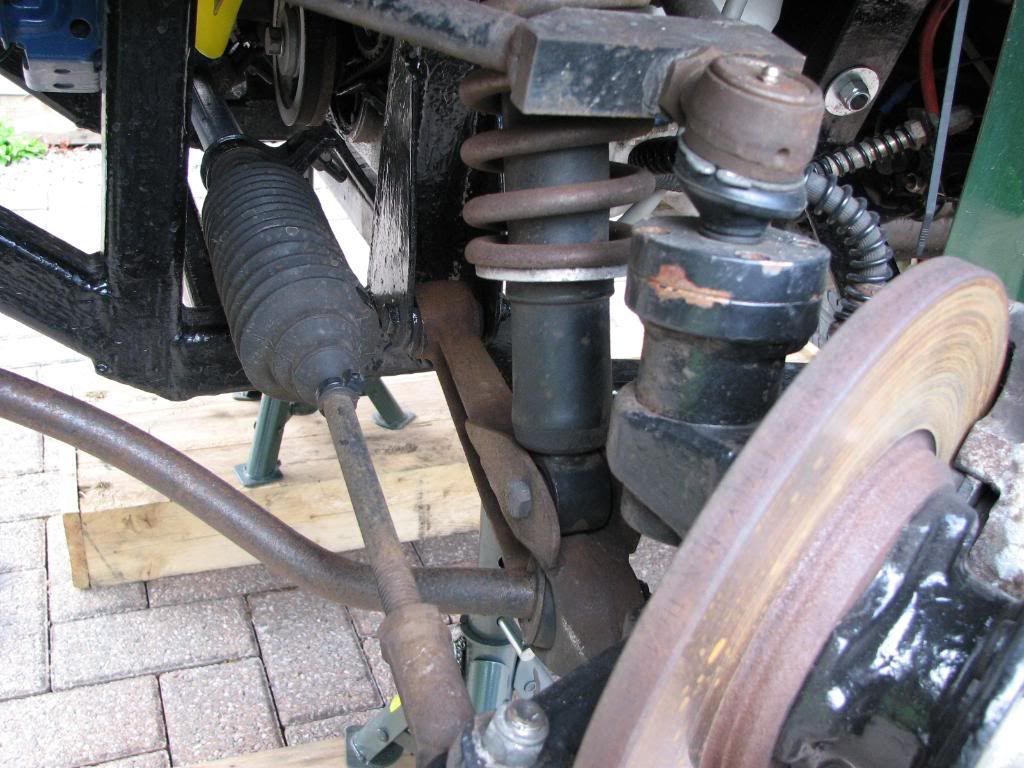
Pic. 26 & 27 - The finished articles installed and ready for final adjustment
Suspension - Rear
The Rear was a solid Escort MK 2 Rear axle 3.54 Diff on part stripped 60mm RS2000 leaf spring. The standard is a three section leaf, the two shorter sections being removed to account for the reduced vehicle weight.
During the inspection I had noticed oil weeping from both of the rear shocks, and while being unsuccessful in finding replacement gas shocks, had been lucky enough to acquire a pair of Monroe Escort Van oil shocks while at Newark. The new Shocks were also ½” shorter while closed which represented an advantage as I was convinced that the current shocks had on occasion bottomed out.
I decided to remove a pair of 1” aftermarket alloy spacer blocks as it was causing the bumper stops to easily bottom, and add 2 x 3/8th spring steel plates top and bottom of the spring. This had the combined effect of increasing the shock travel and not sticking the back end too high in the air.
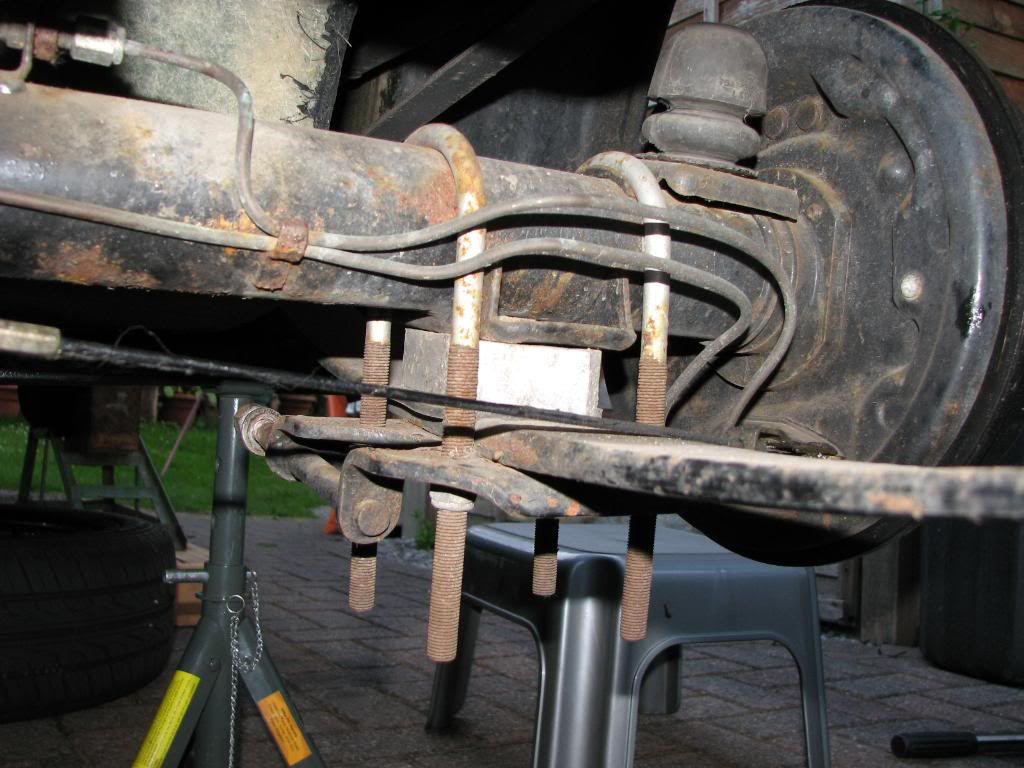
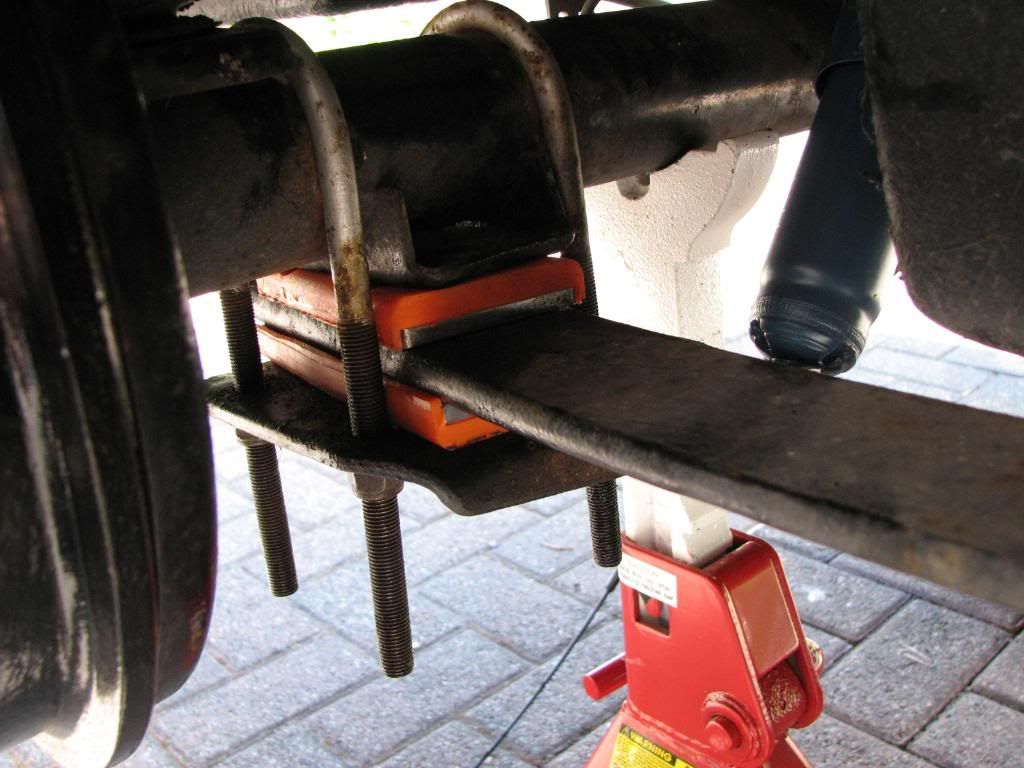
Pic. 28 & 29 - The Old vs. New Rear Suspension Setup
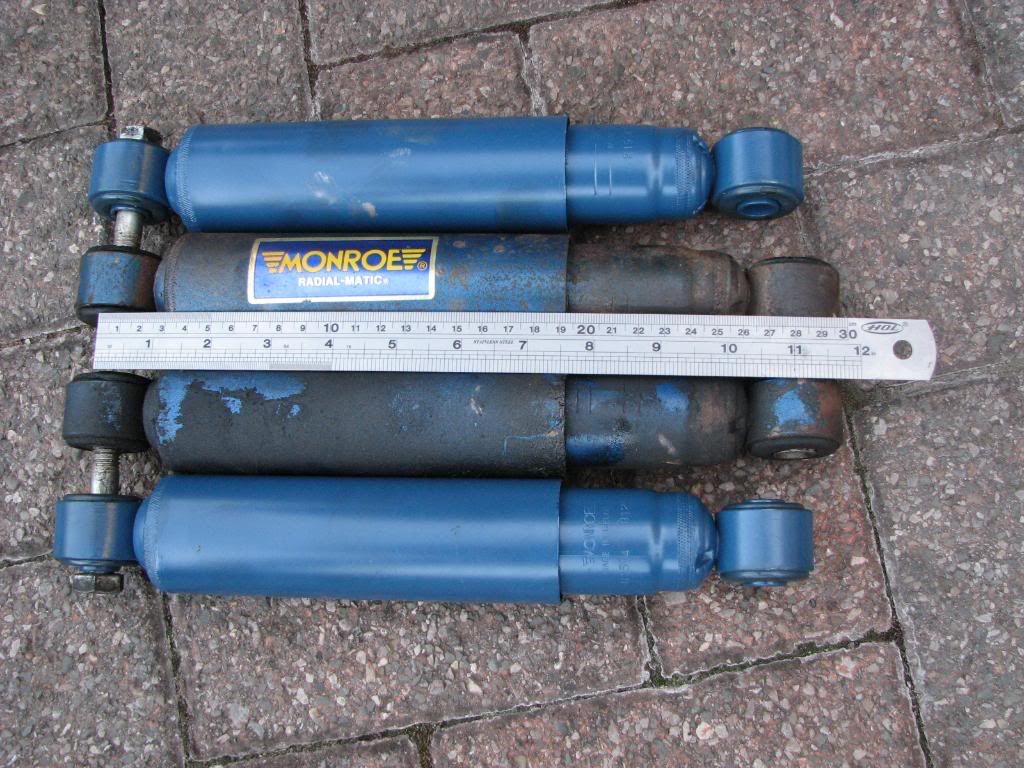
Pic. 30 & 31 - The Old vs. New Rear Socks and the Finished Suspension.
Standard Polly flex plates were also fitted, but new bushes front and rear were not fitted as these appeared in almost perfect condition. The modifications also meant that the handbrake cable no longer fouled on the leaf spring.
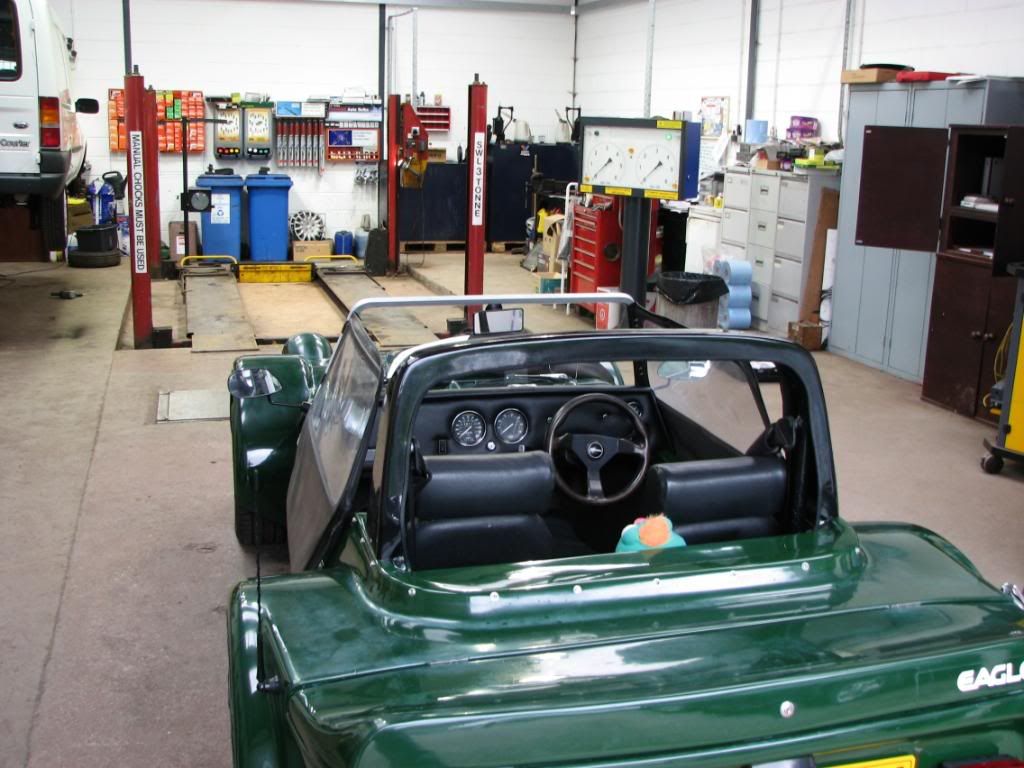
Preparation for MOT - (August 2007)
Various minor issues were addressed a Pair of Horns were fitted replacing the embarrassing squeak with a more manly grunt. A quality pair of Wing Mirrors sourced and fitted. New wiring introduced to power the replacement chrome auxiliary lights, and the all important windscreen washers, new pipes fitted, filler bottle scrubbed out and we were about done.
The day arrived and after a very nervous 45 minutes the car was declared past with no exceptions.
The passing of the MOT at the end of August would allow the taxing of the vehicle in the new year as it was my intention to (SORN) take the car off the road during the winter months , ‘save paying our beloved chancellor more money’
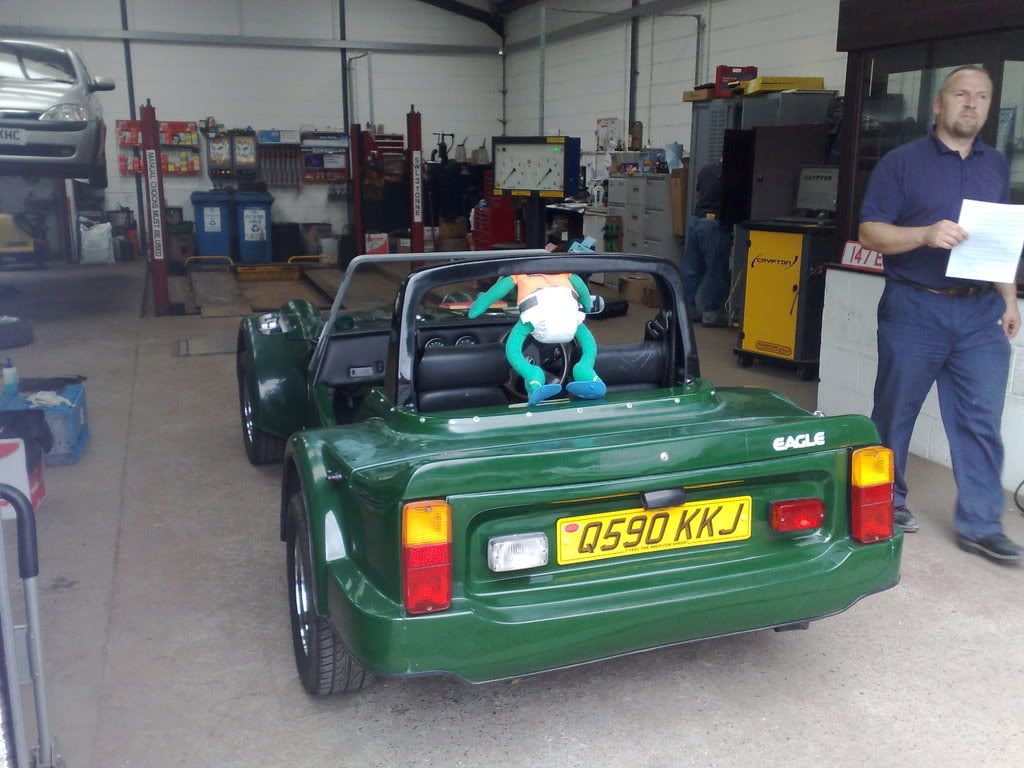
Pic. 32 - The Cars Undergoing MOT ‘Fingers Crossed - Kermit looks nervous’


 . No wonder his tongue is hanging out lol ;D