|
|
Post by wiggy on Dec 21, 2019 12:08:31 GMT
|
|
|
|
Post by Peter on Dec 21, 2019 14:57:19 GMT
Not actually seeing anything Wiggy.
|
|
|
|
Post by wiggy on Dec 22, 2019 10:16:09 GMT
 all, I got called out on an emergency and just before I had to leave and in my haste I made a mistake an accidentally deleted the images I had uploaded. |
|
|
|
Post by biggles1 on Dec 22, 2019 10:43:13 GMT
I feel your pain.
I have exactly the same issue. I hardly dare look at mine. It's a horrible mess. I guess every previous owner has had their fingers in there.
Once I get everything else sorted, a full rewire, will be the last job.
John
|
|
|
|
Post by Peter on Dec 22, 2019 11:52:52 GMT
Must say it was easier than I anticipated even as an auto electrician it is a daunting task but all new wire in the correct colour and nice new connections and boxes does make it easier.
Loosely lay in the wiring avoiding any taped up bunches but just a LOOSE zip tie at intervals to keep it all in place until the final check and test and THEN tape up the looms. Saves all that undoing and redoing when you find a problem or need to add or remove a wire.
|
|
|
|
Post by Mark on Dec 22, 2019 13:21:01 GMT
A daunting task indeed. Are you following Cortina wiring, if that is your nearest main donor car? Some Haynes manuals have a pretty good wiring schematic to follow.
Those scotch locks, as easy to use for adding wires to the loom they are, I found from past experience to be unreliable and I avoid them like the plague.
If you do have to add/change to donor car layout make your own little extra diagram of this. I failed to do this with some areas on my loom and once the loom is taped up they wires are so hard to trace.
Loose is good advice as when they are taped up the loom seems to magically shrink.
All the best, out with the spaghetti and in with the new.
|
|
|
|
Post by wiggy on Dec 23, 2019 9:27:14 GMT
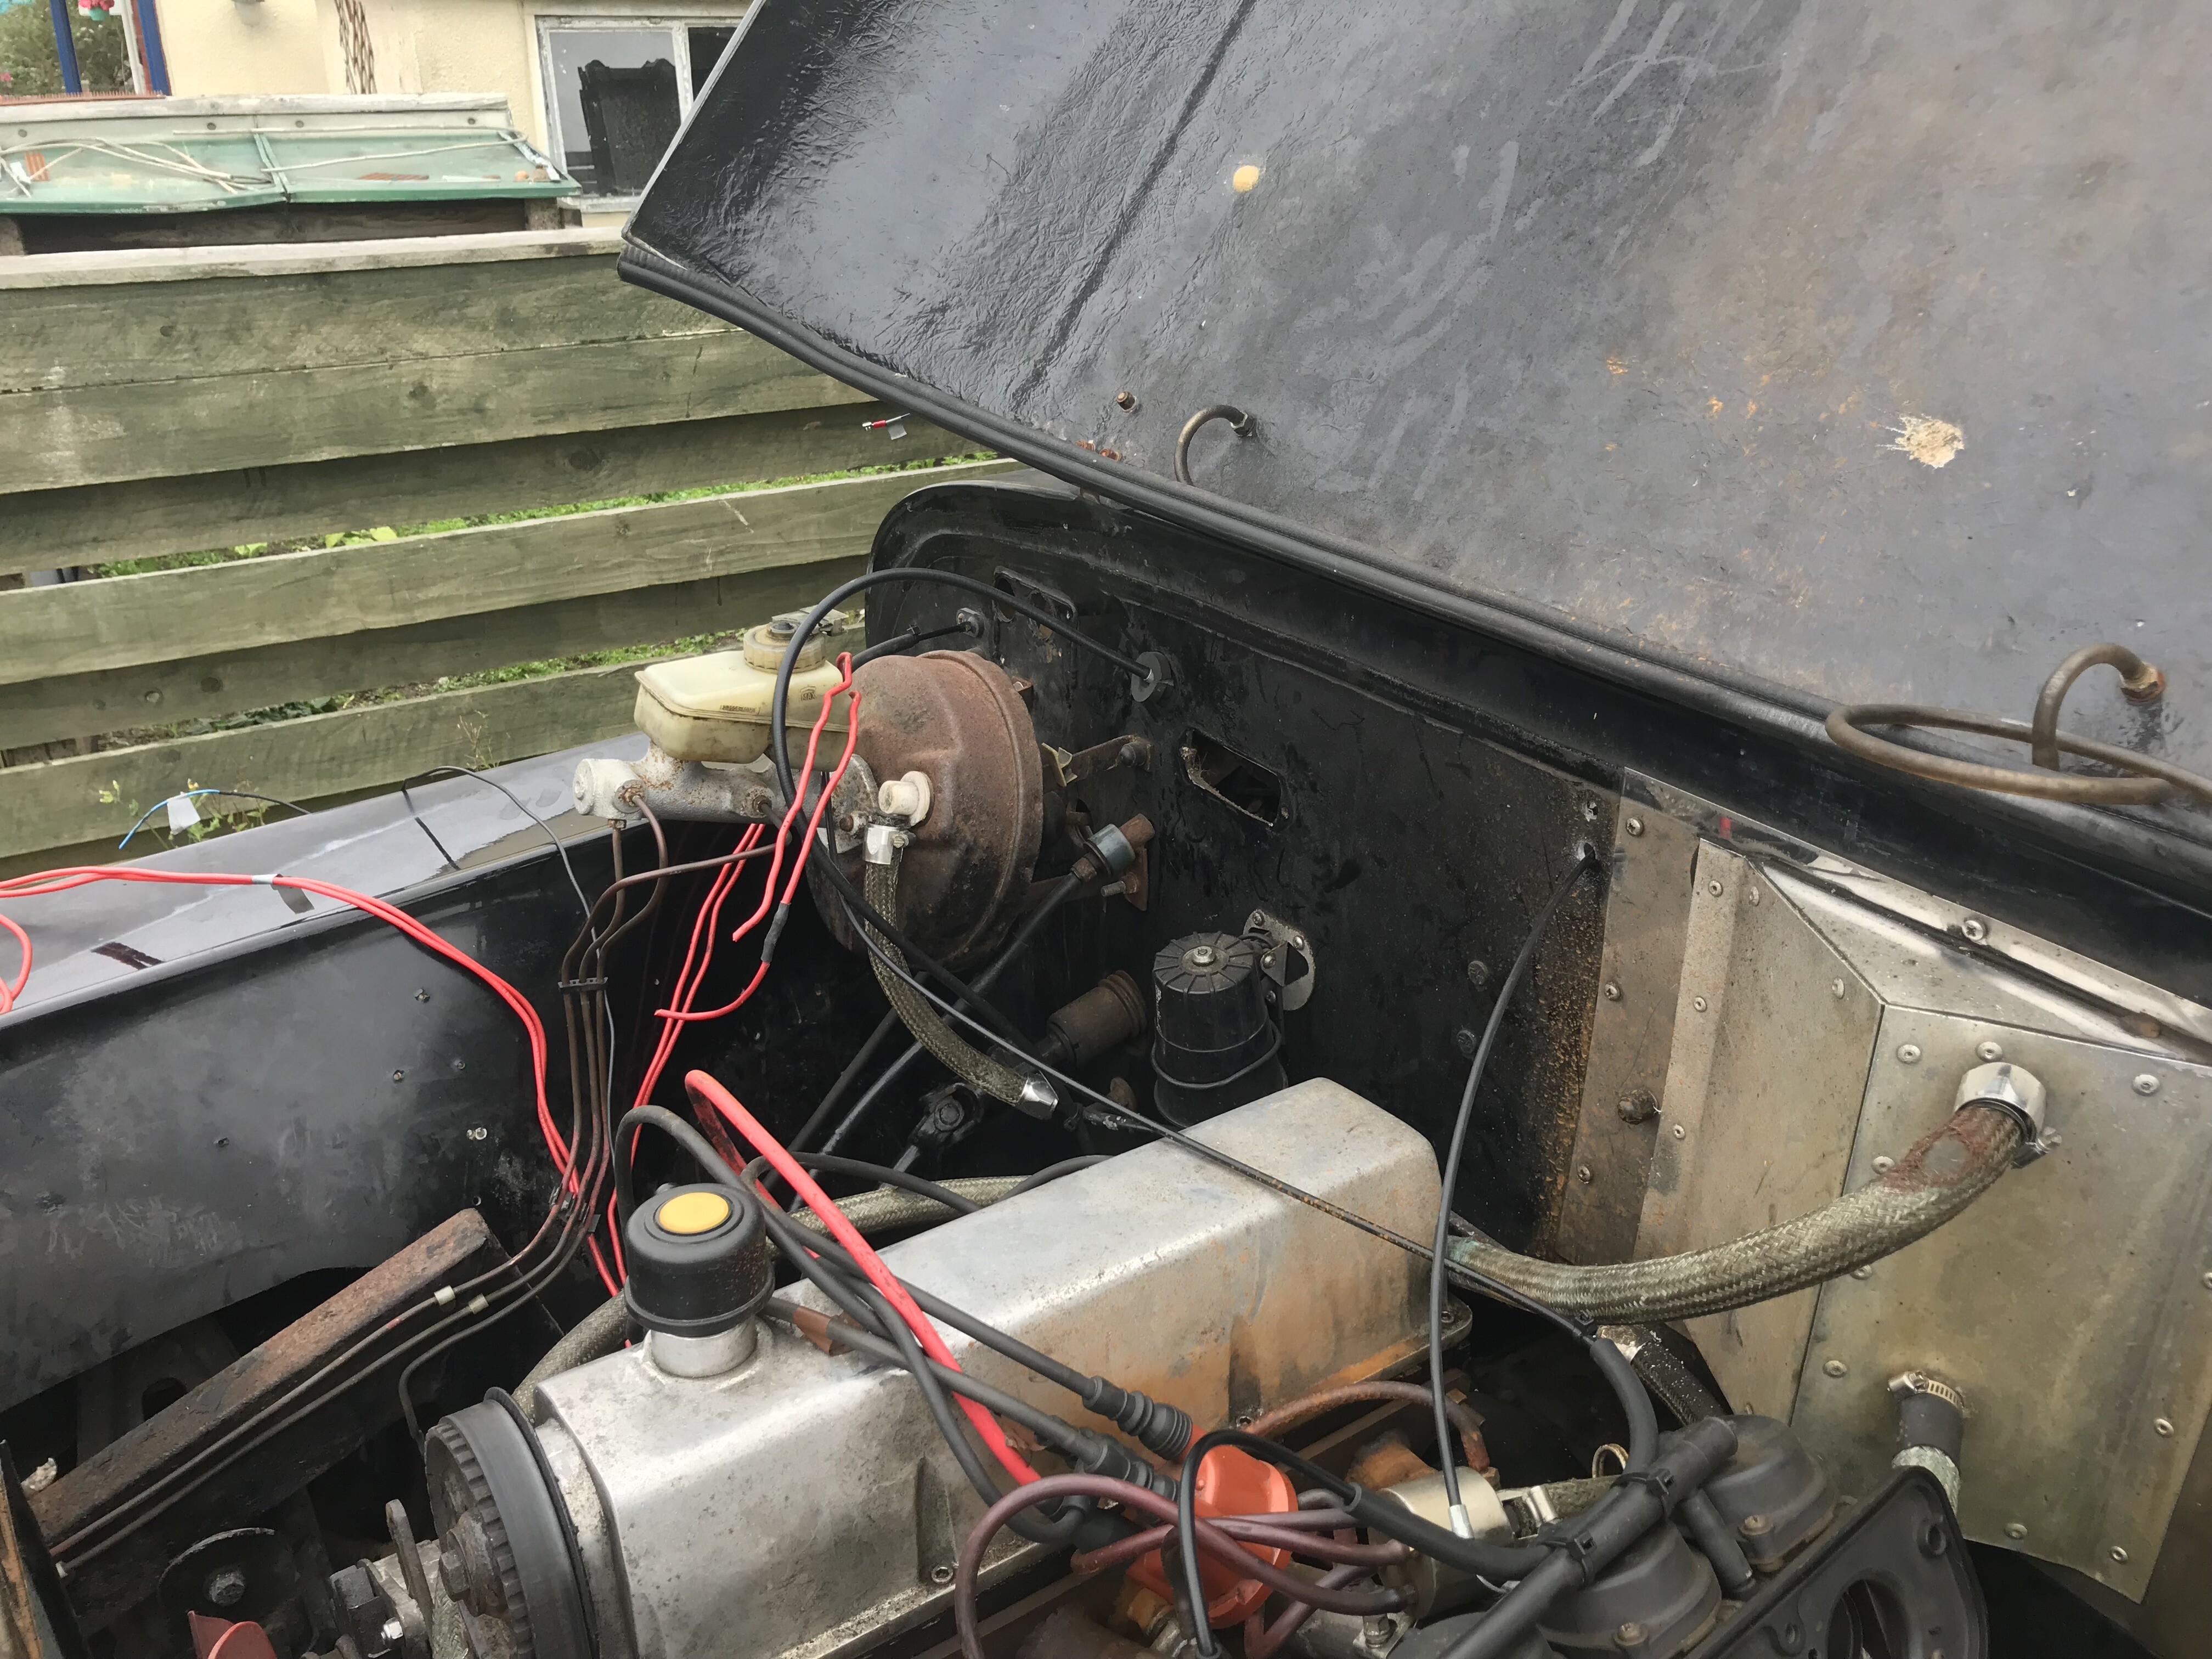
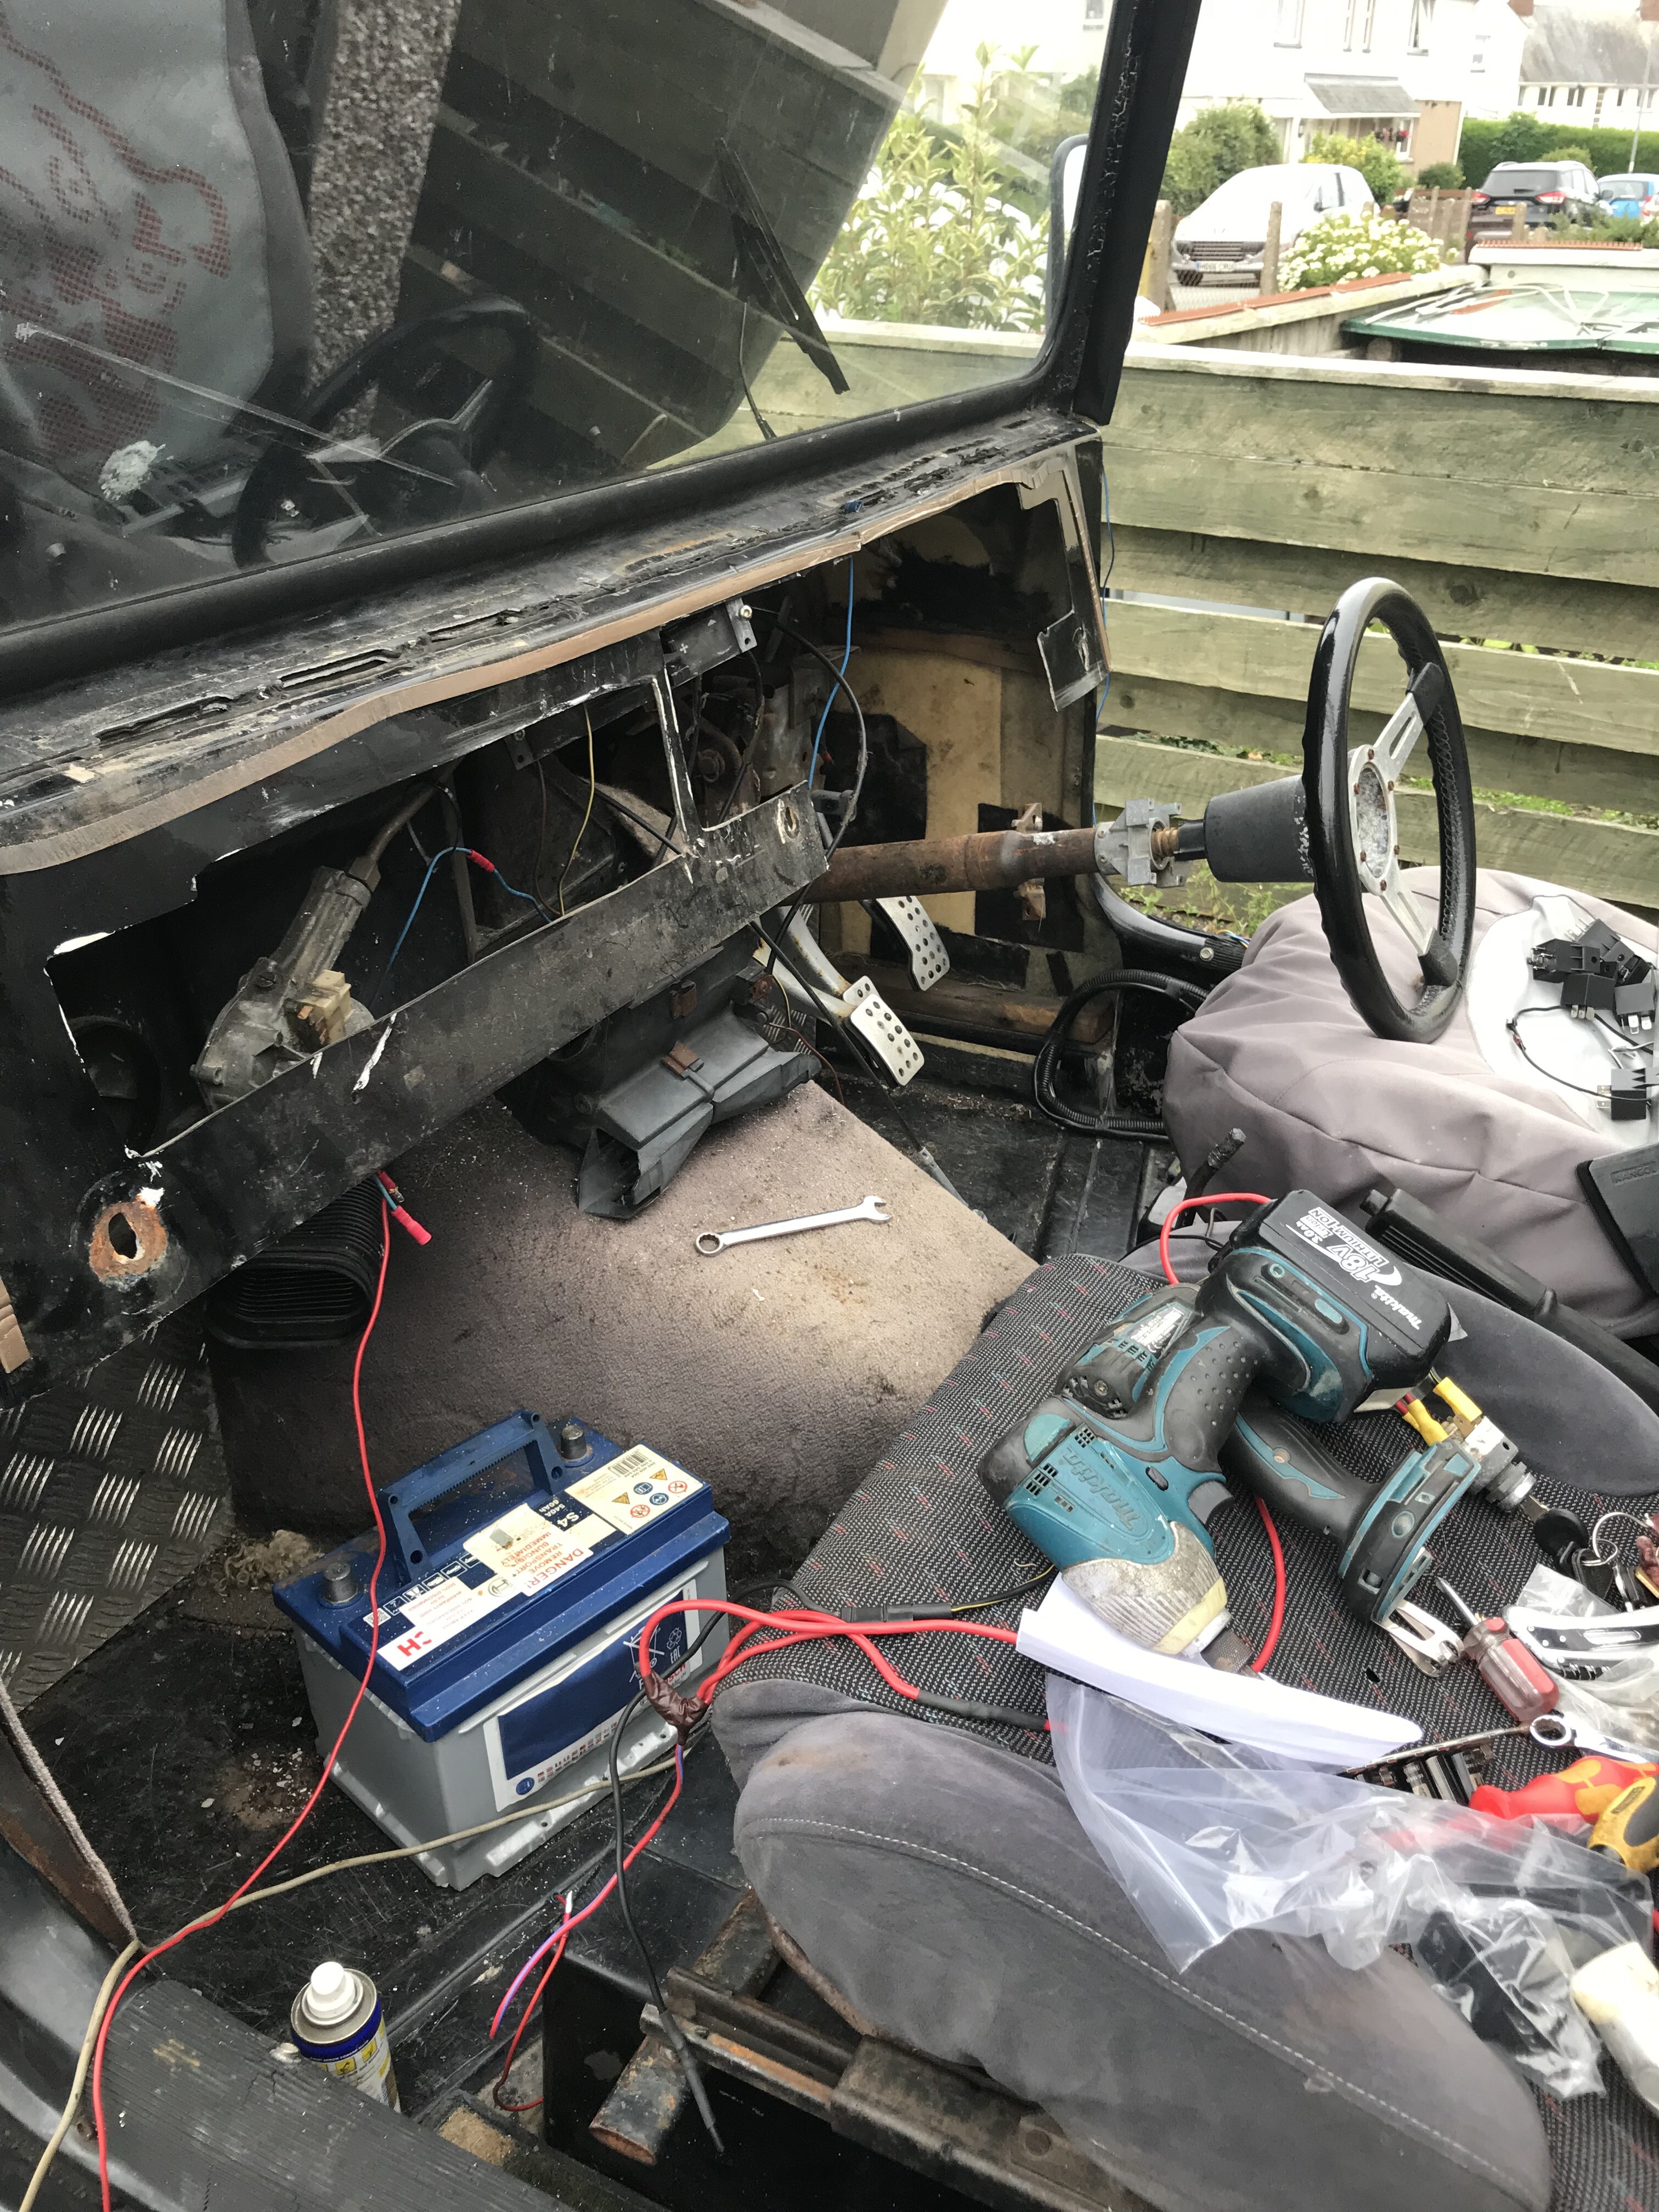
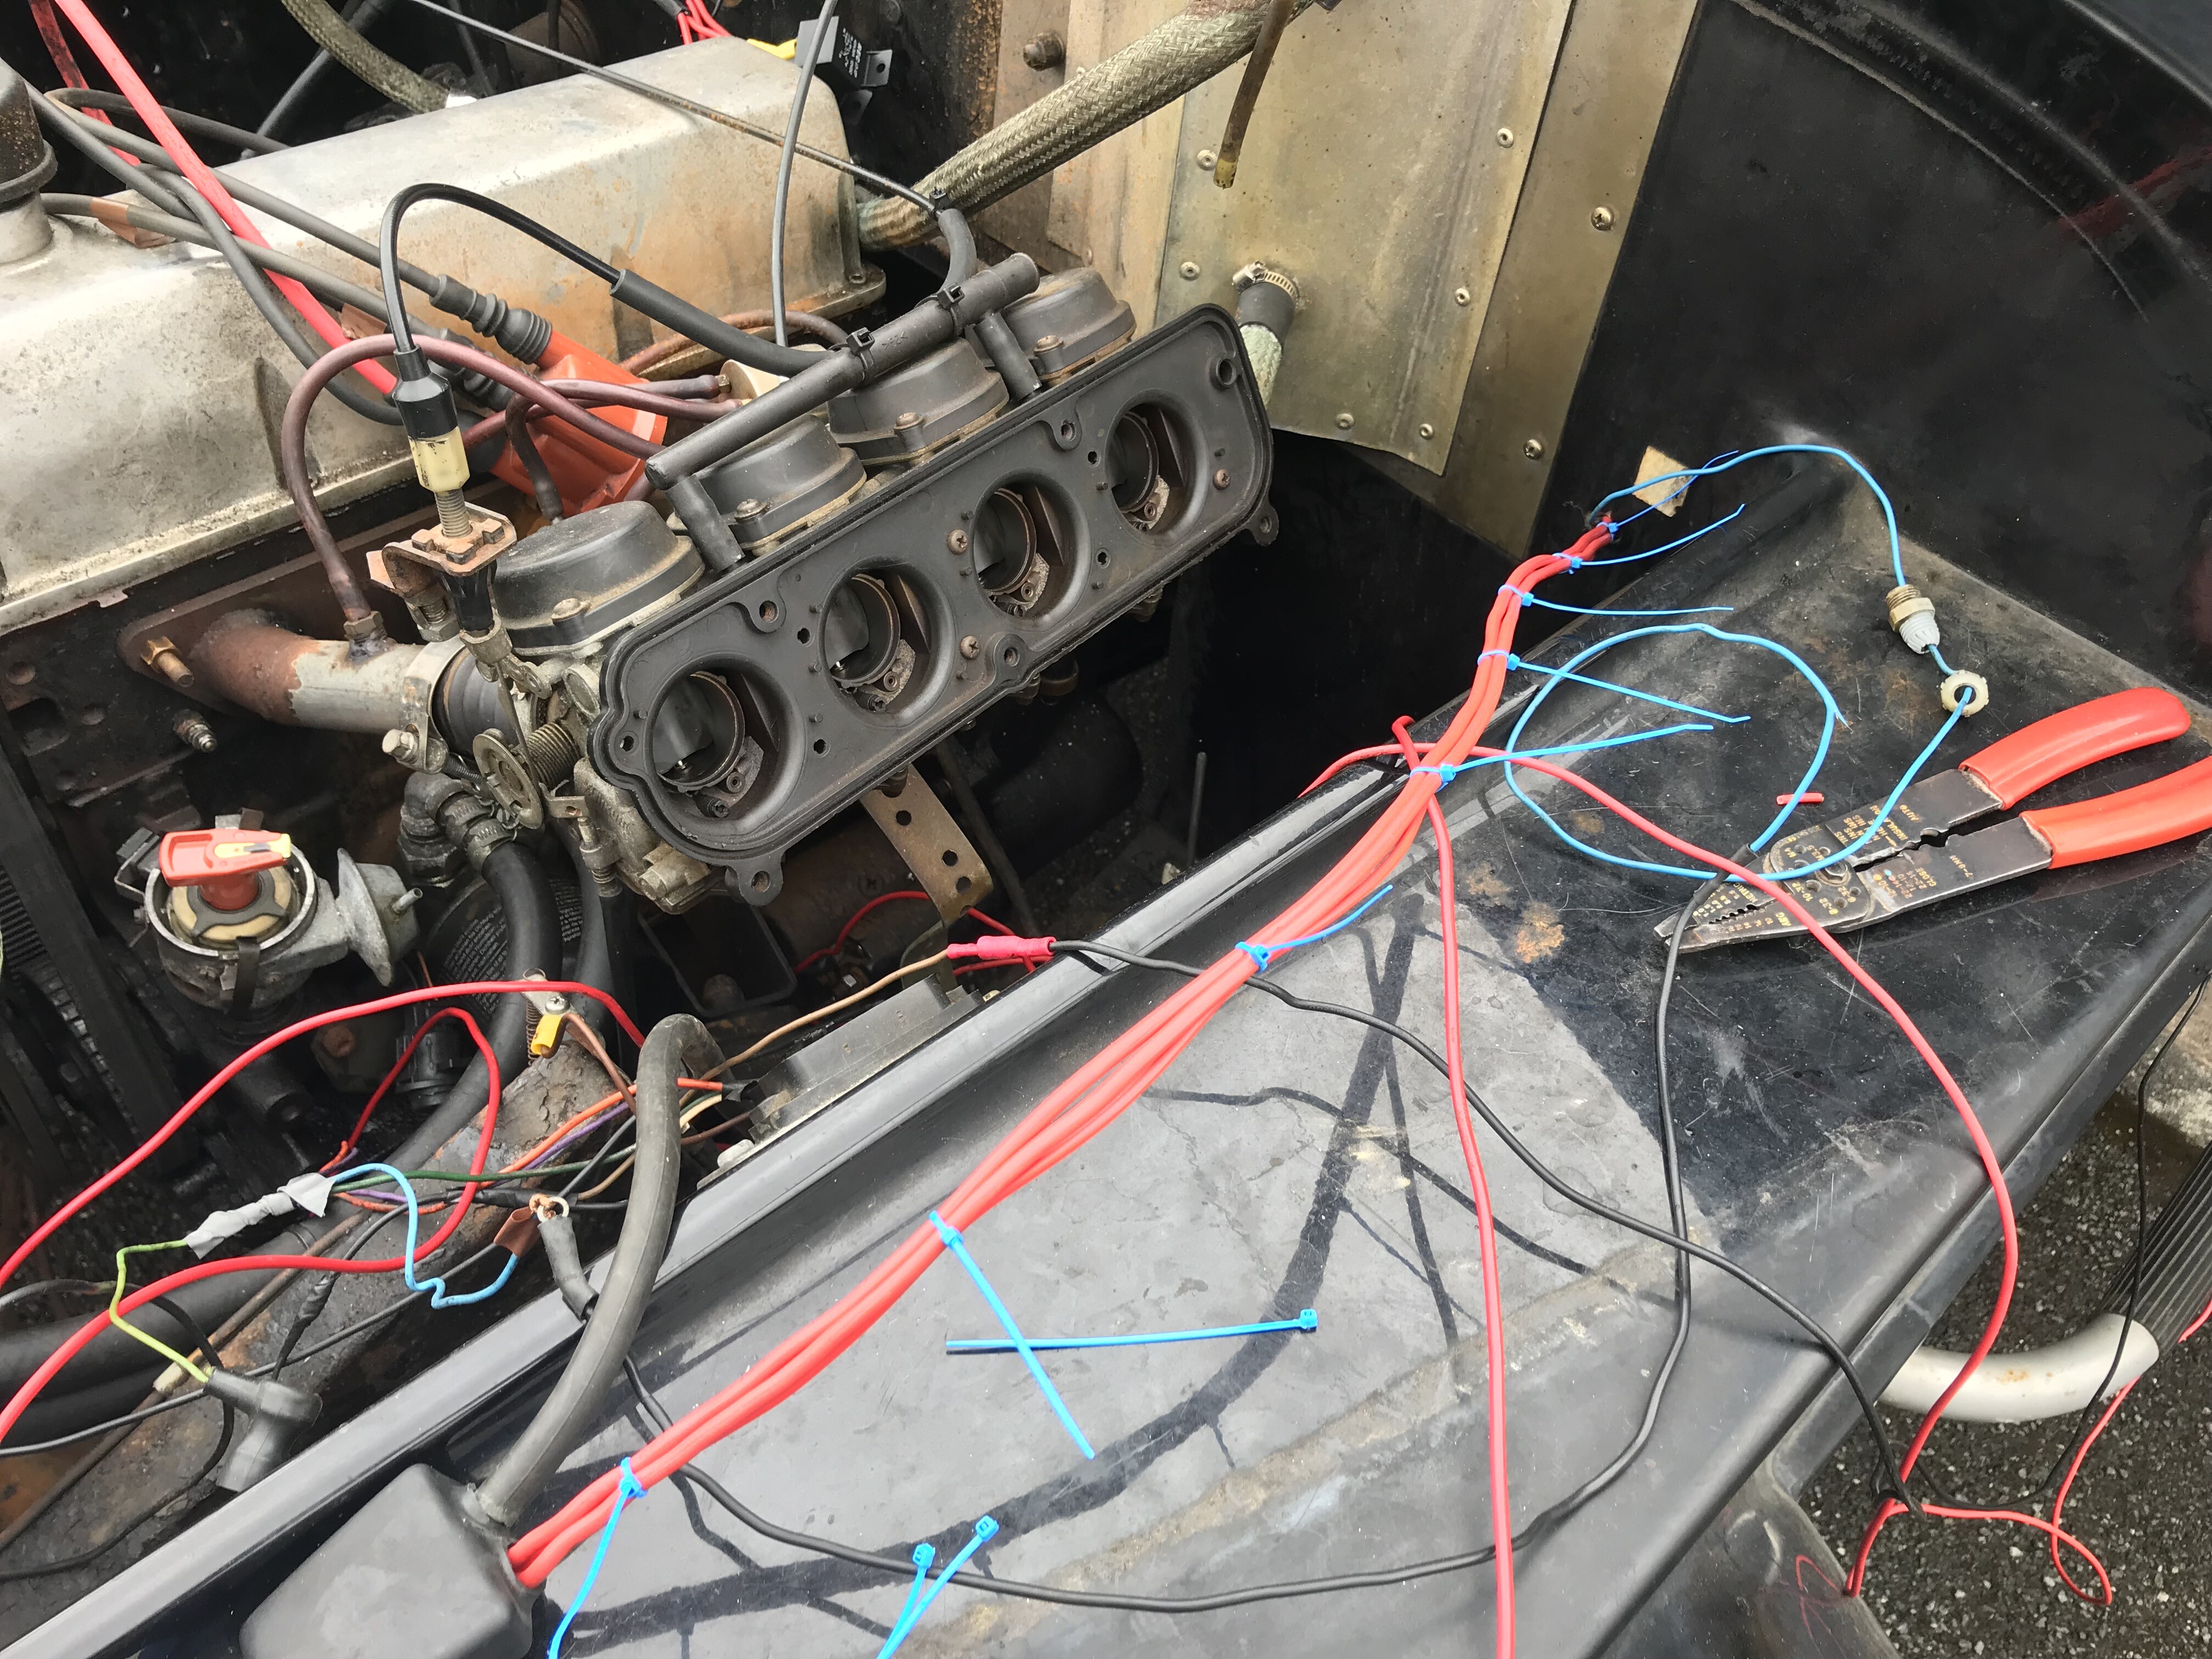
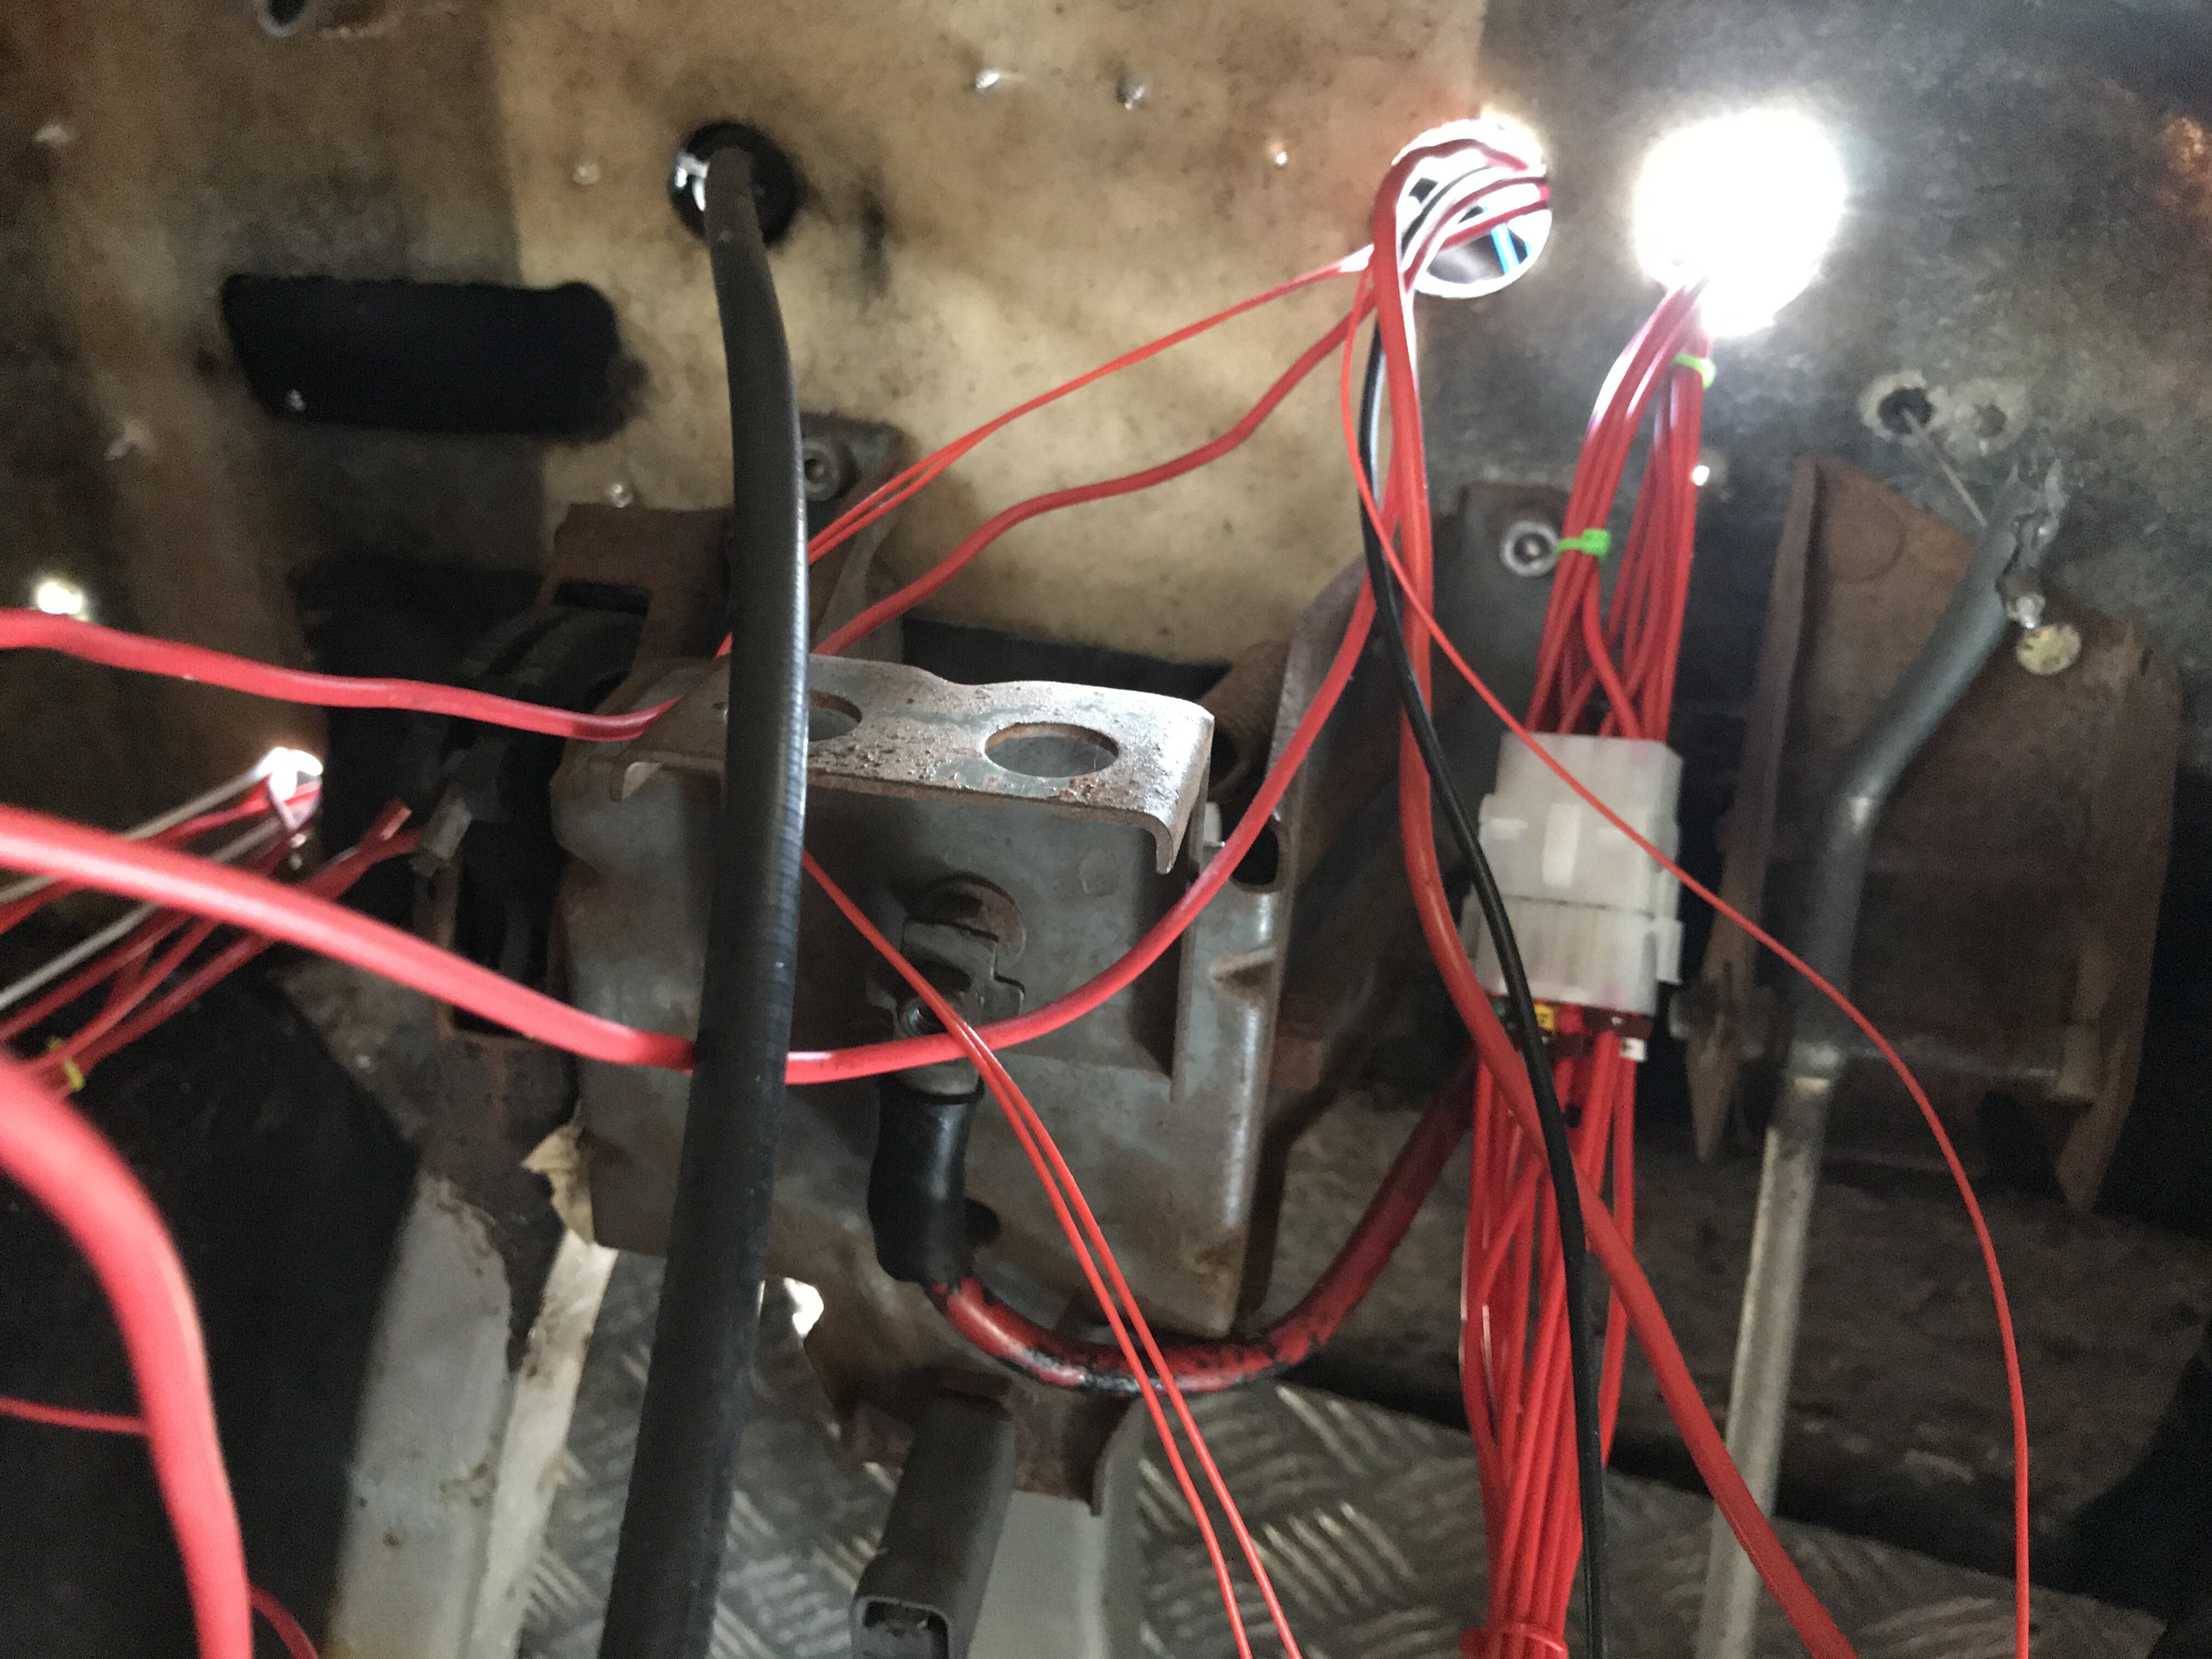
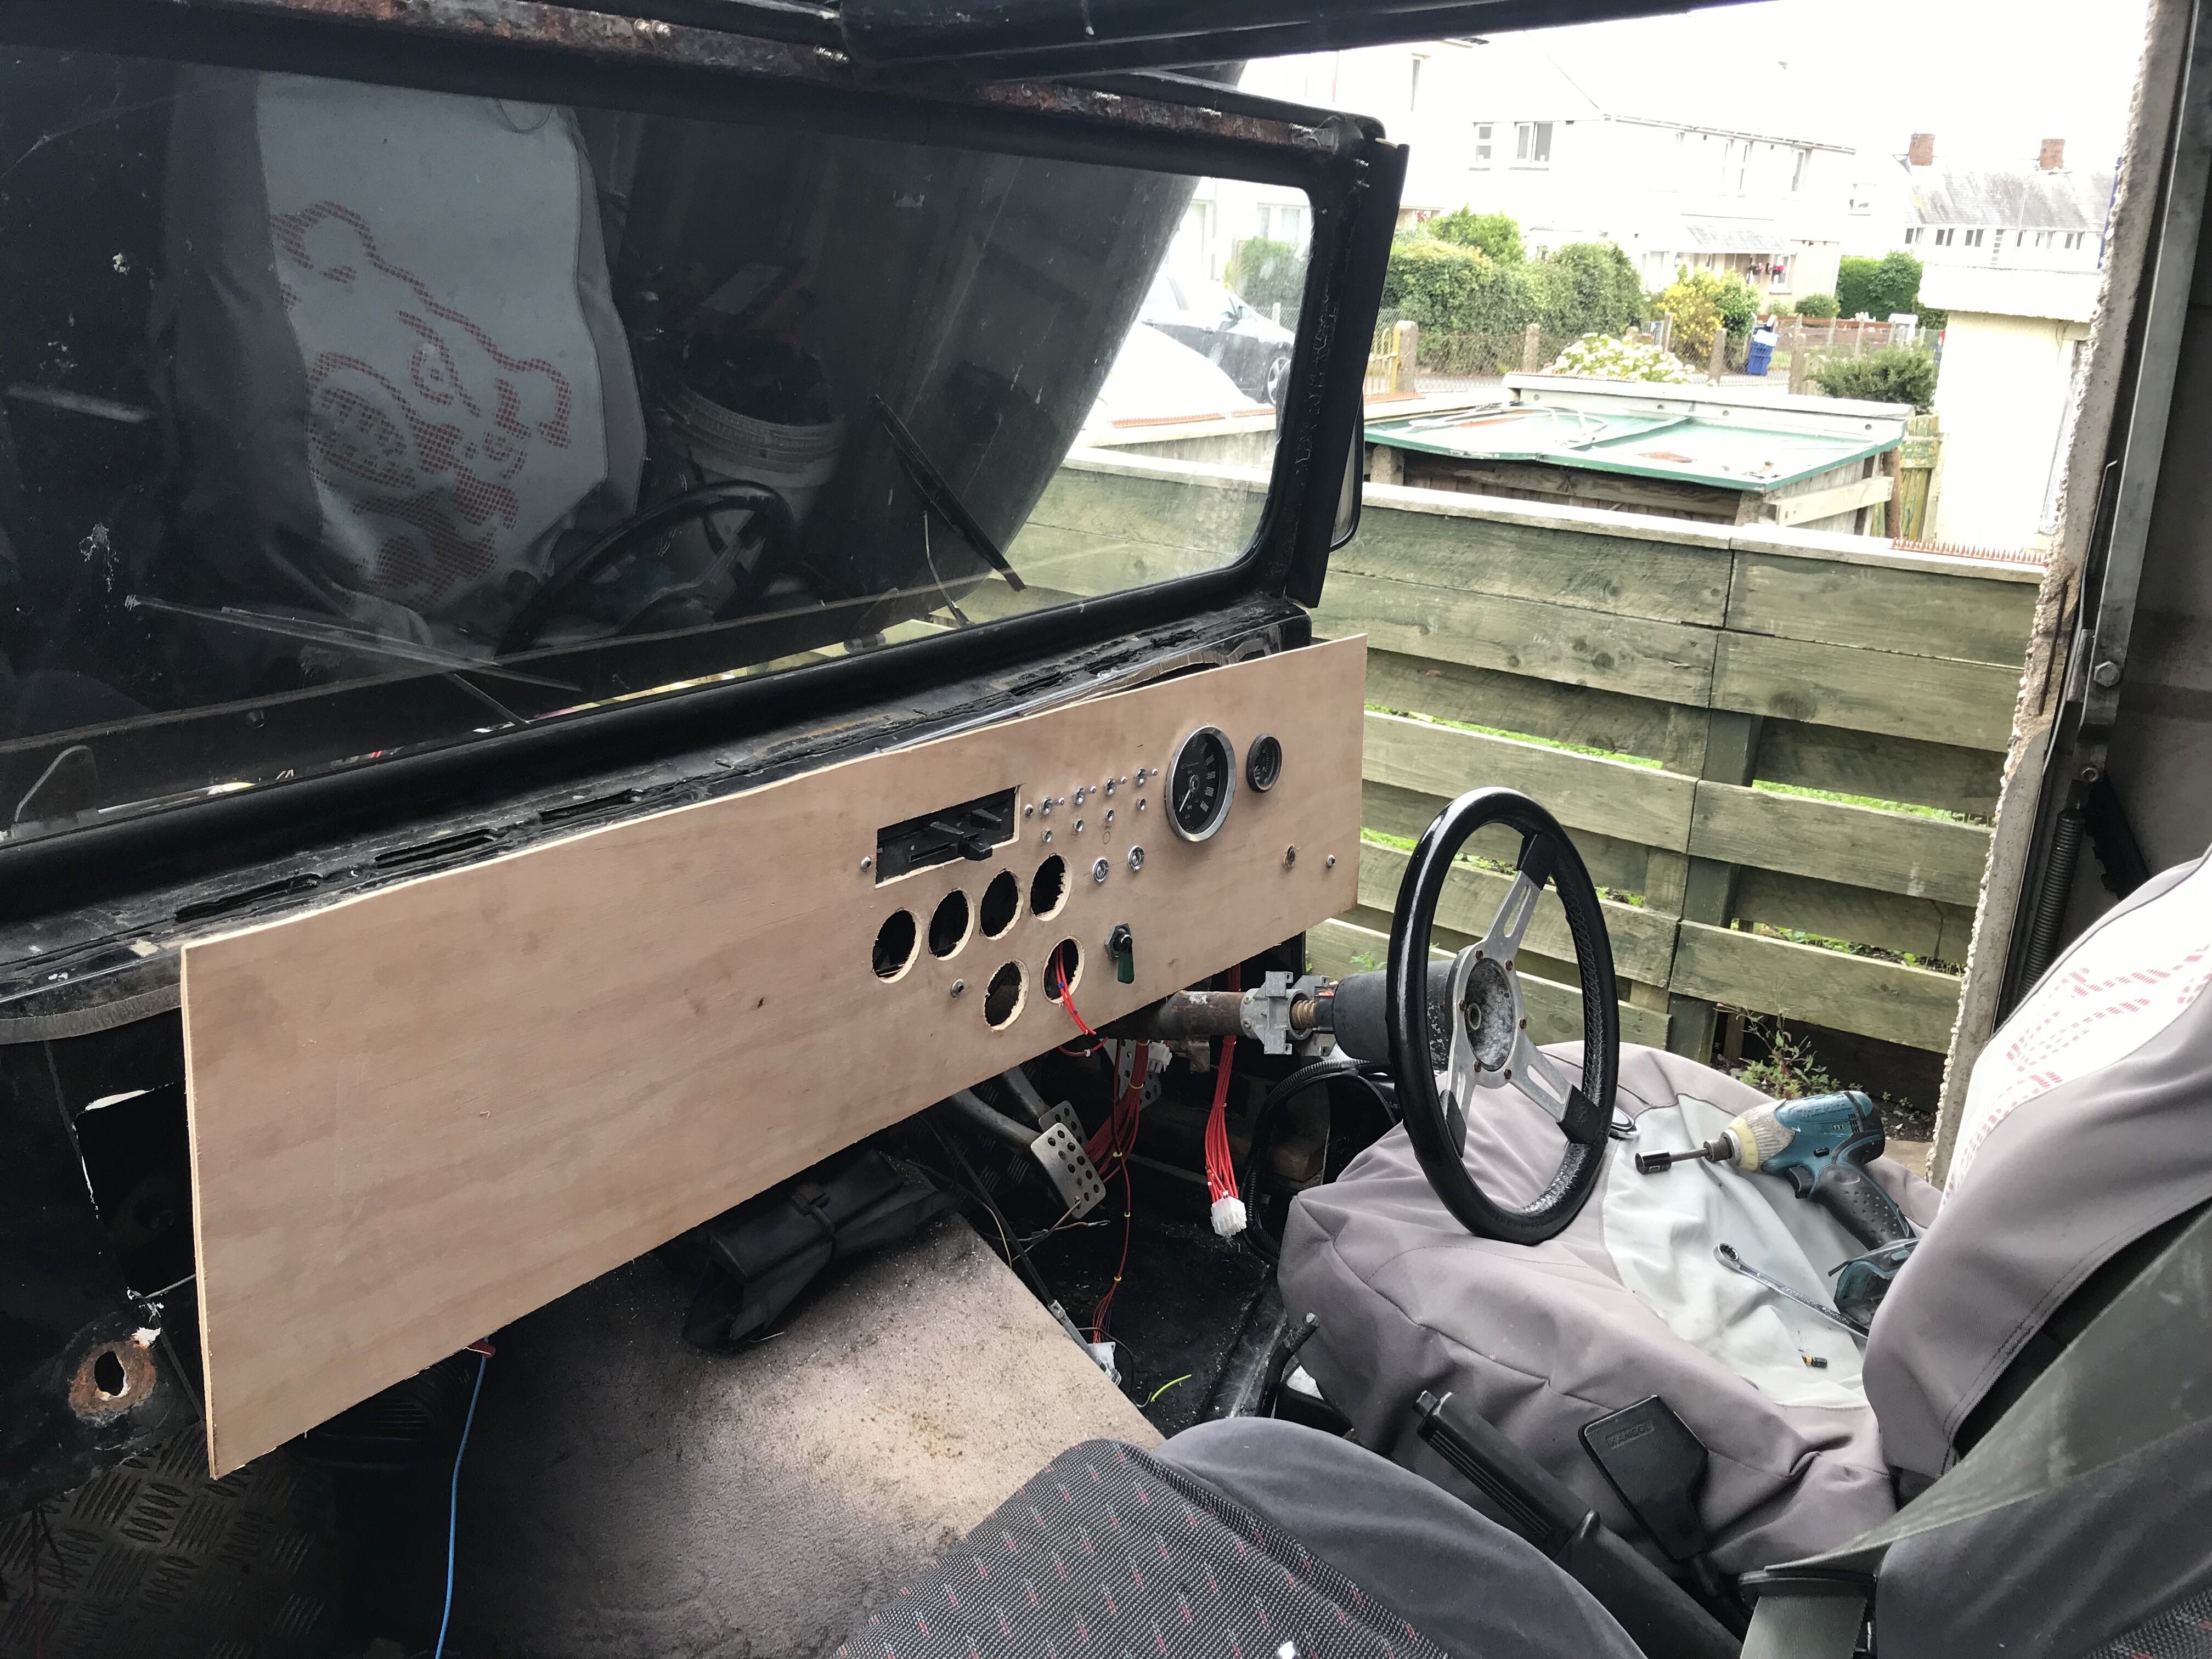
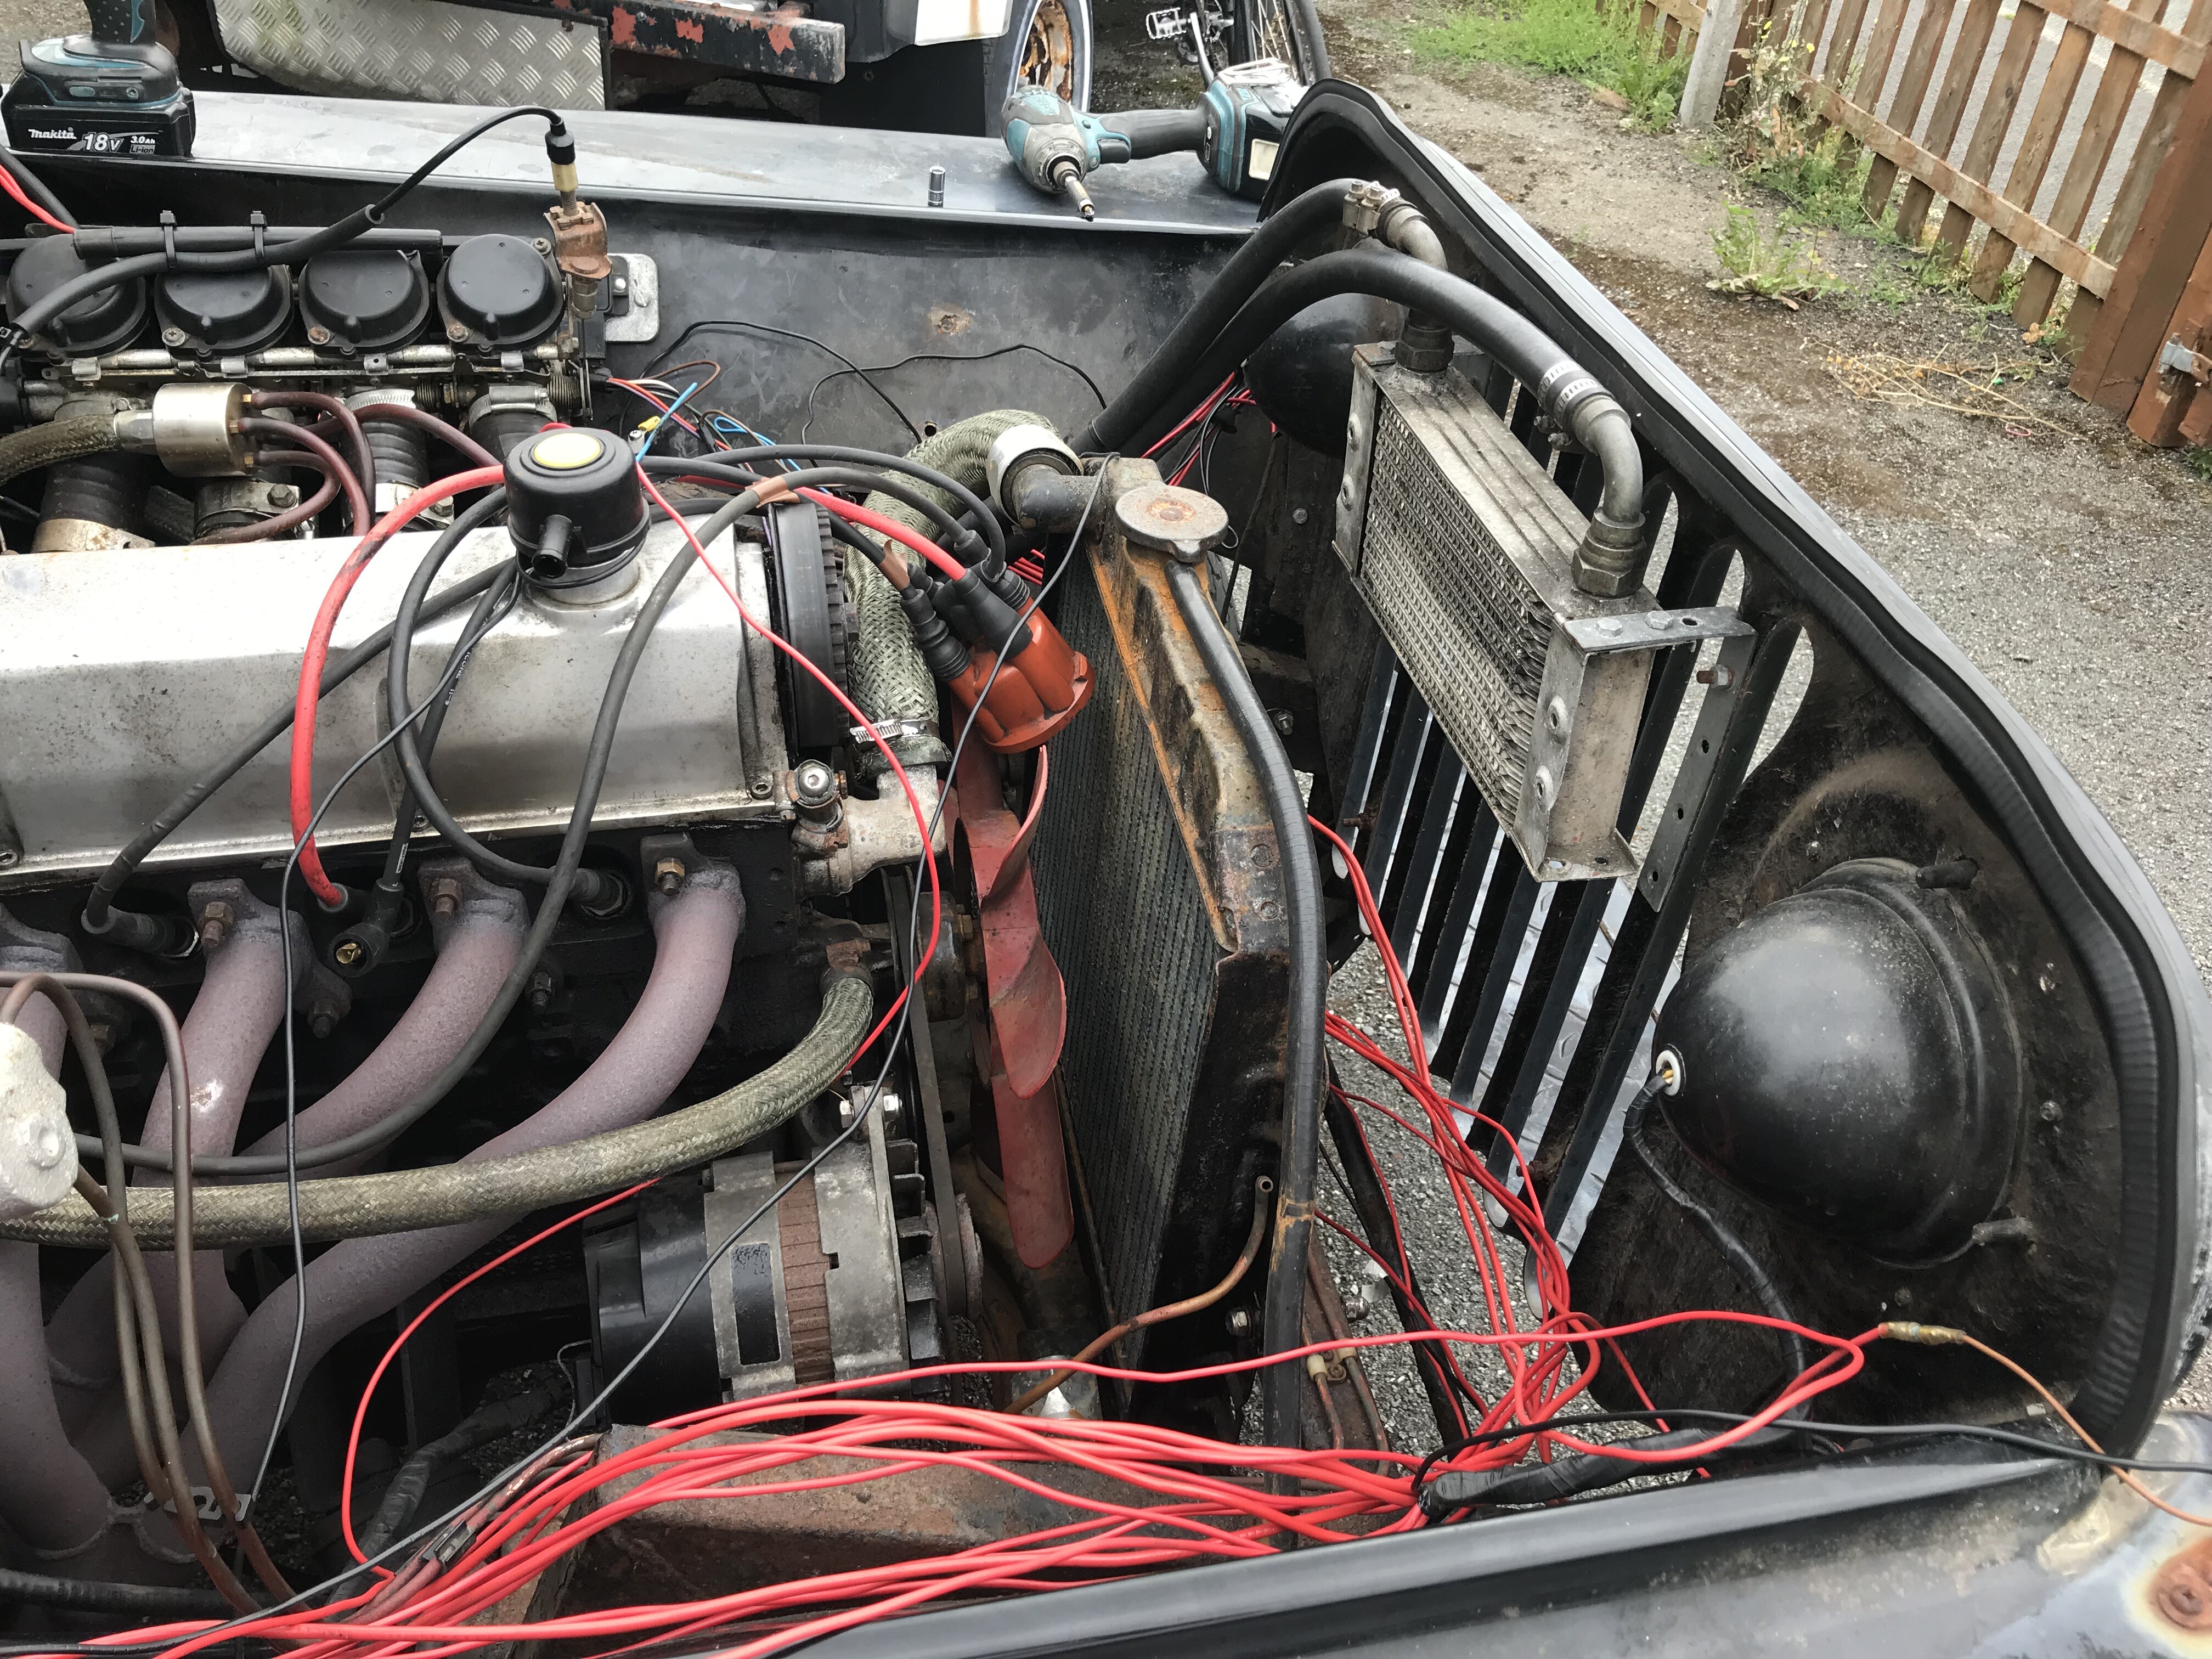 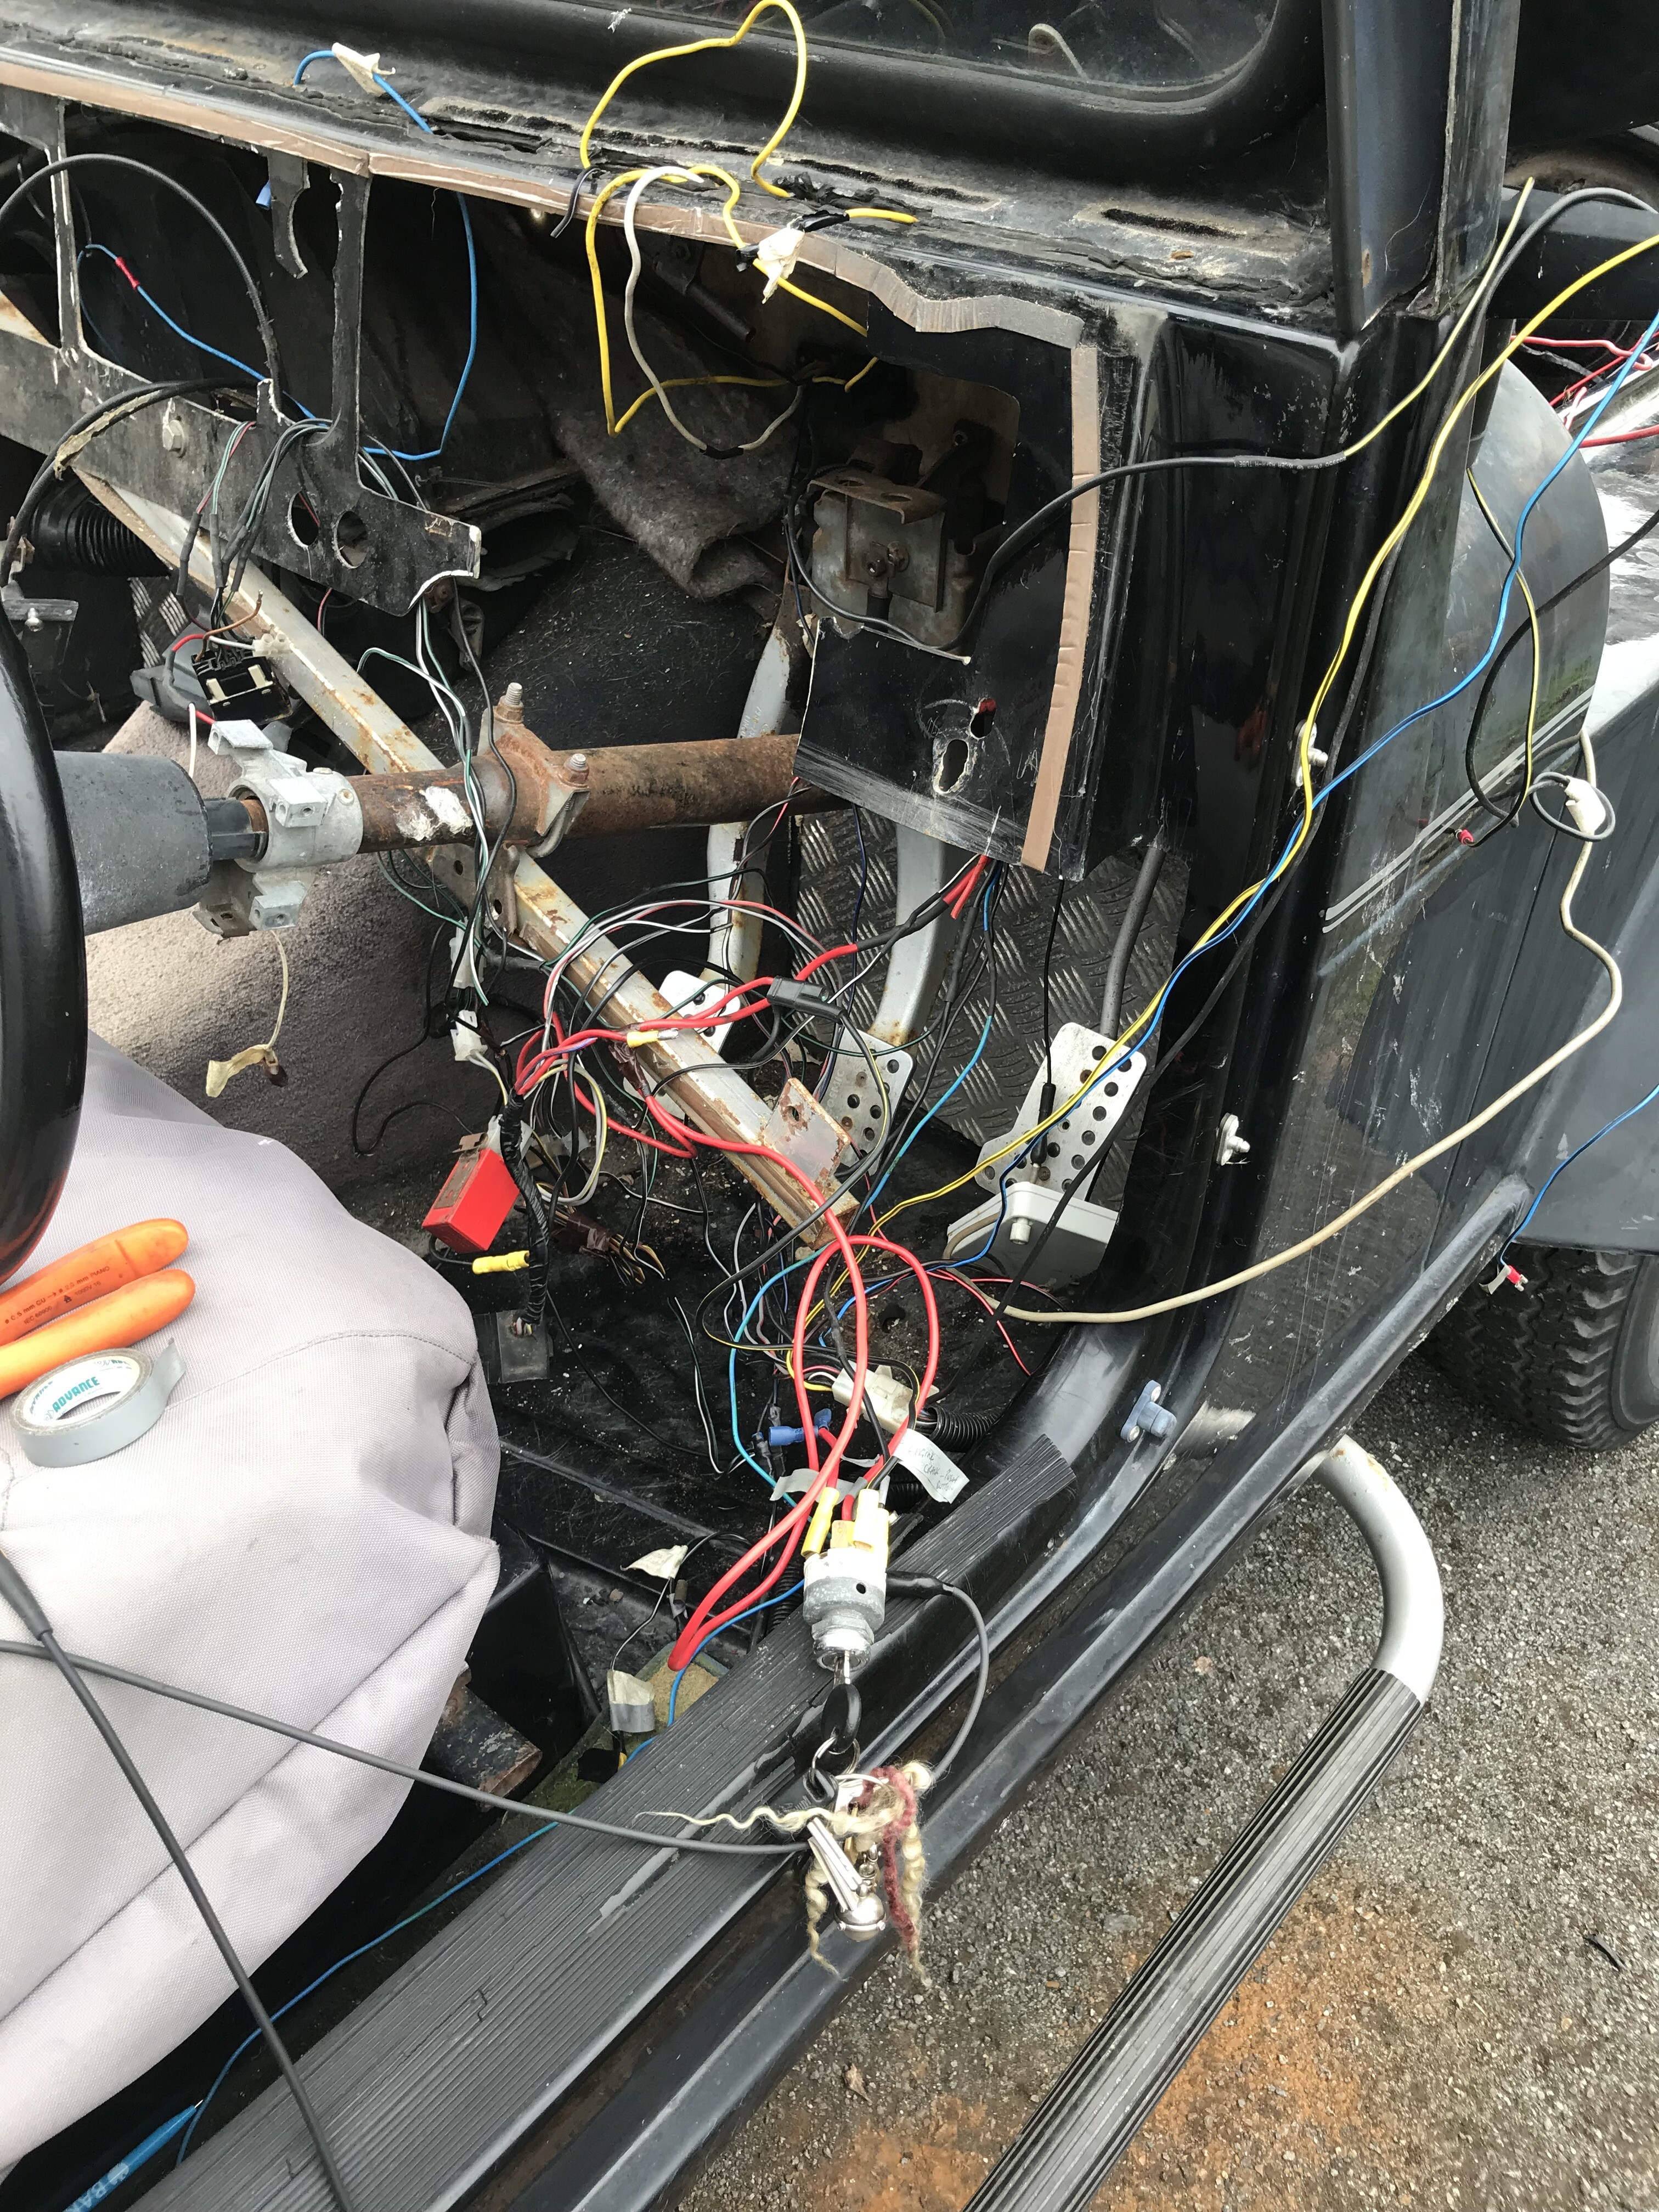 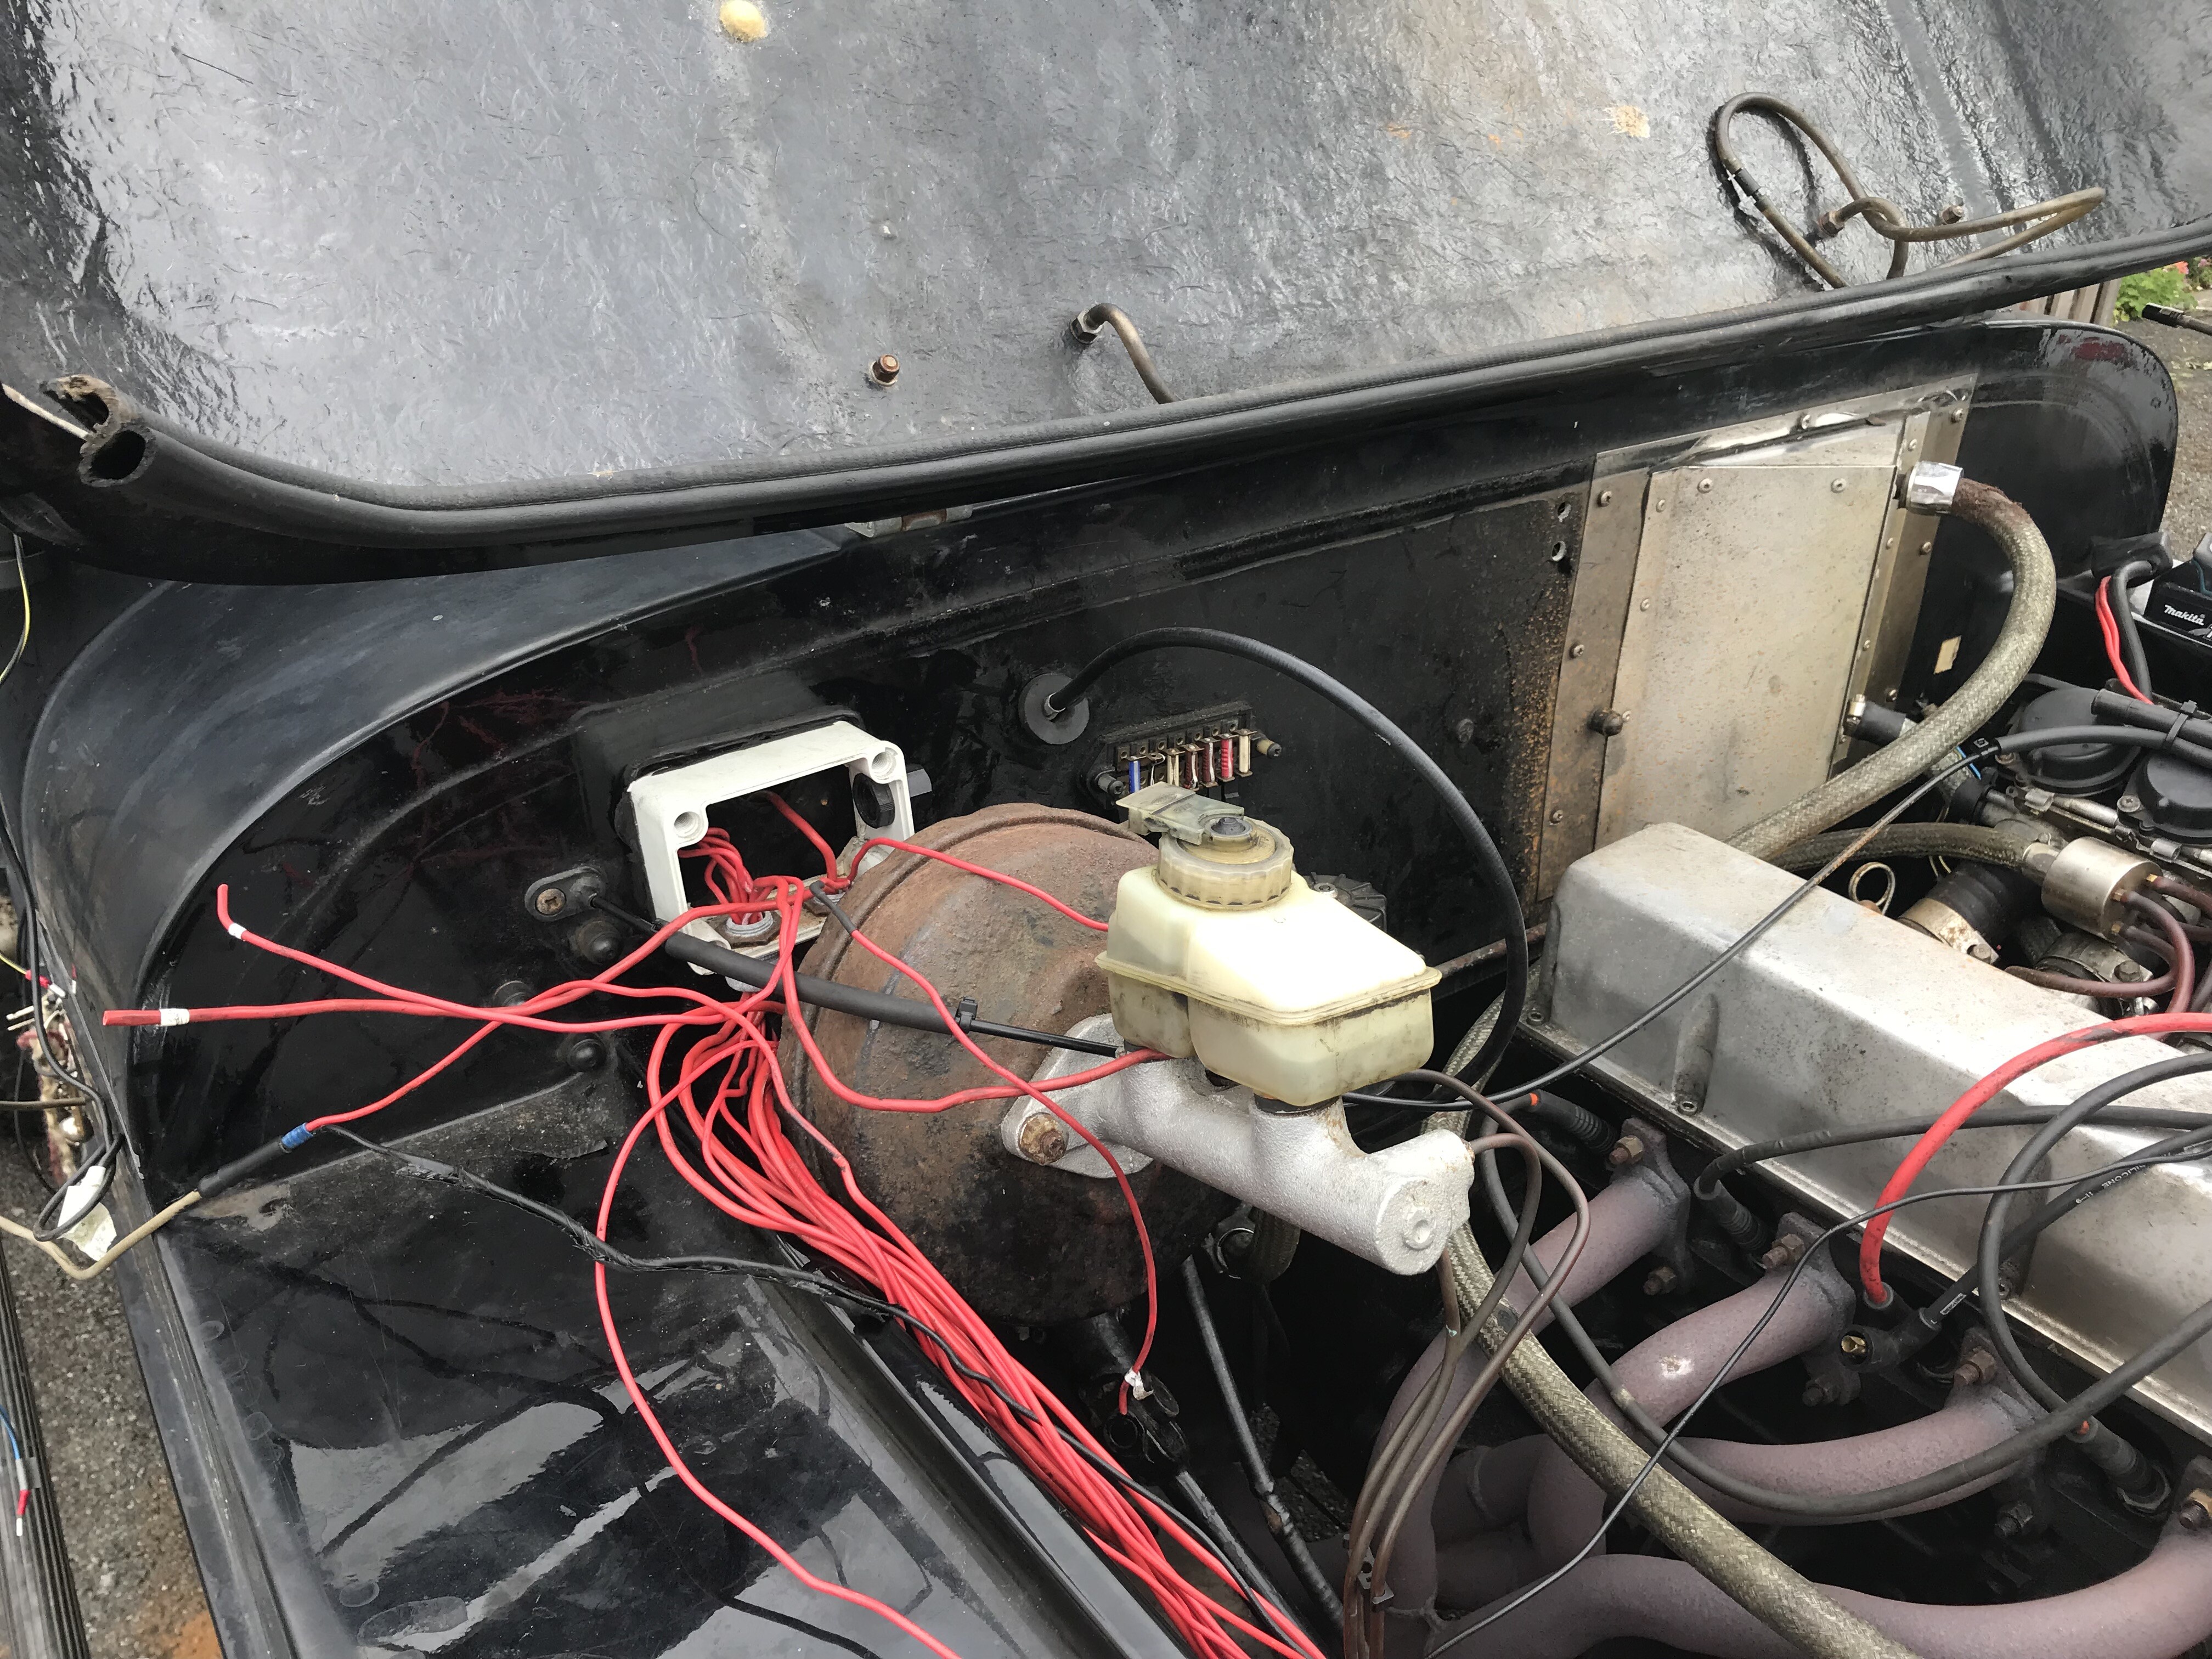 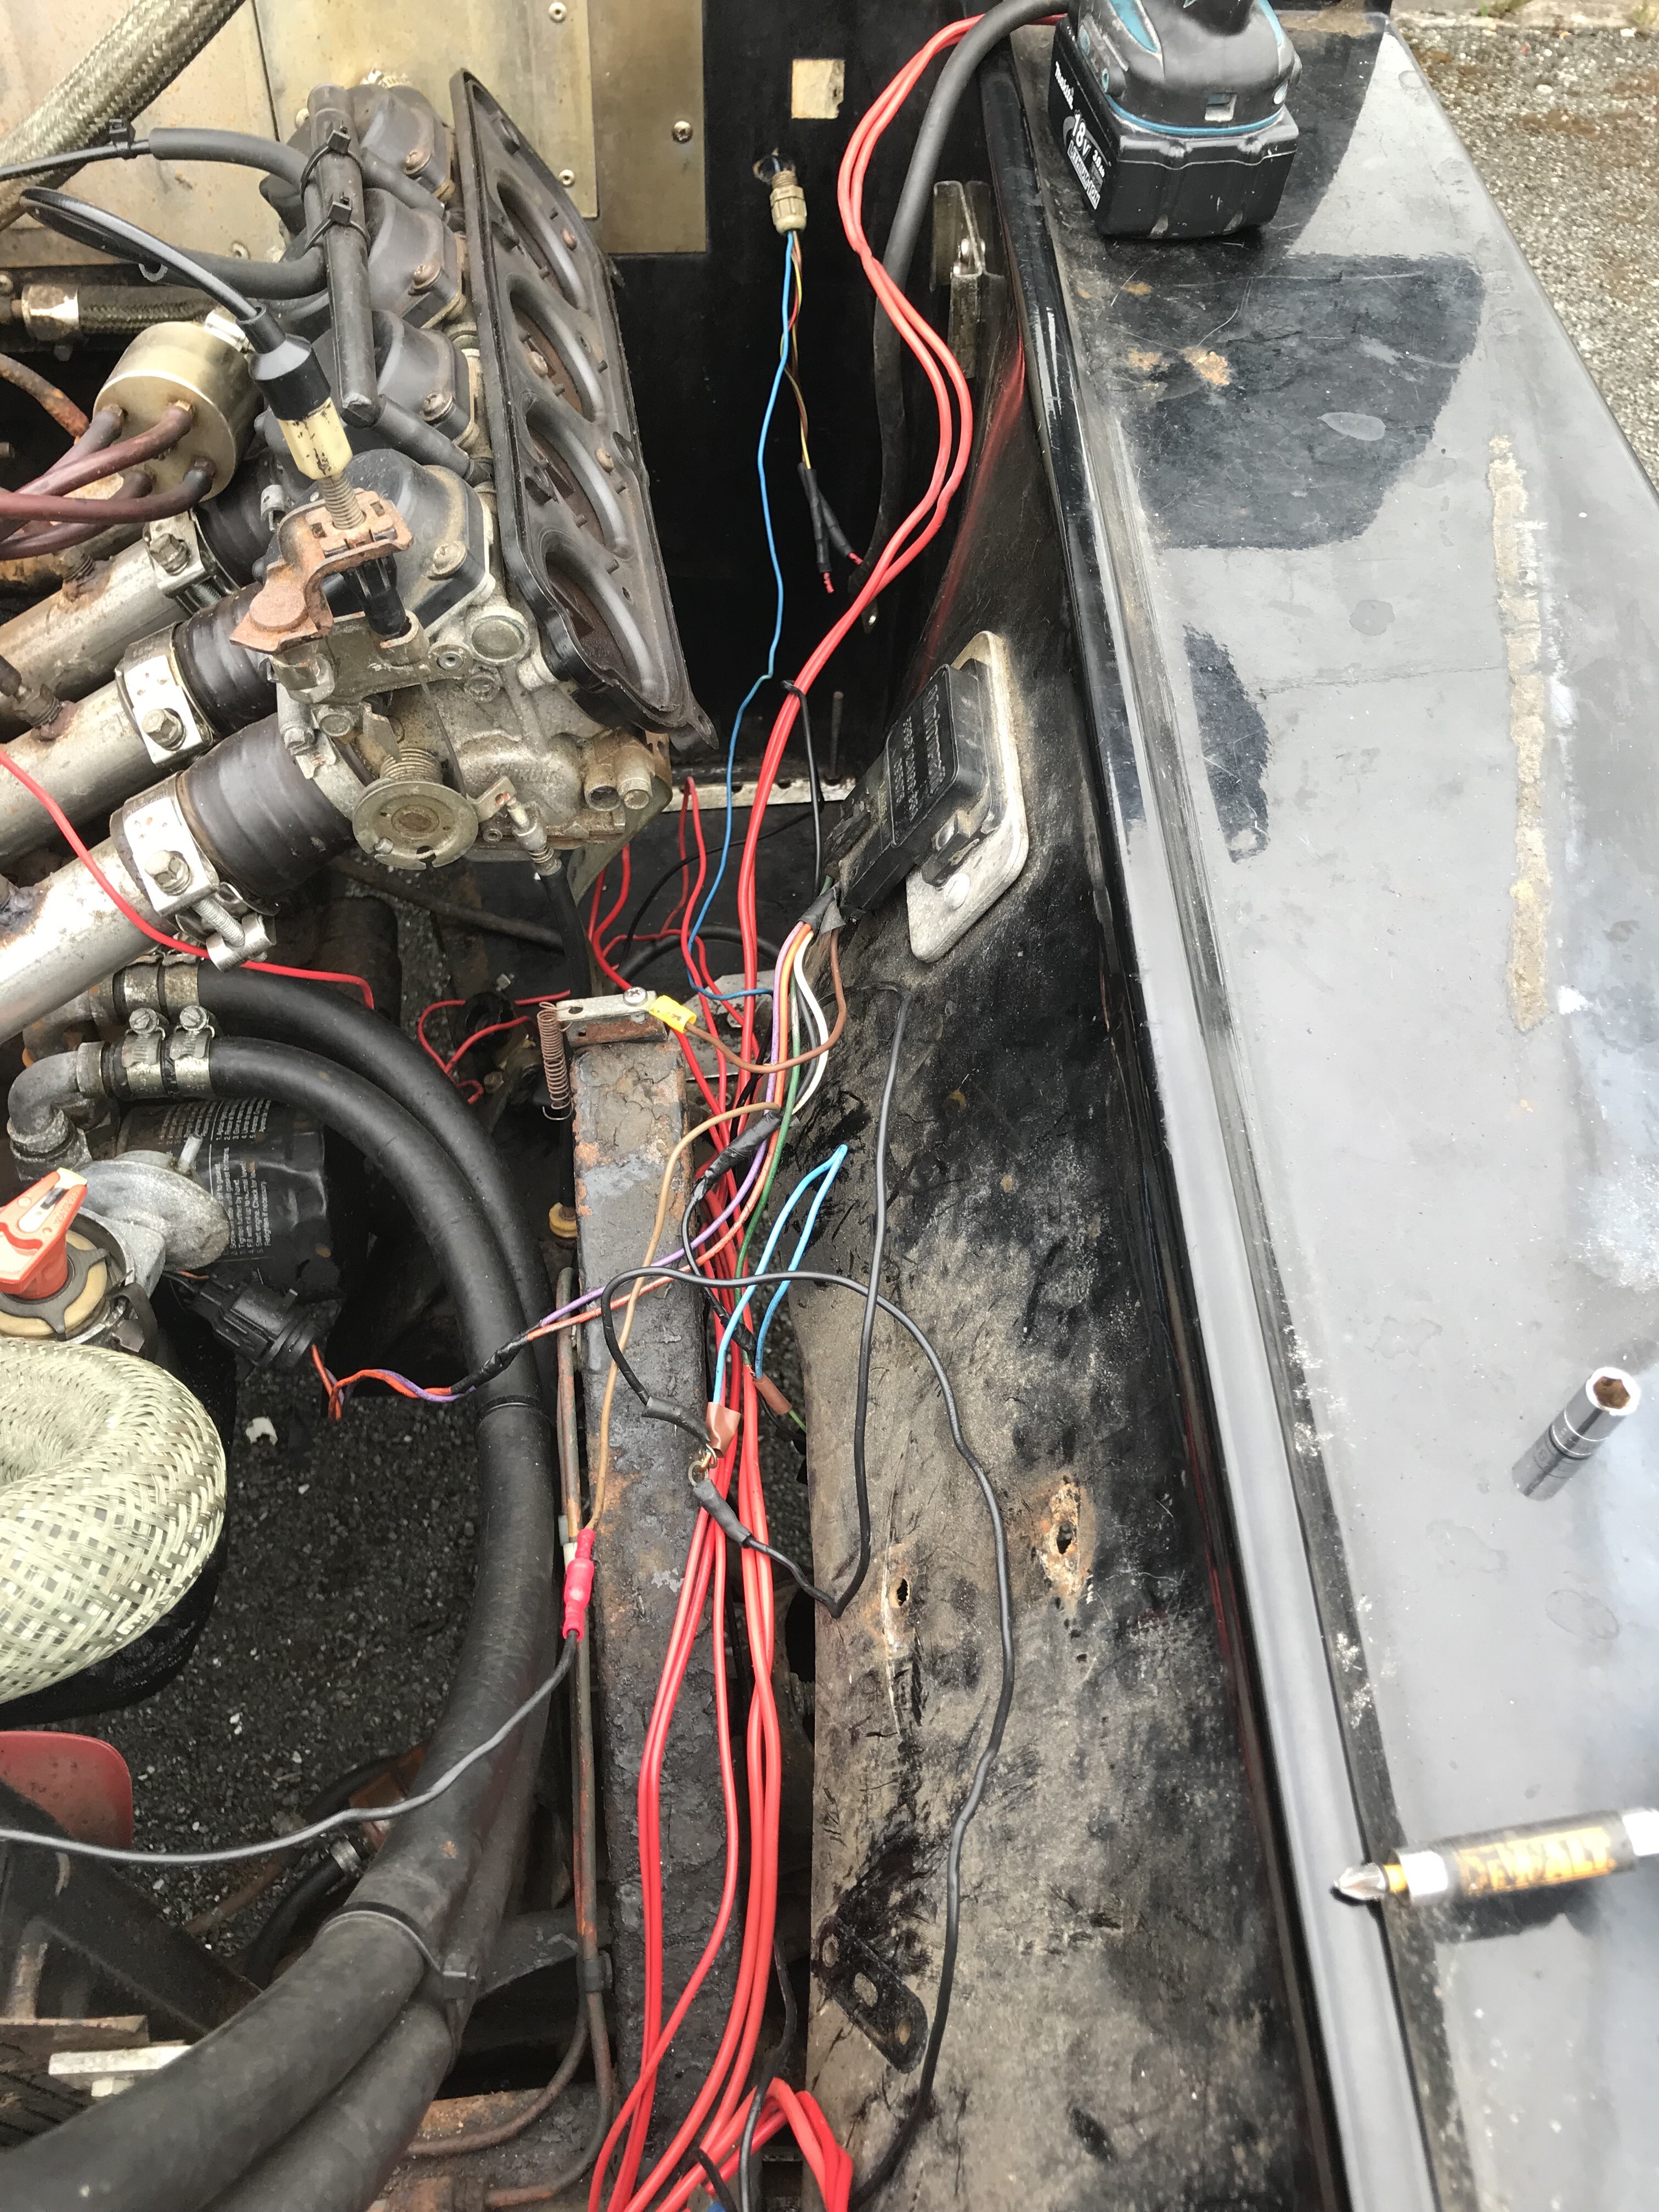  Hi guys, thanks for all your input and advice. I am going with my own wiring diagram and layout of instruments and controls. I have removed the indicators, horn etc. cluster off the steering column and I will be reproducing them on the new dashboard. This will also make it nice and easy (hopefully) to fit in the new dashboard with a small opening for the column. The cluster has been a real issue for me as my RV lives a lot of its life outside with no roof (aaaah (but she is used daily)), so it has always been a constant battle with keeping the cluster operational living on the coast in Wales. I have decided to number tag my cables as you can see in the engine bay a previous owner has used red cable that is still in good condition (recycling and all that), a heavy gauge and I also have some rolls of cable left over from previous projects that is red. I will be upgrading the fuse box and removing the grey box to its right that has been used to bring the old Cortina loom and the engine bay wiring together. It will also be good to finish off nicely the wiring to the Sierra MK1 ignition module and distributor that I fitted a number of years ago to relieve me of the hassle of points. So as you can see in the last image, the wiring is nearly all out. |
|
|
|
Post by biggles1 on Dec 23, 2019 9:51:46 GMT
Crikey !!
Well done.
|
|
|
|
Post by Peter on Dec 25, 2019 13:44:24 GMT
"Those scotch locks, as easy to use for adding wires to the loom". Sacking offense in my day using those. certainly did not comply with our Thatchem standard. All joint and junctions had to be soldered and either shrink sleeve or self amalgamating tape before looming. Looks like it might even work, well done taking that on. It is easy to 'T' onto a wire with the right stripper. (trim figure, brunette, 30-40.)  |
|
|
|
Post by wiggy on Dec 26, 2019 17:33:58 GMT
|
|
|
|
Post by Peter on Dec 28, 2019 12:02:40 GMT
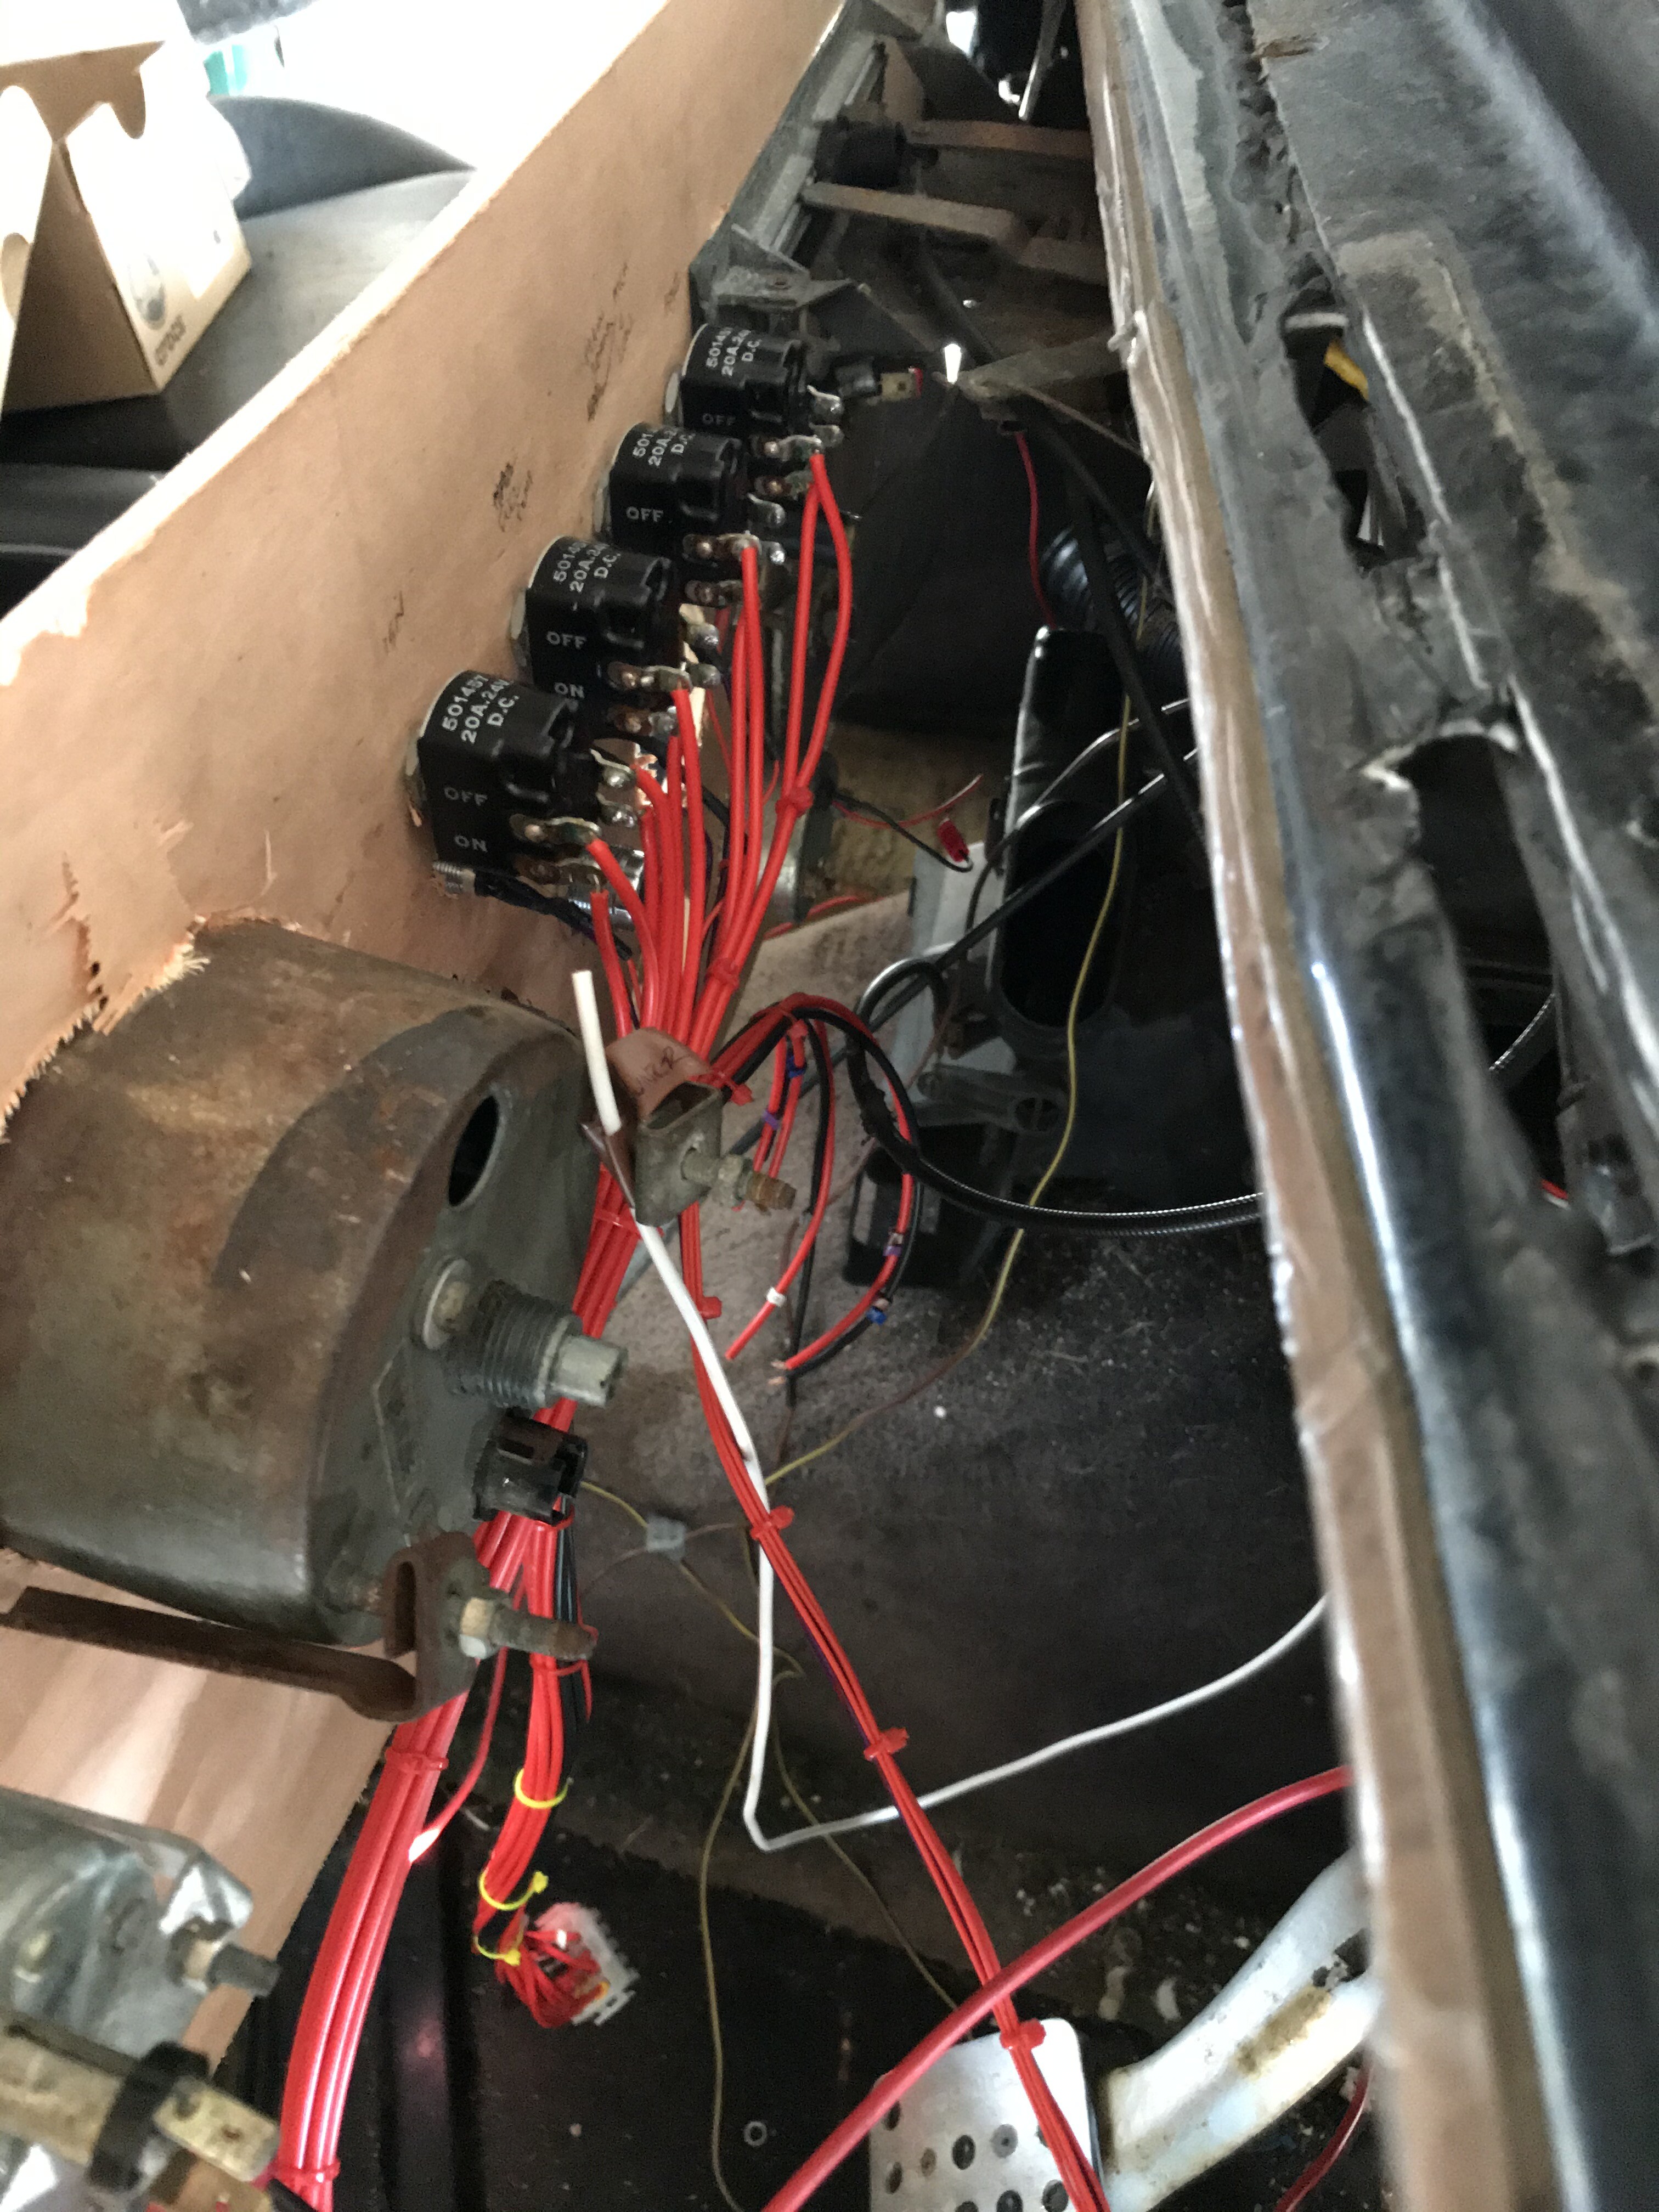
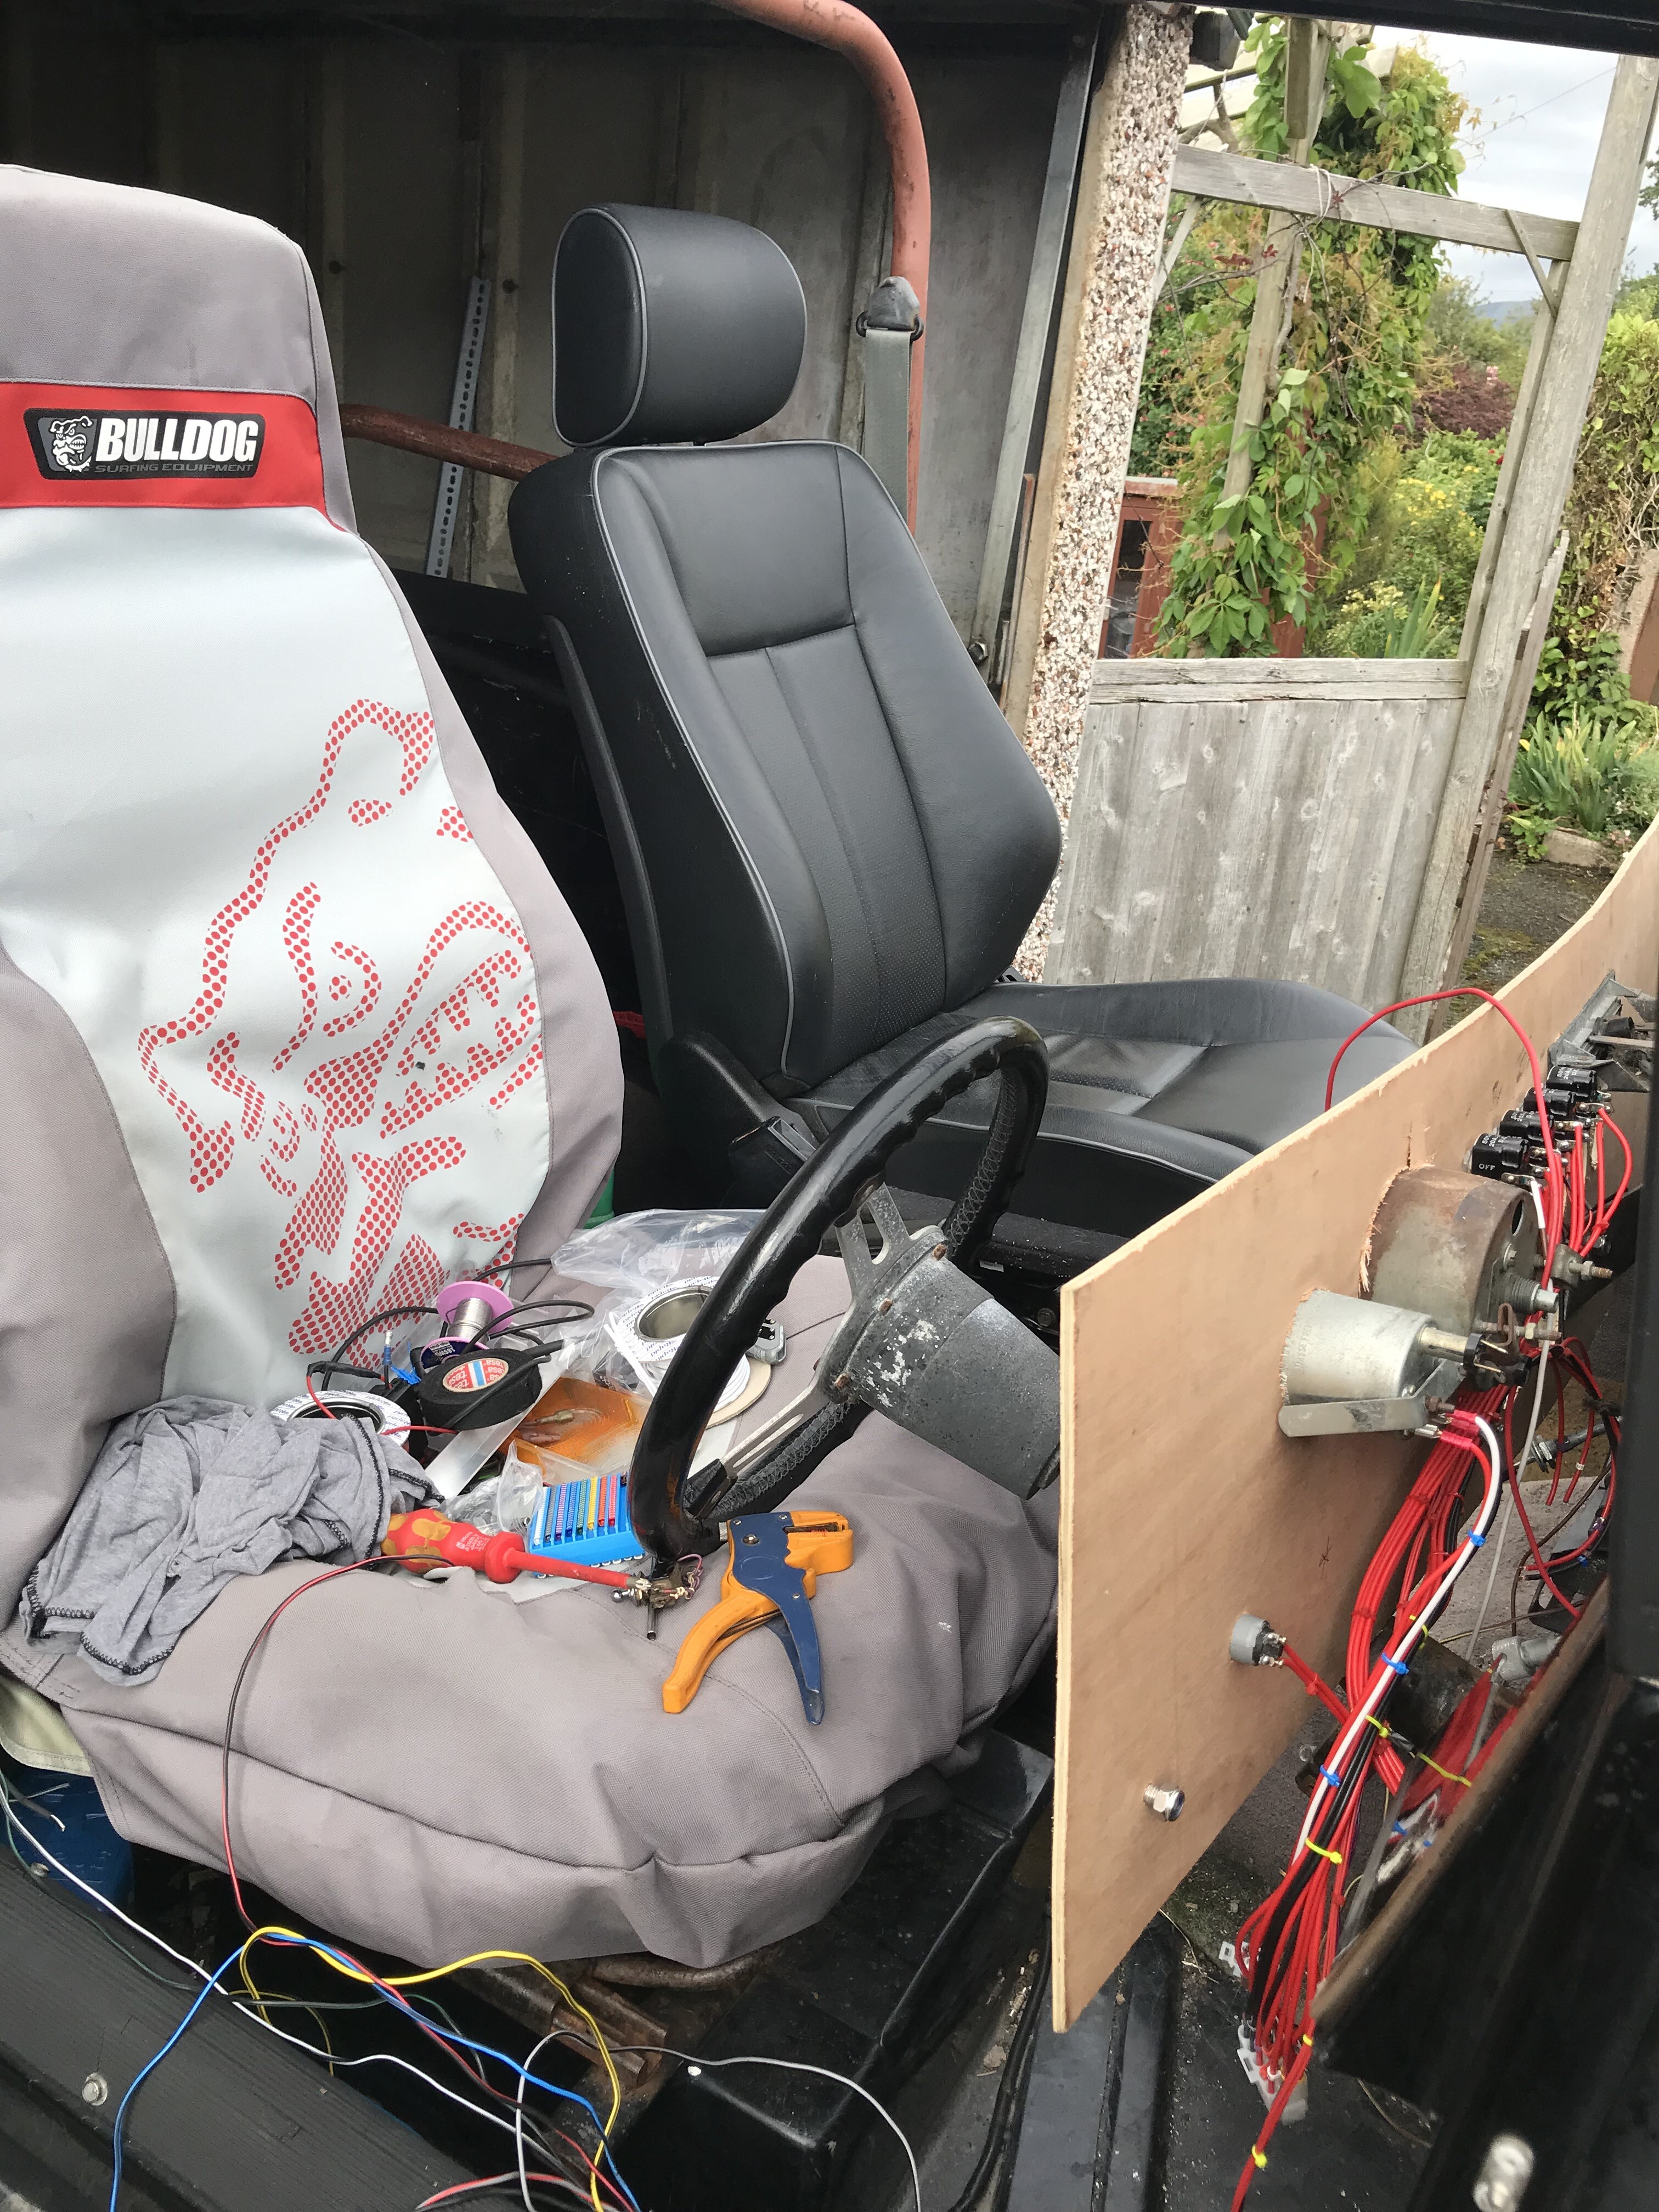
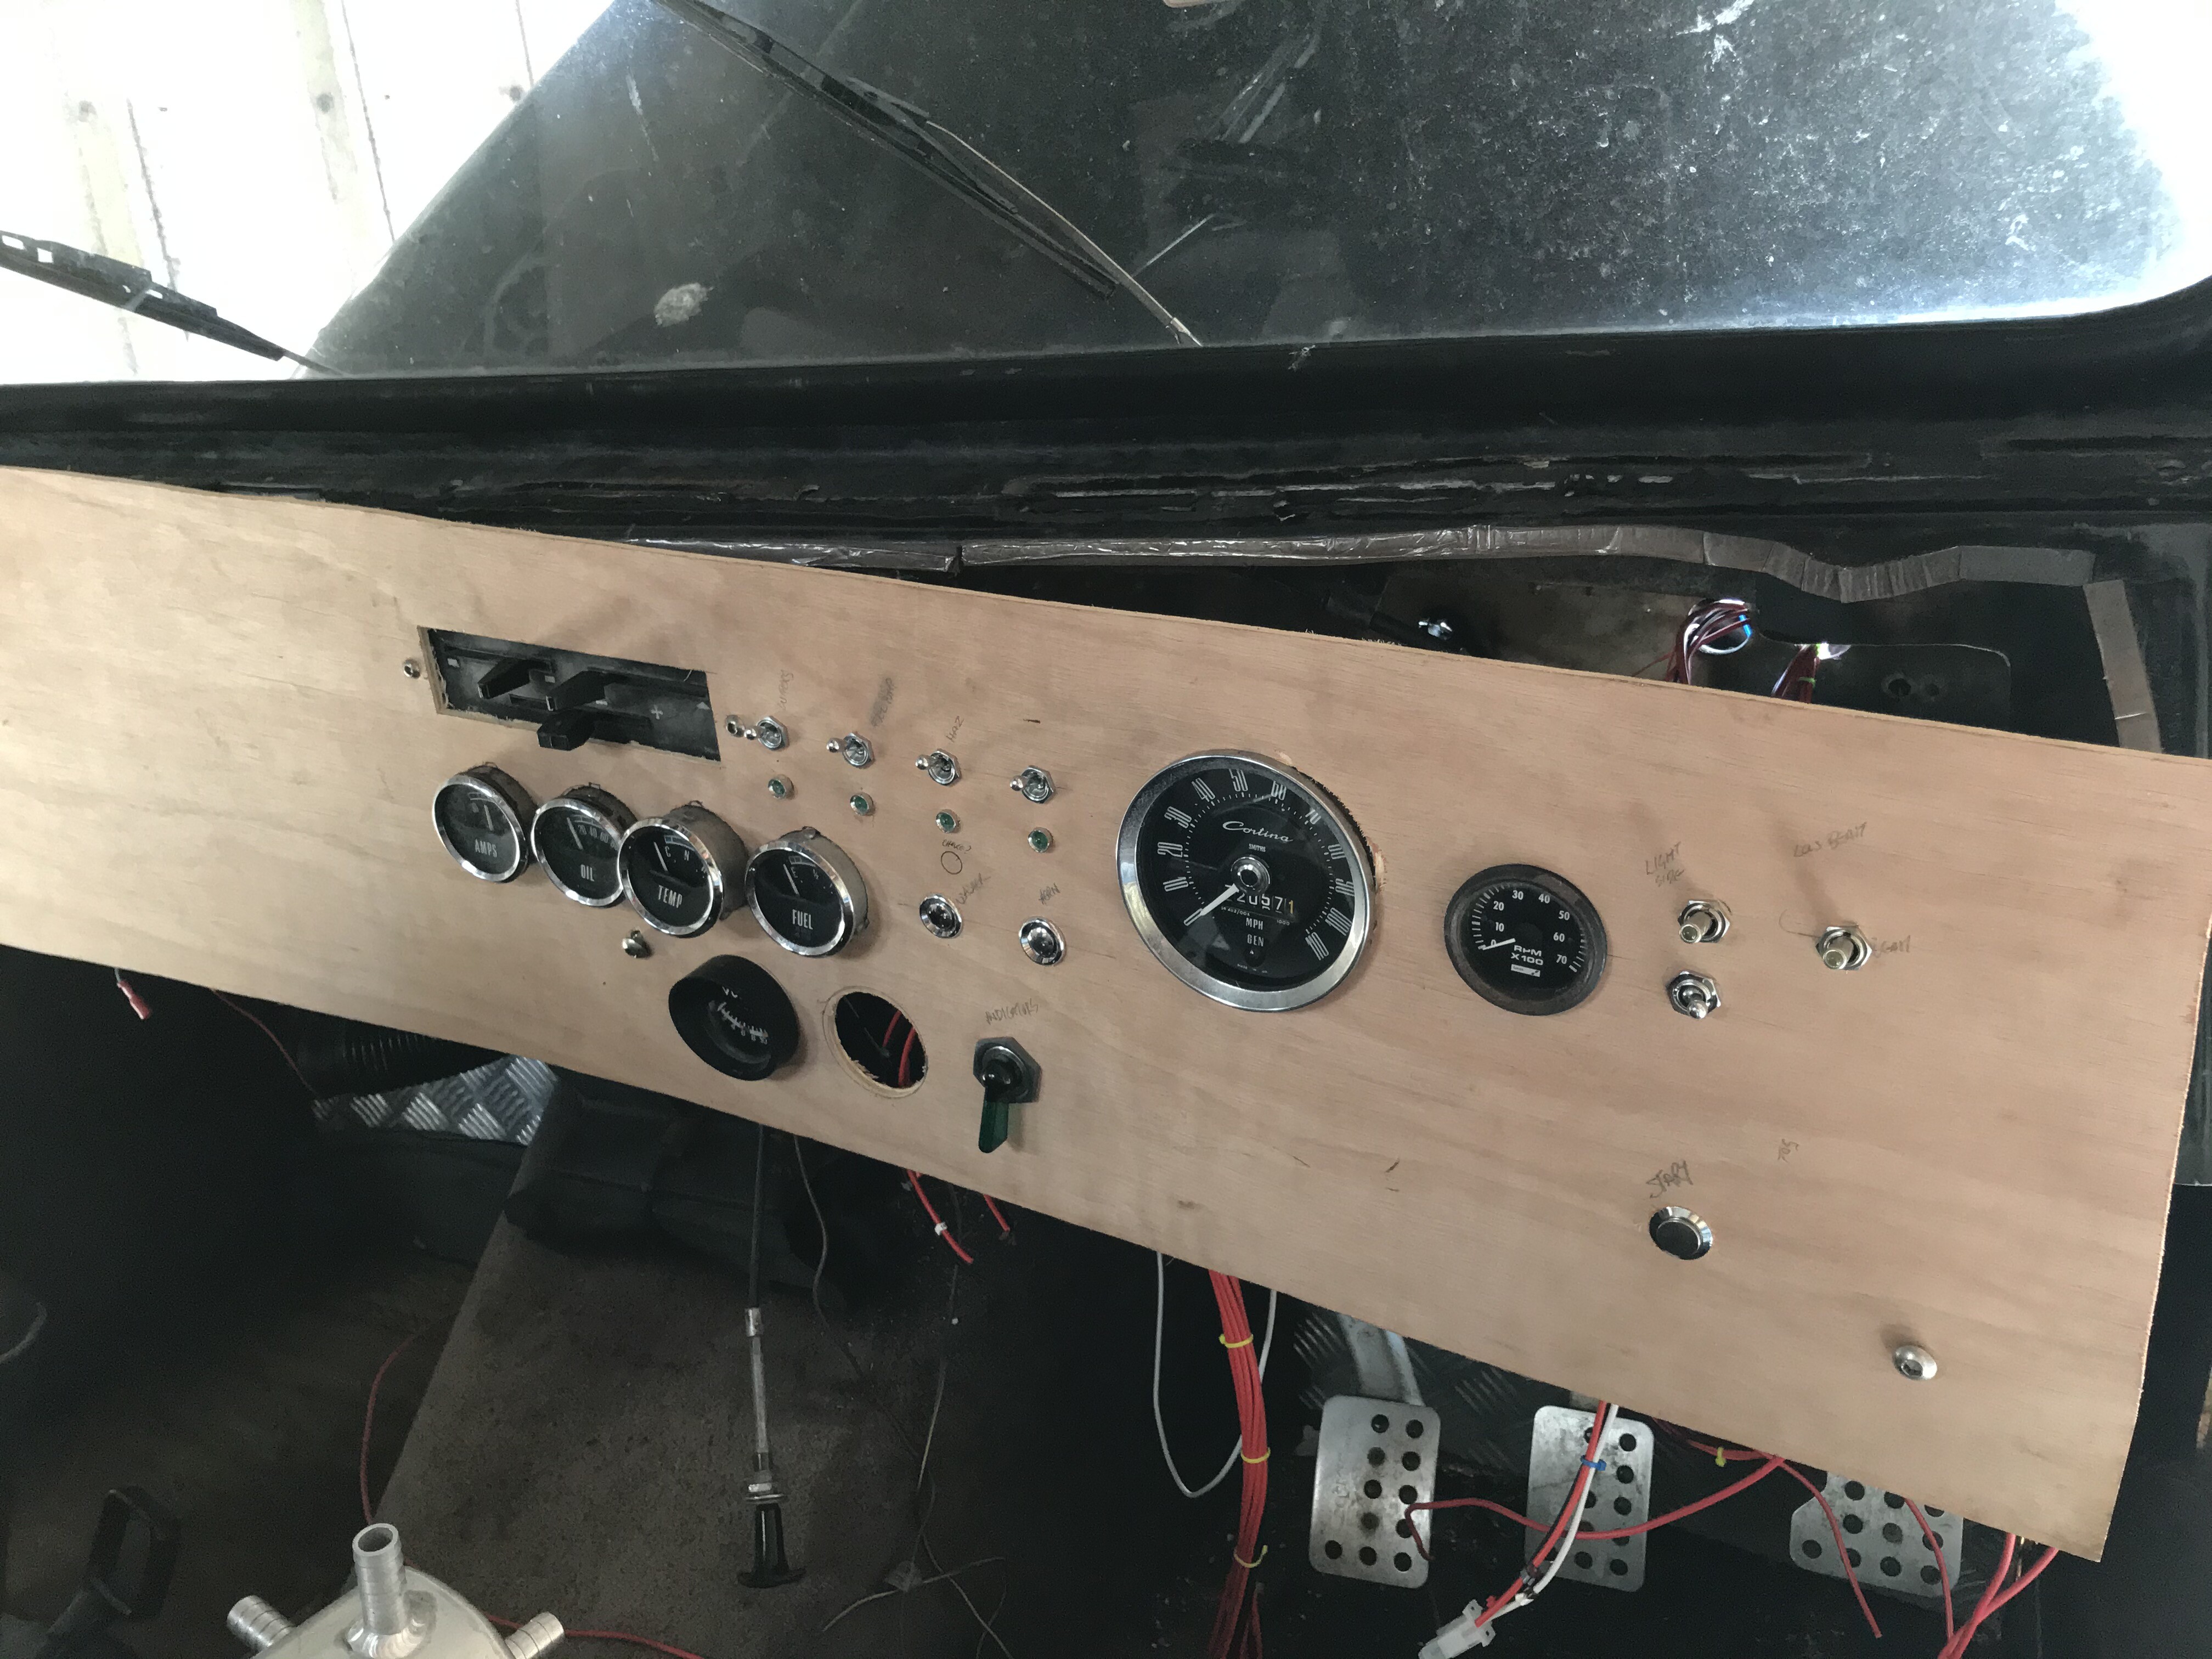
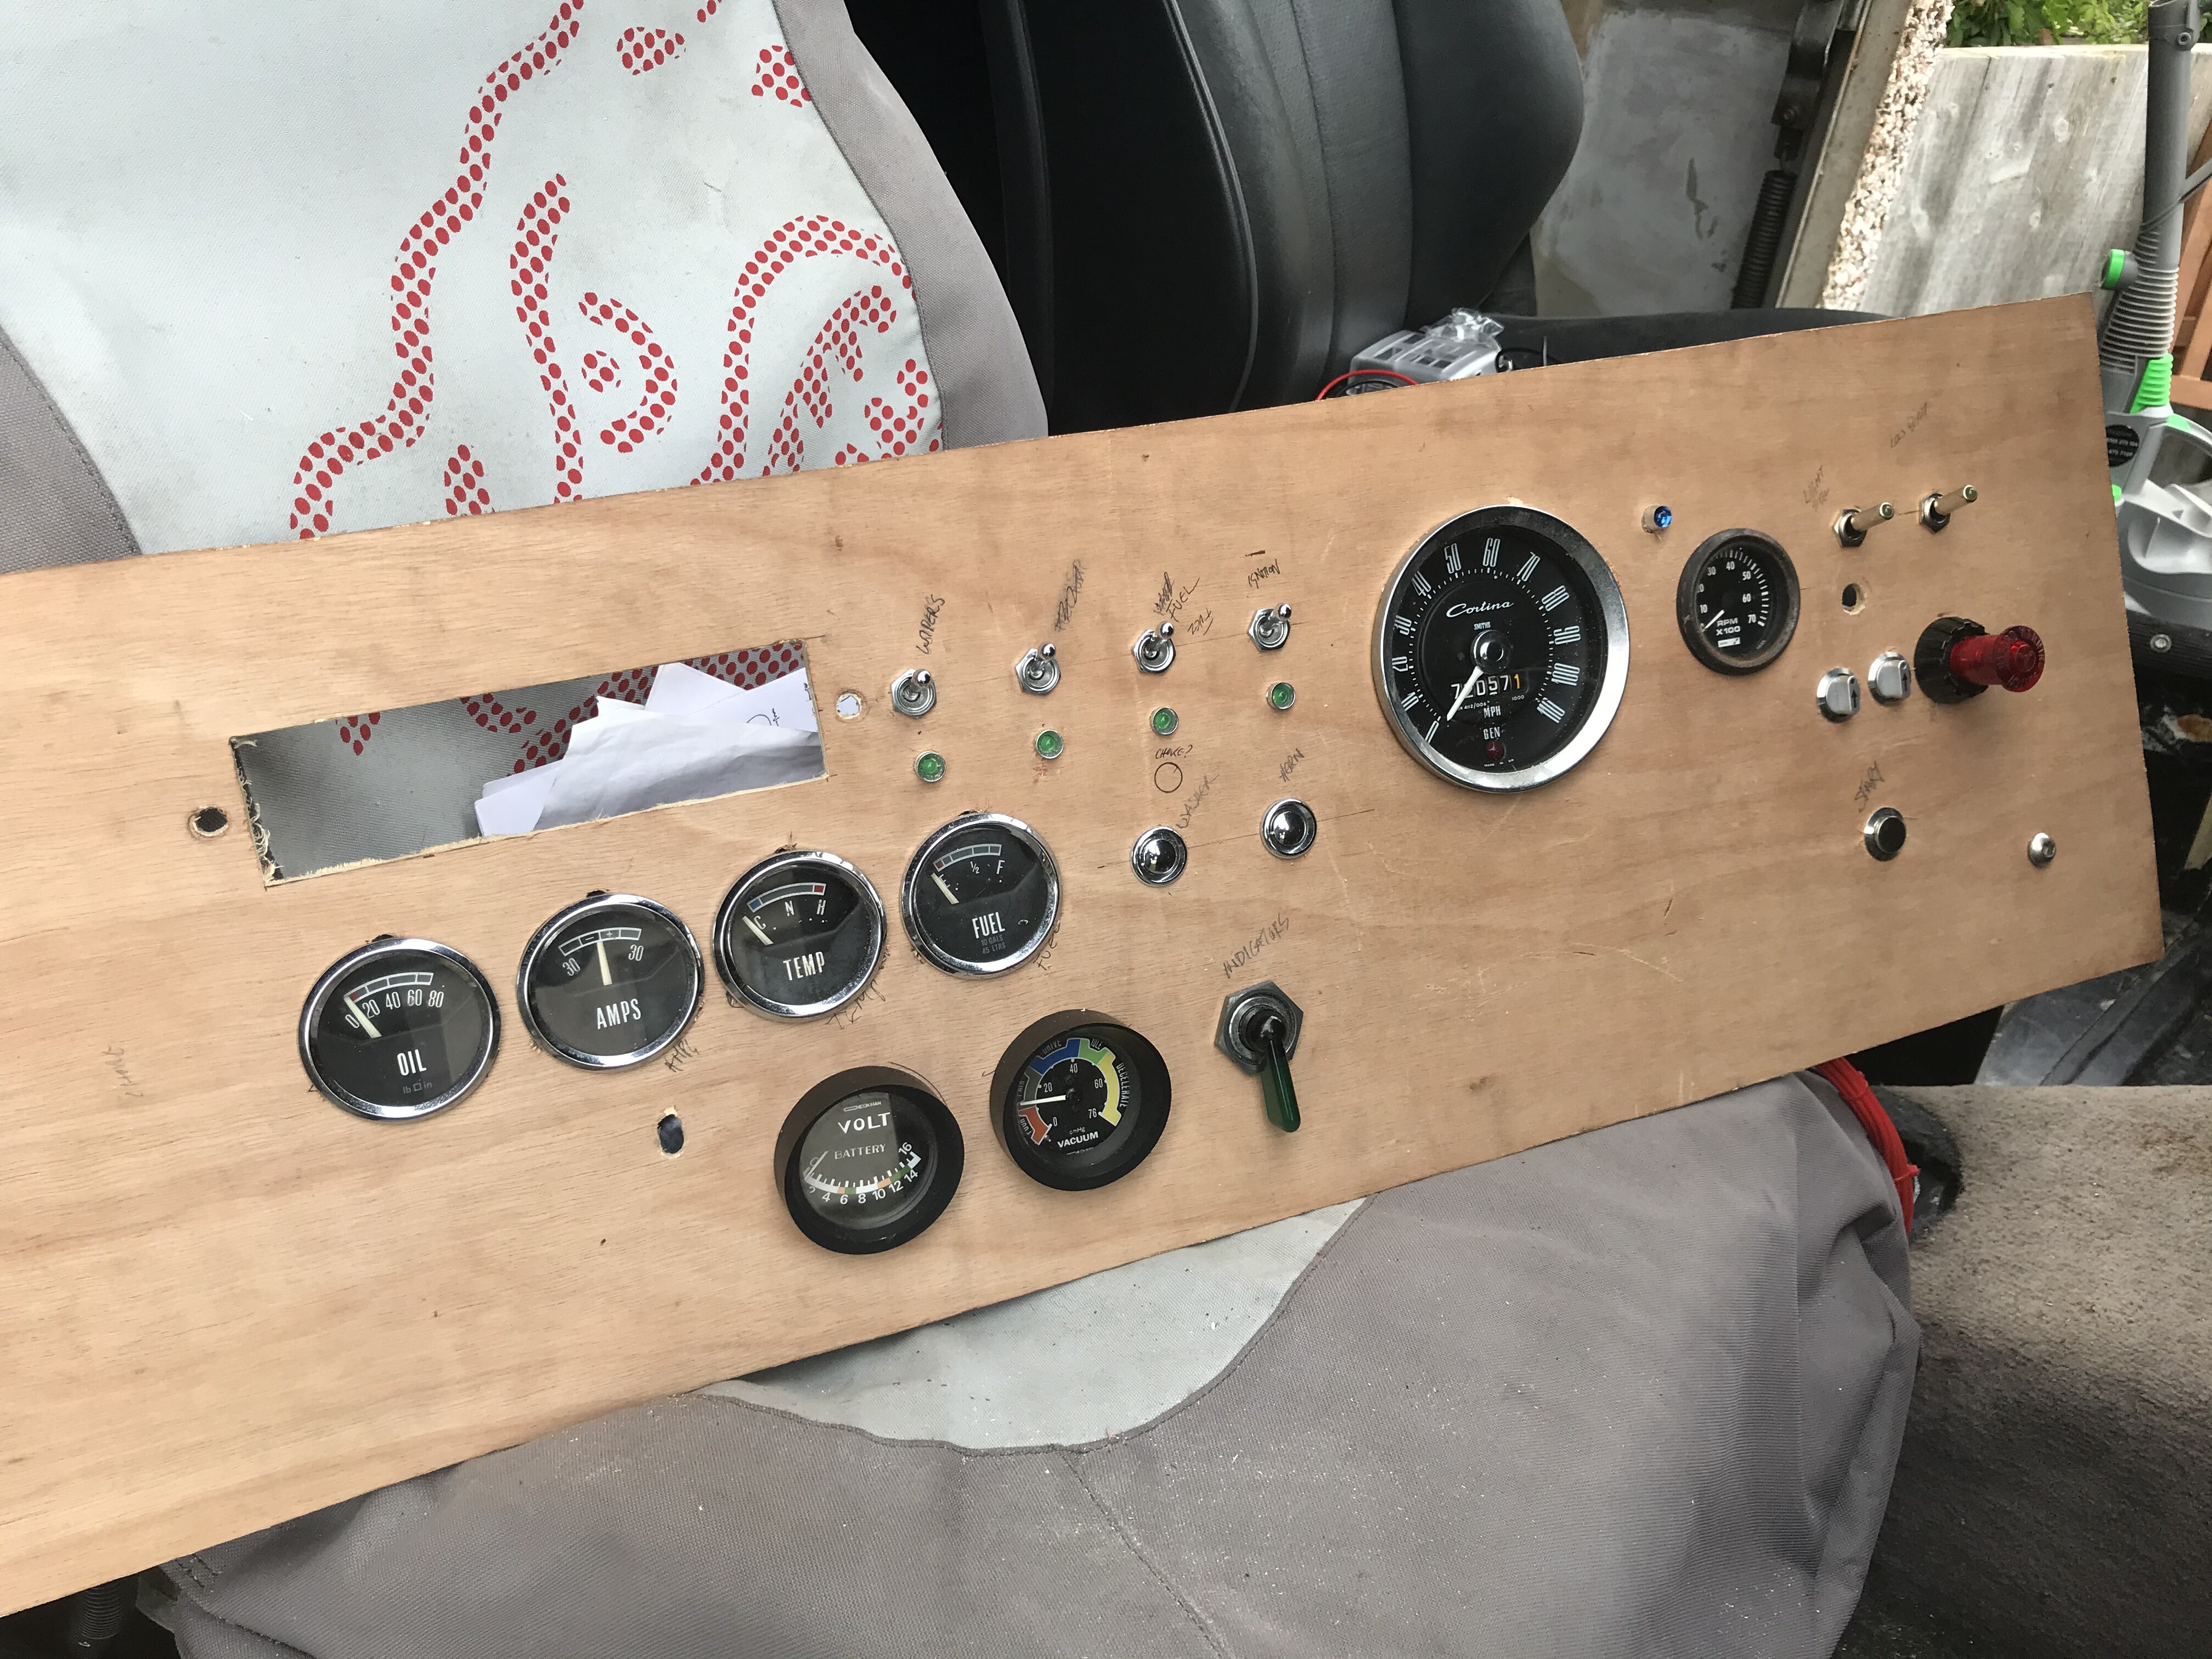
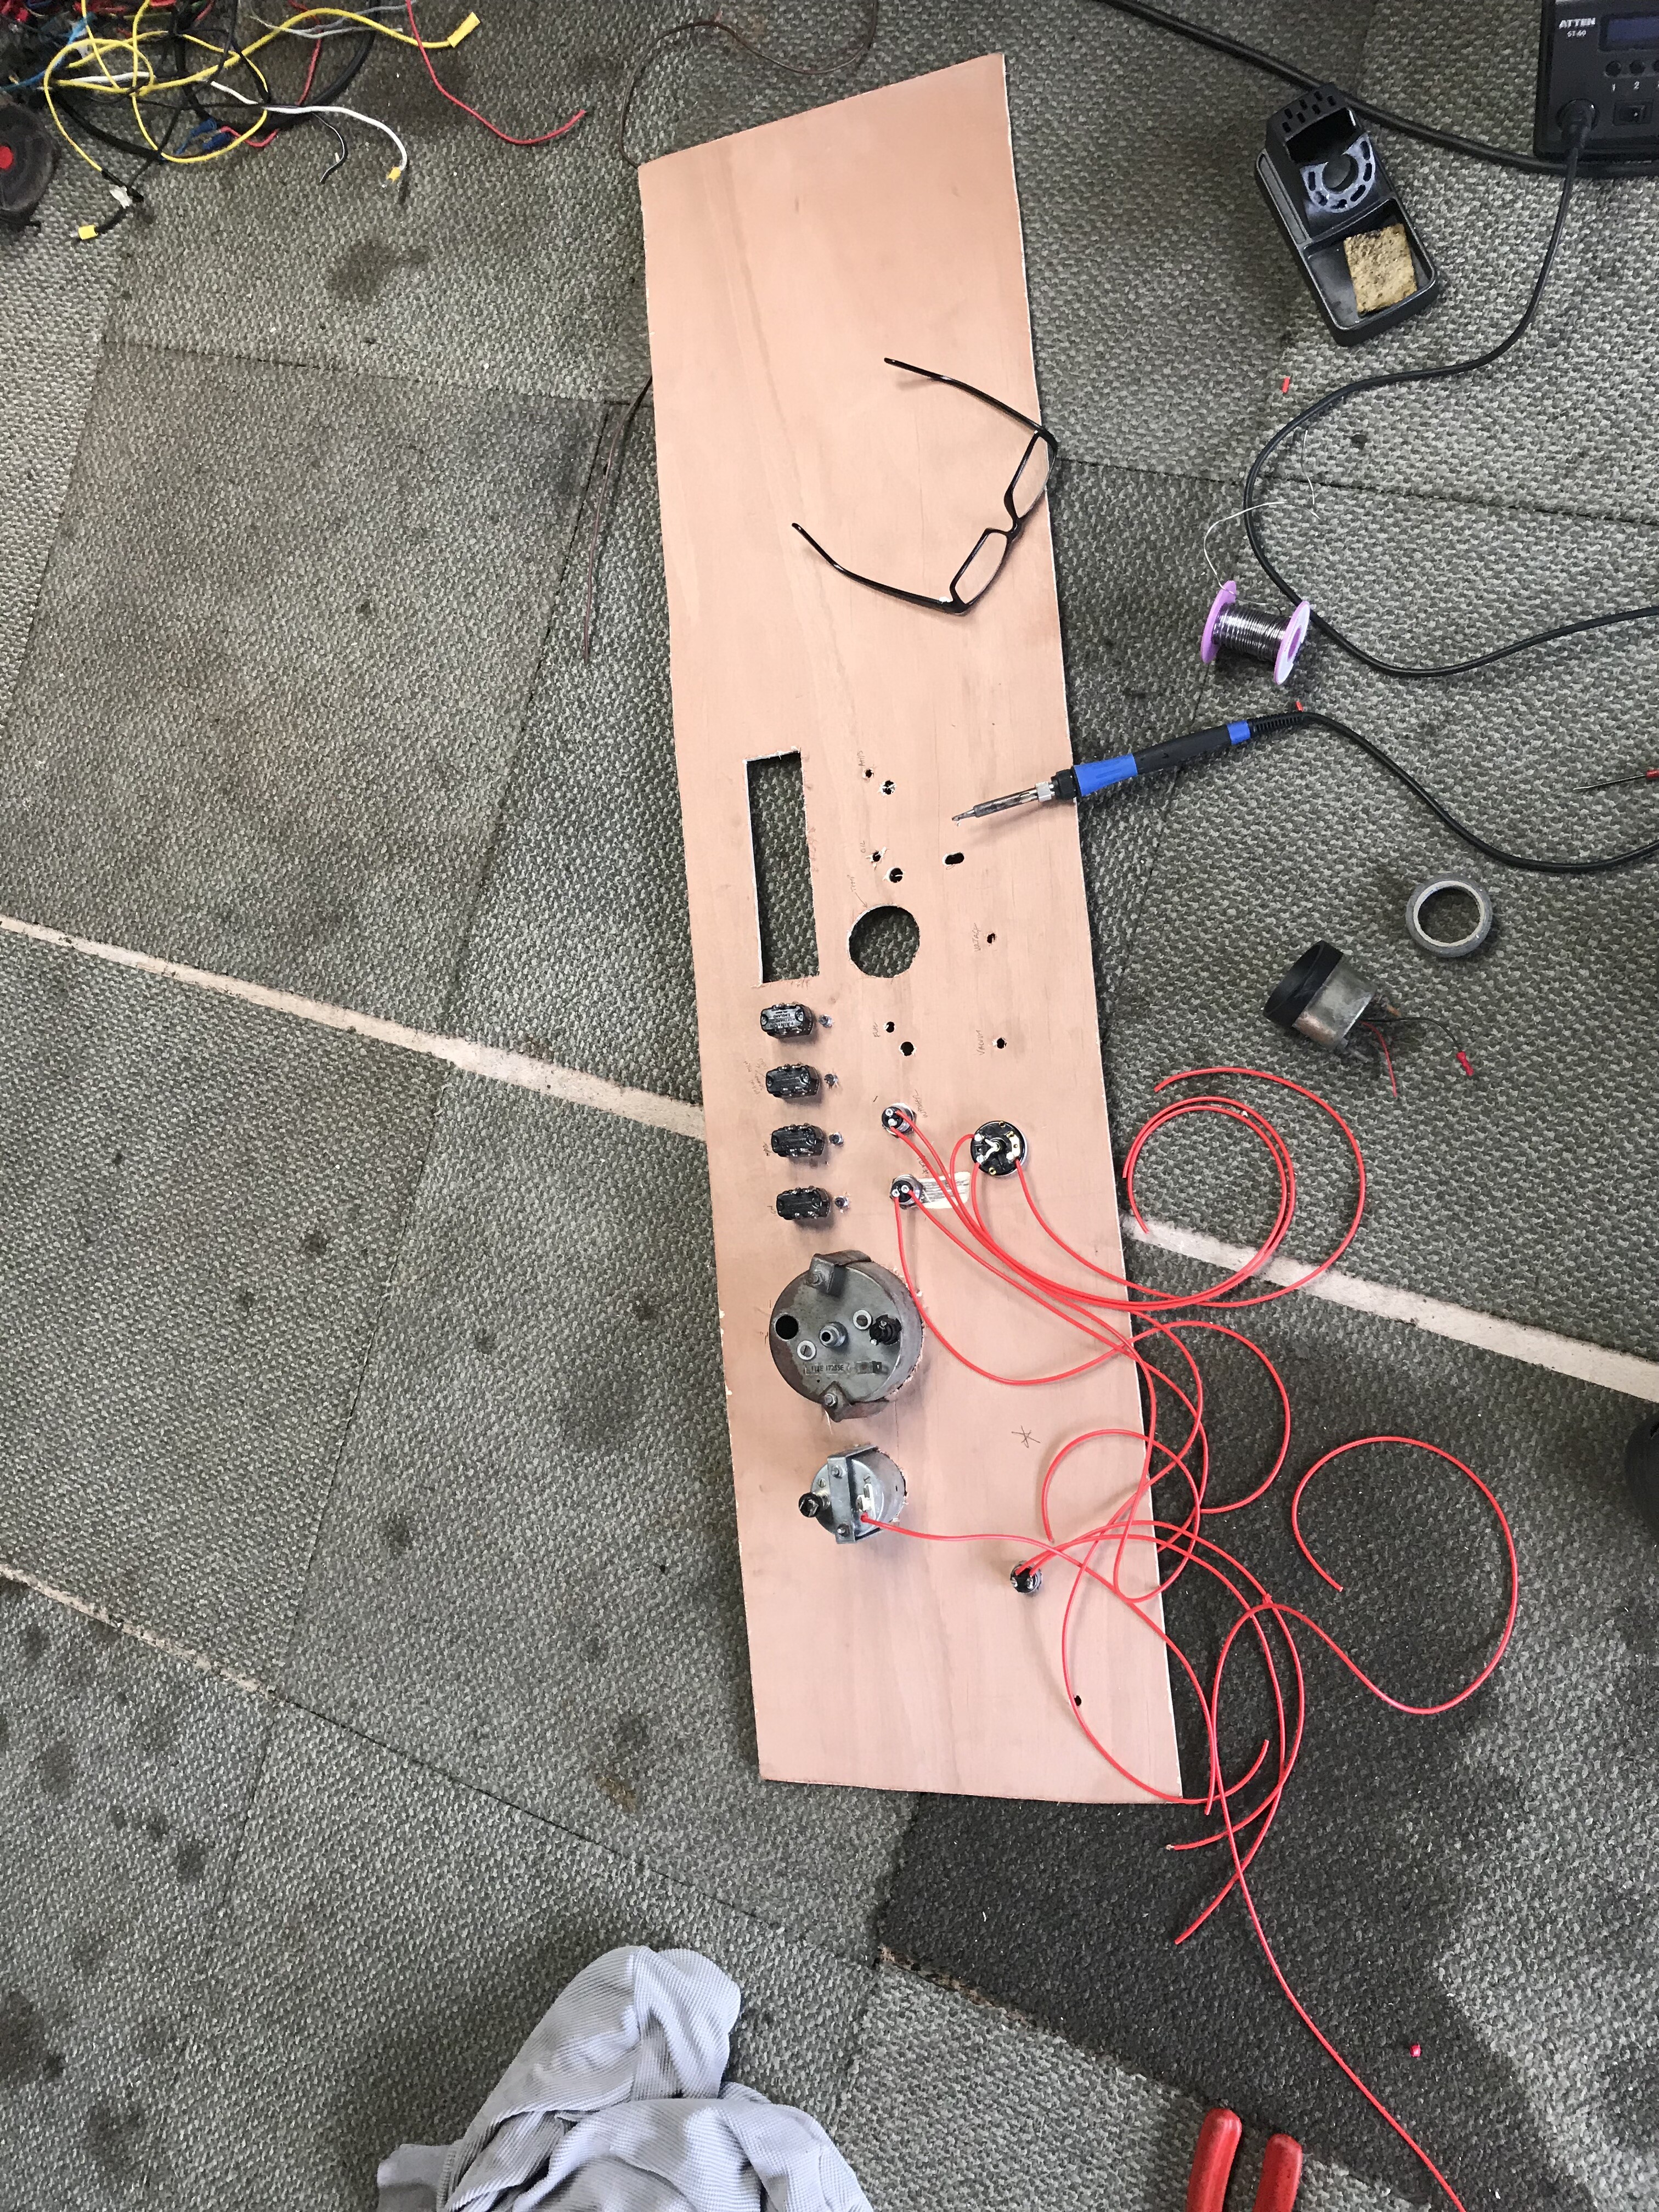  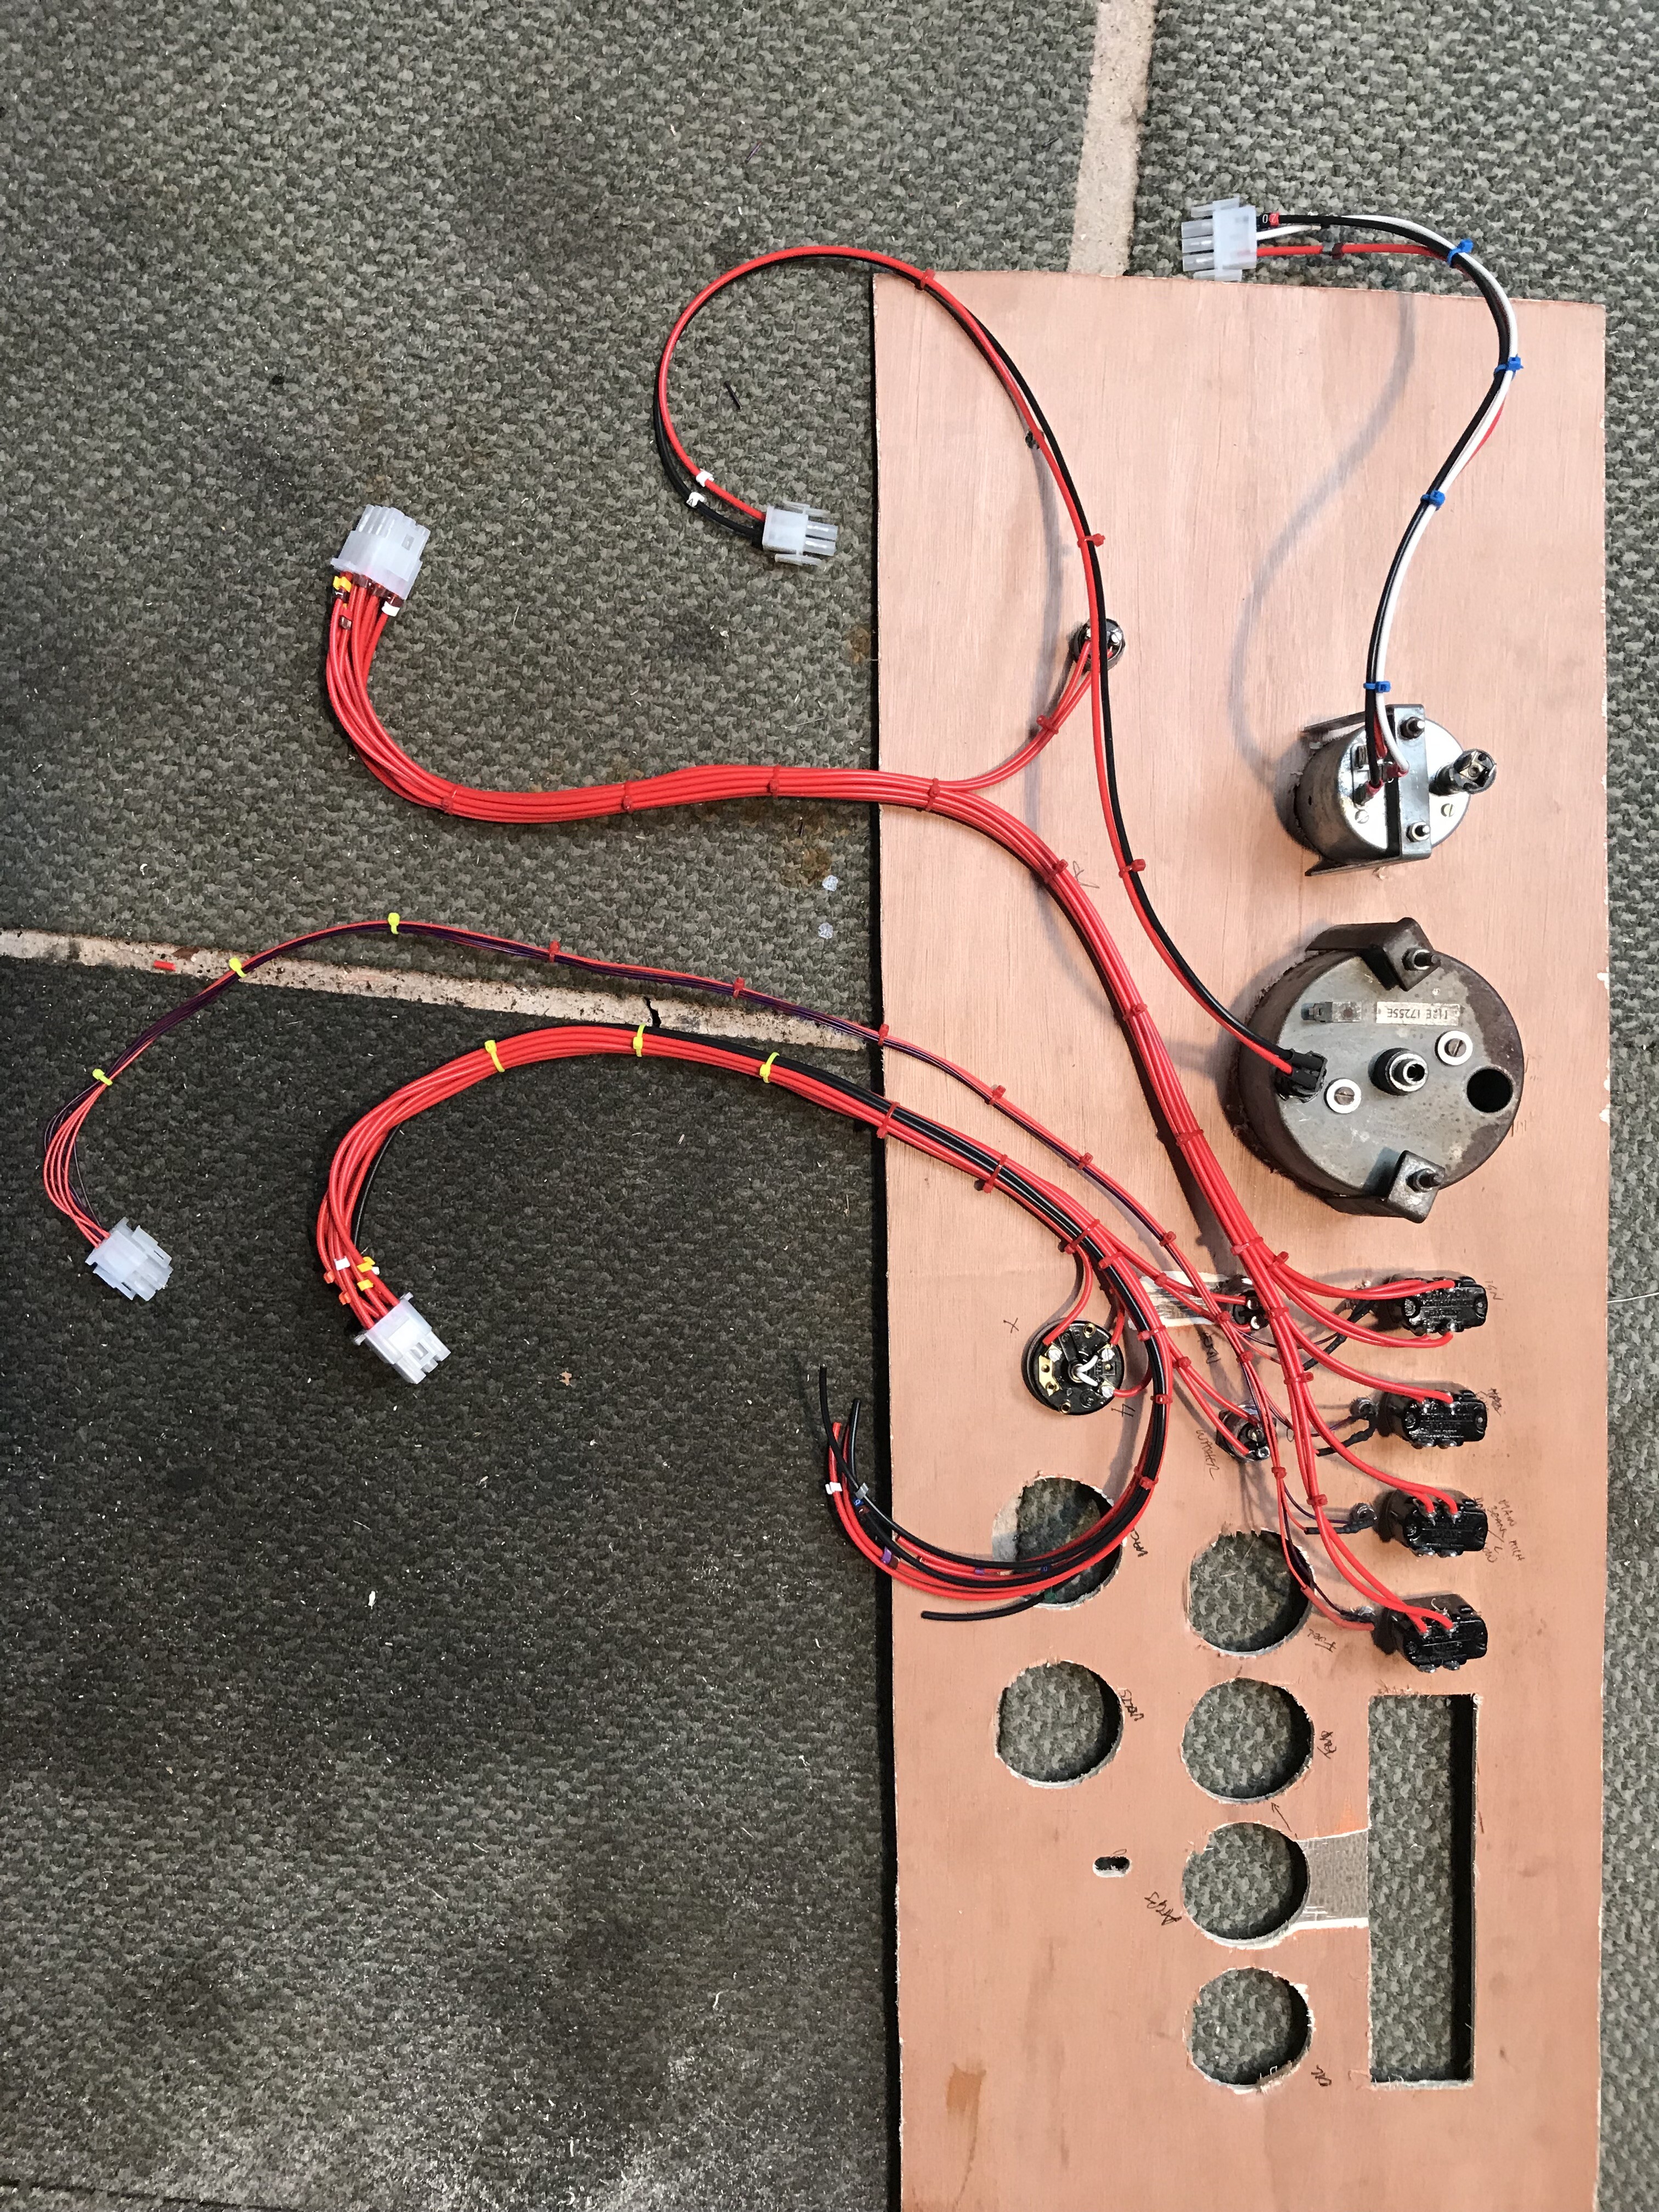 Once the wiring was all stripped out I started with the dashboard. Using a piece of thin plyboard as a template I laid out where I wanted my speedo, rev counter and then added the new switches and push buttons: indicator, horn, washer and windscreen wiper. Started the looms and tagging the cables with number markers. I also decided to go keyless and just have an ignition switch and a push button starter, if anyone can work out how to start it and have the guts to drive it they can take it. Another important part for me with the dash was for me to be able to easily remove it and so I have made the looms just to connect behind the dash itself. Once I have chosen where the amp, oil, temp, fuel, volts and vacuum guage are going I will make a loom for the gauges illumination circuit and finish off adding the required wires for the guages to operate. Same here except I used a button/relay unit which has a few more wires but basically, foot on brake, press button and starter is engaged for 4 seconds, (or in my case, until it starts due to a latching relay on the solinoid), stop, press button again. So what stops it getting nicked, a transducer that activates the buttons live by my phones presents, also stops me forgetting the phone.  |
|
|
|
Post by wiggy on Jan 1, 2021 14:20:01 GMT
|
|
|
|
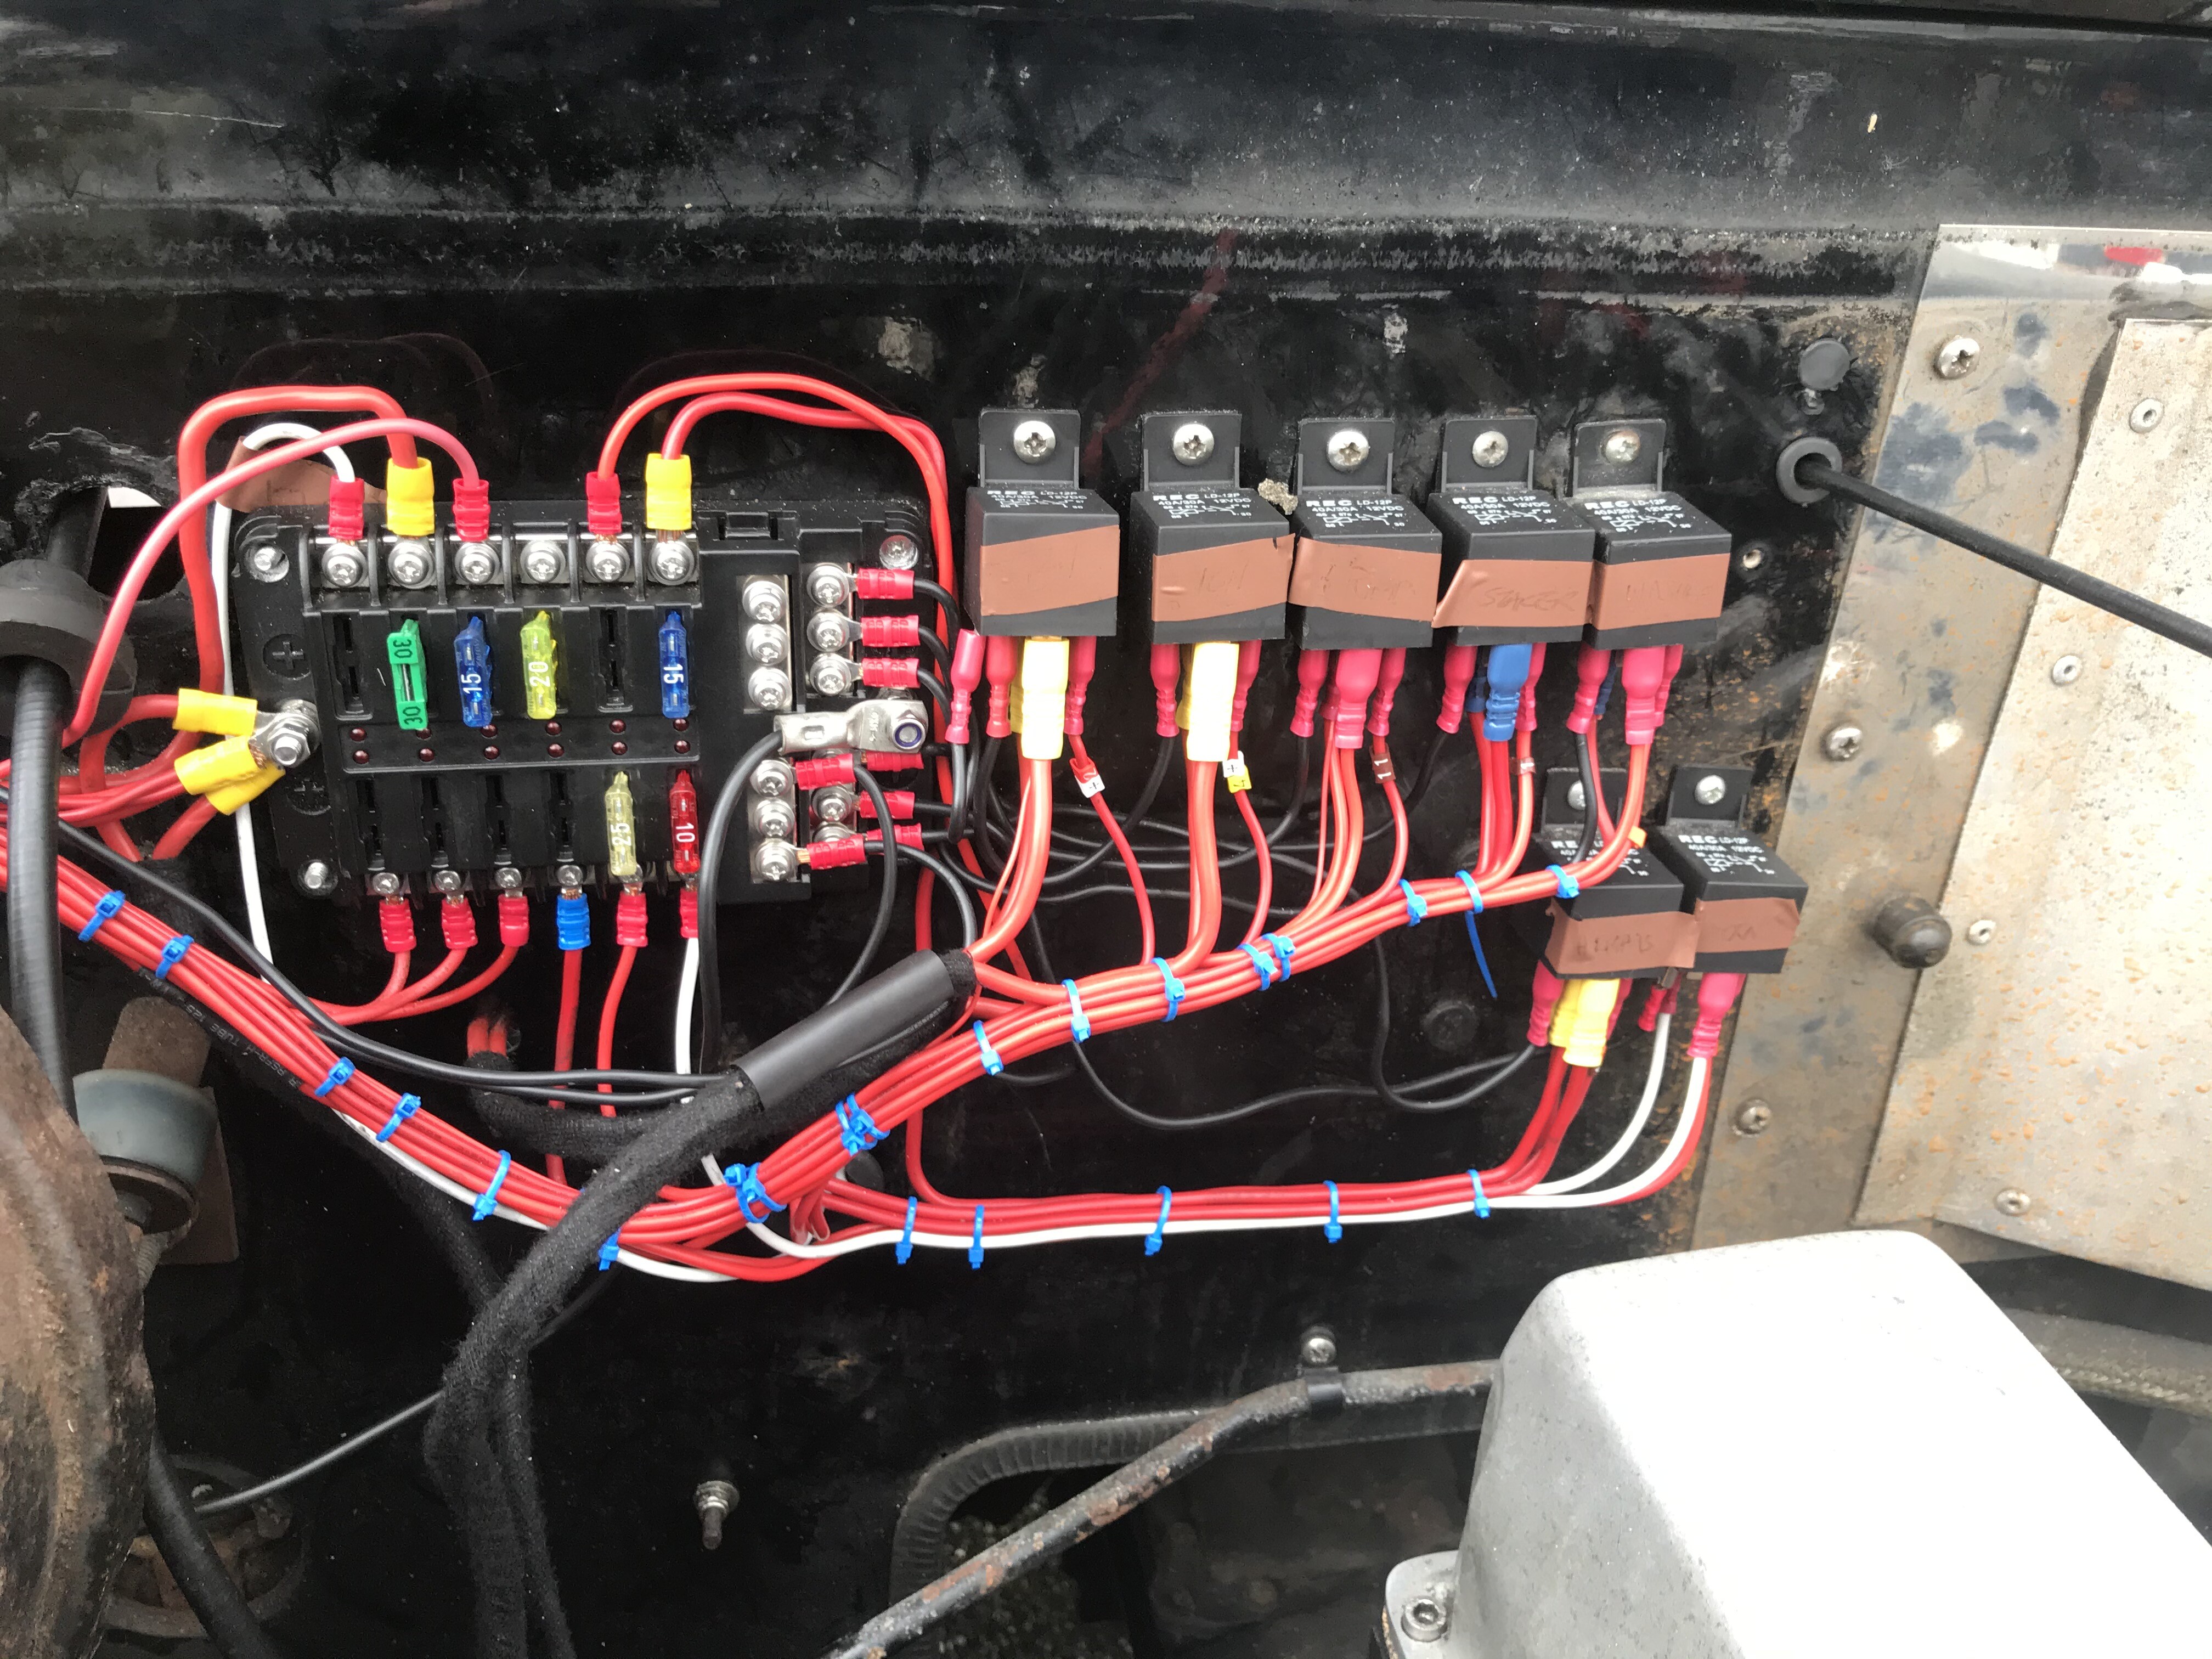
Post by wiggy on Jan 1, 2021 14:50:33 GMT
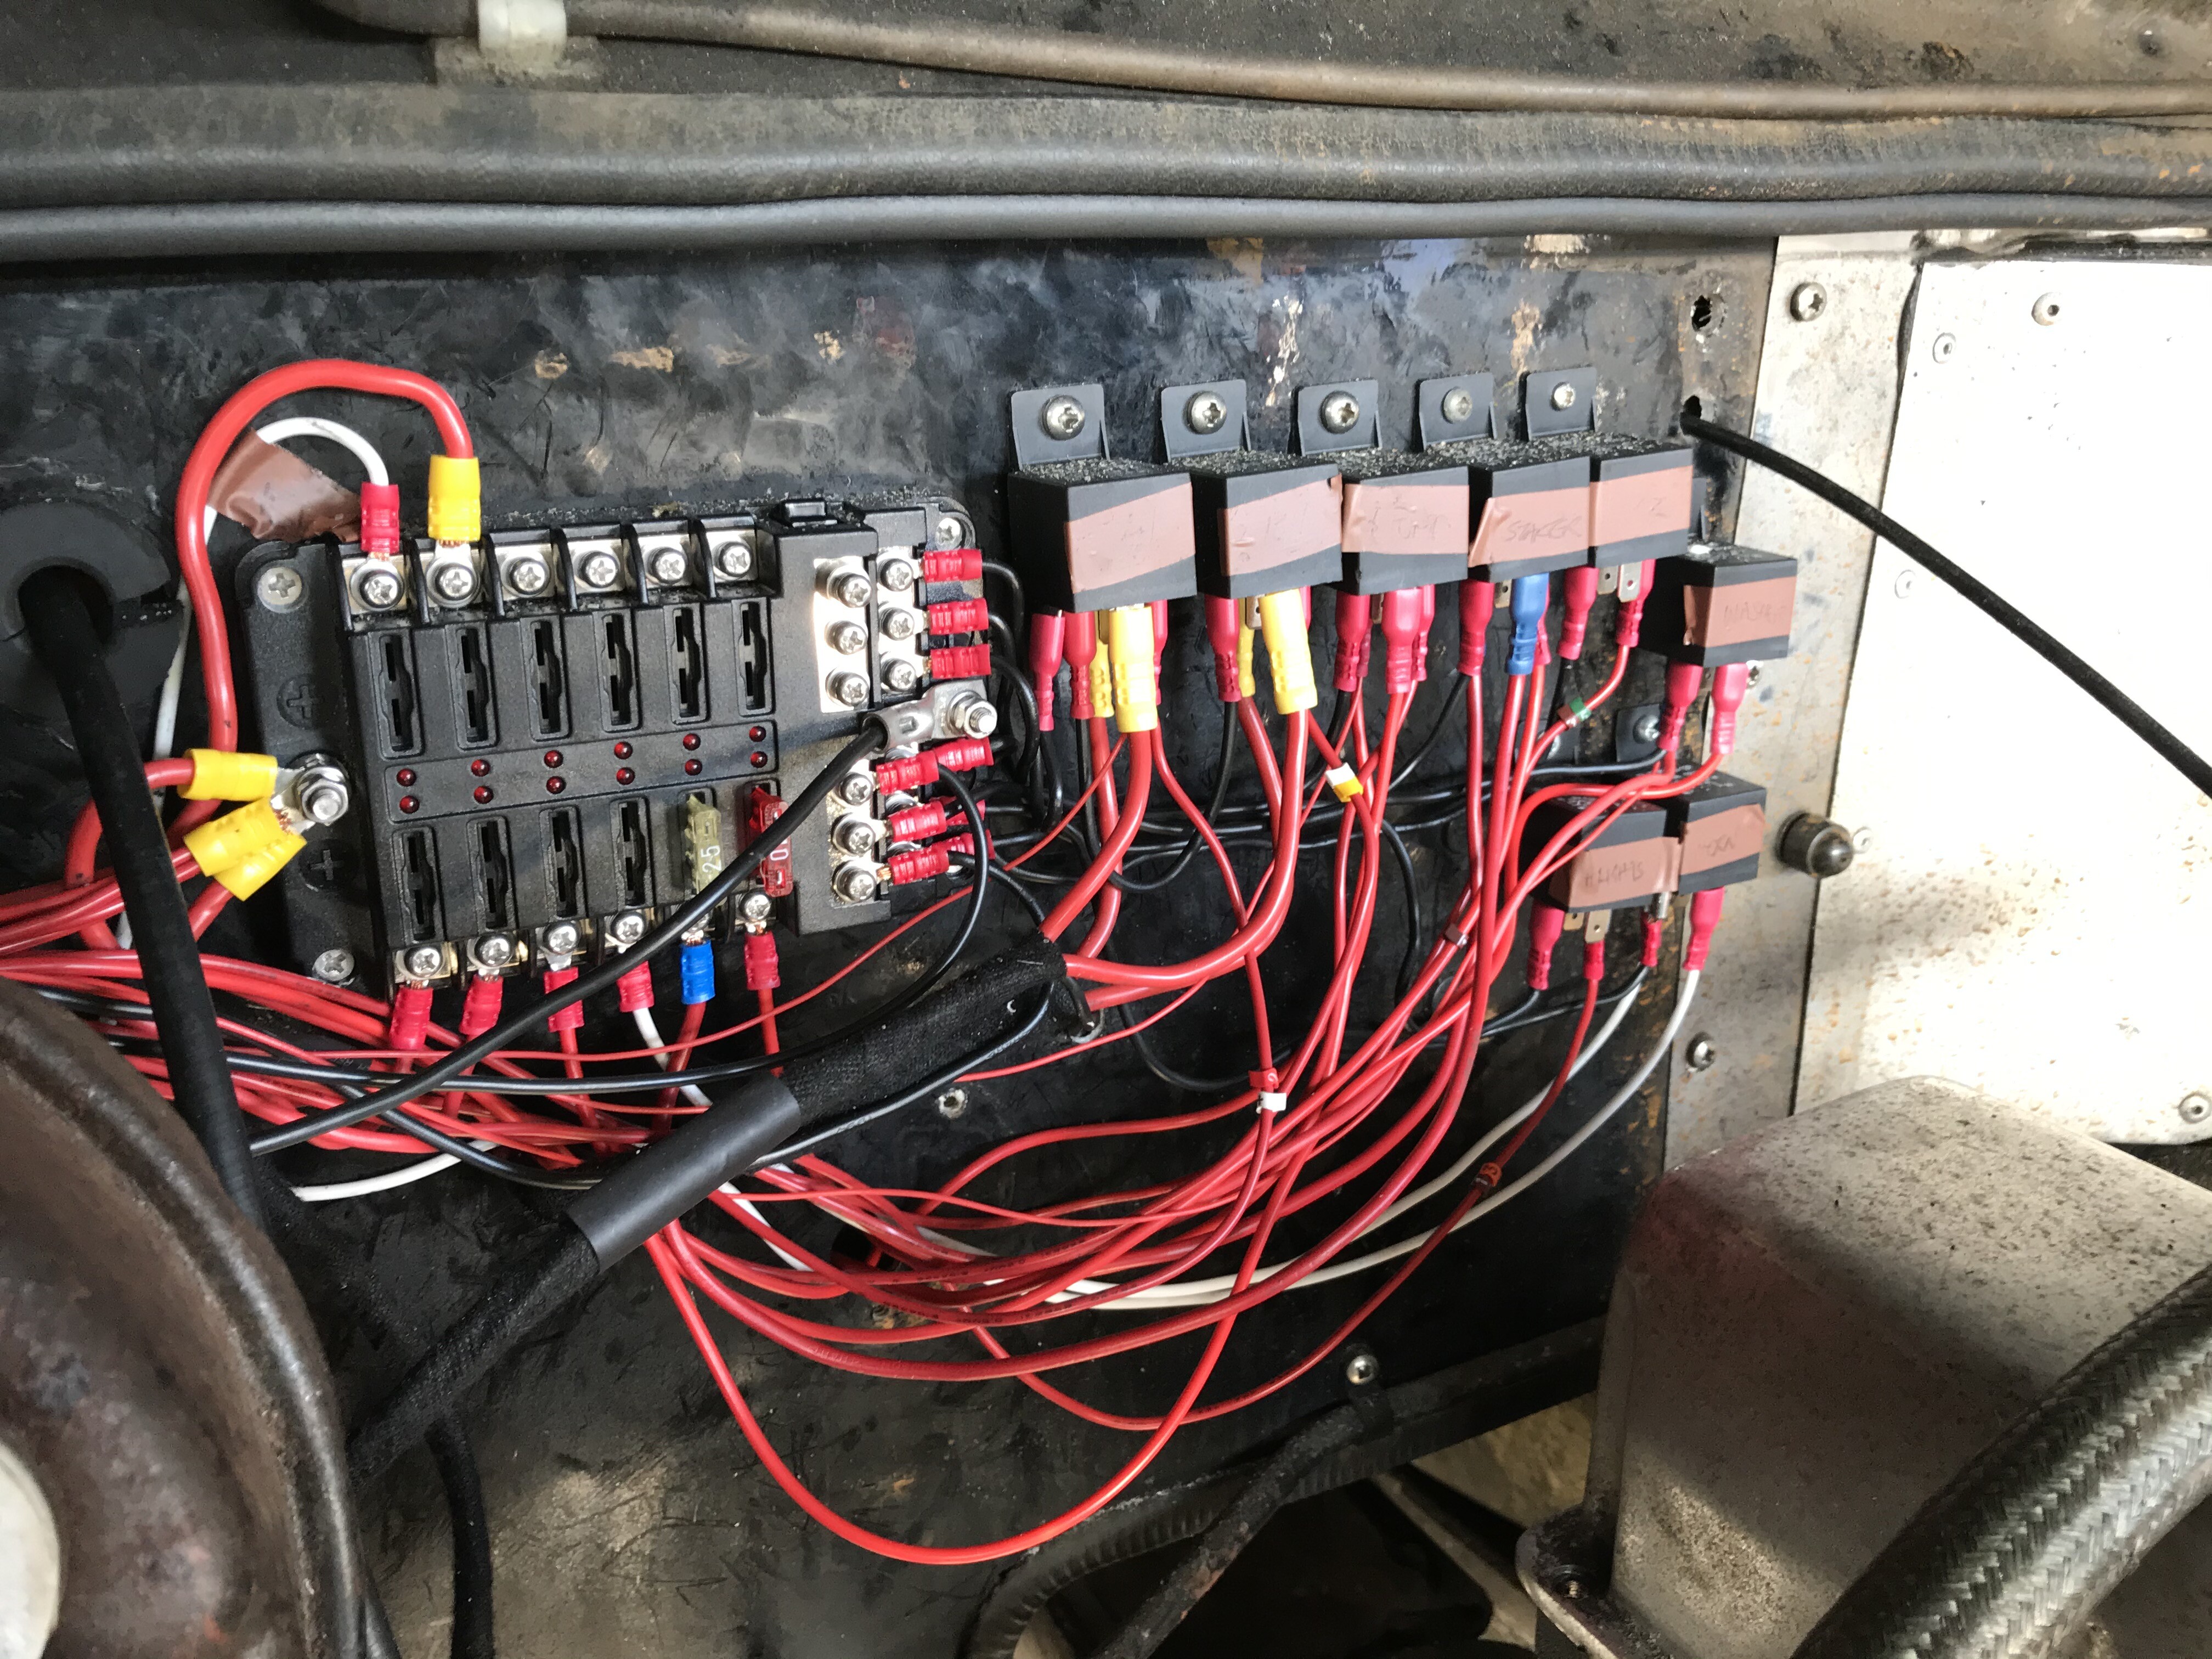
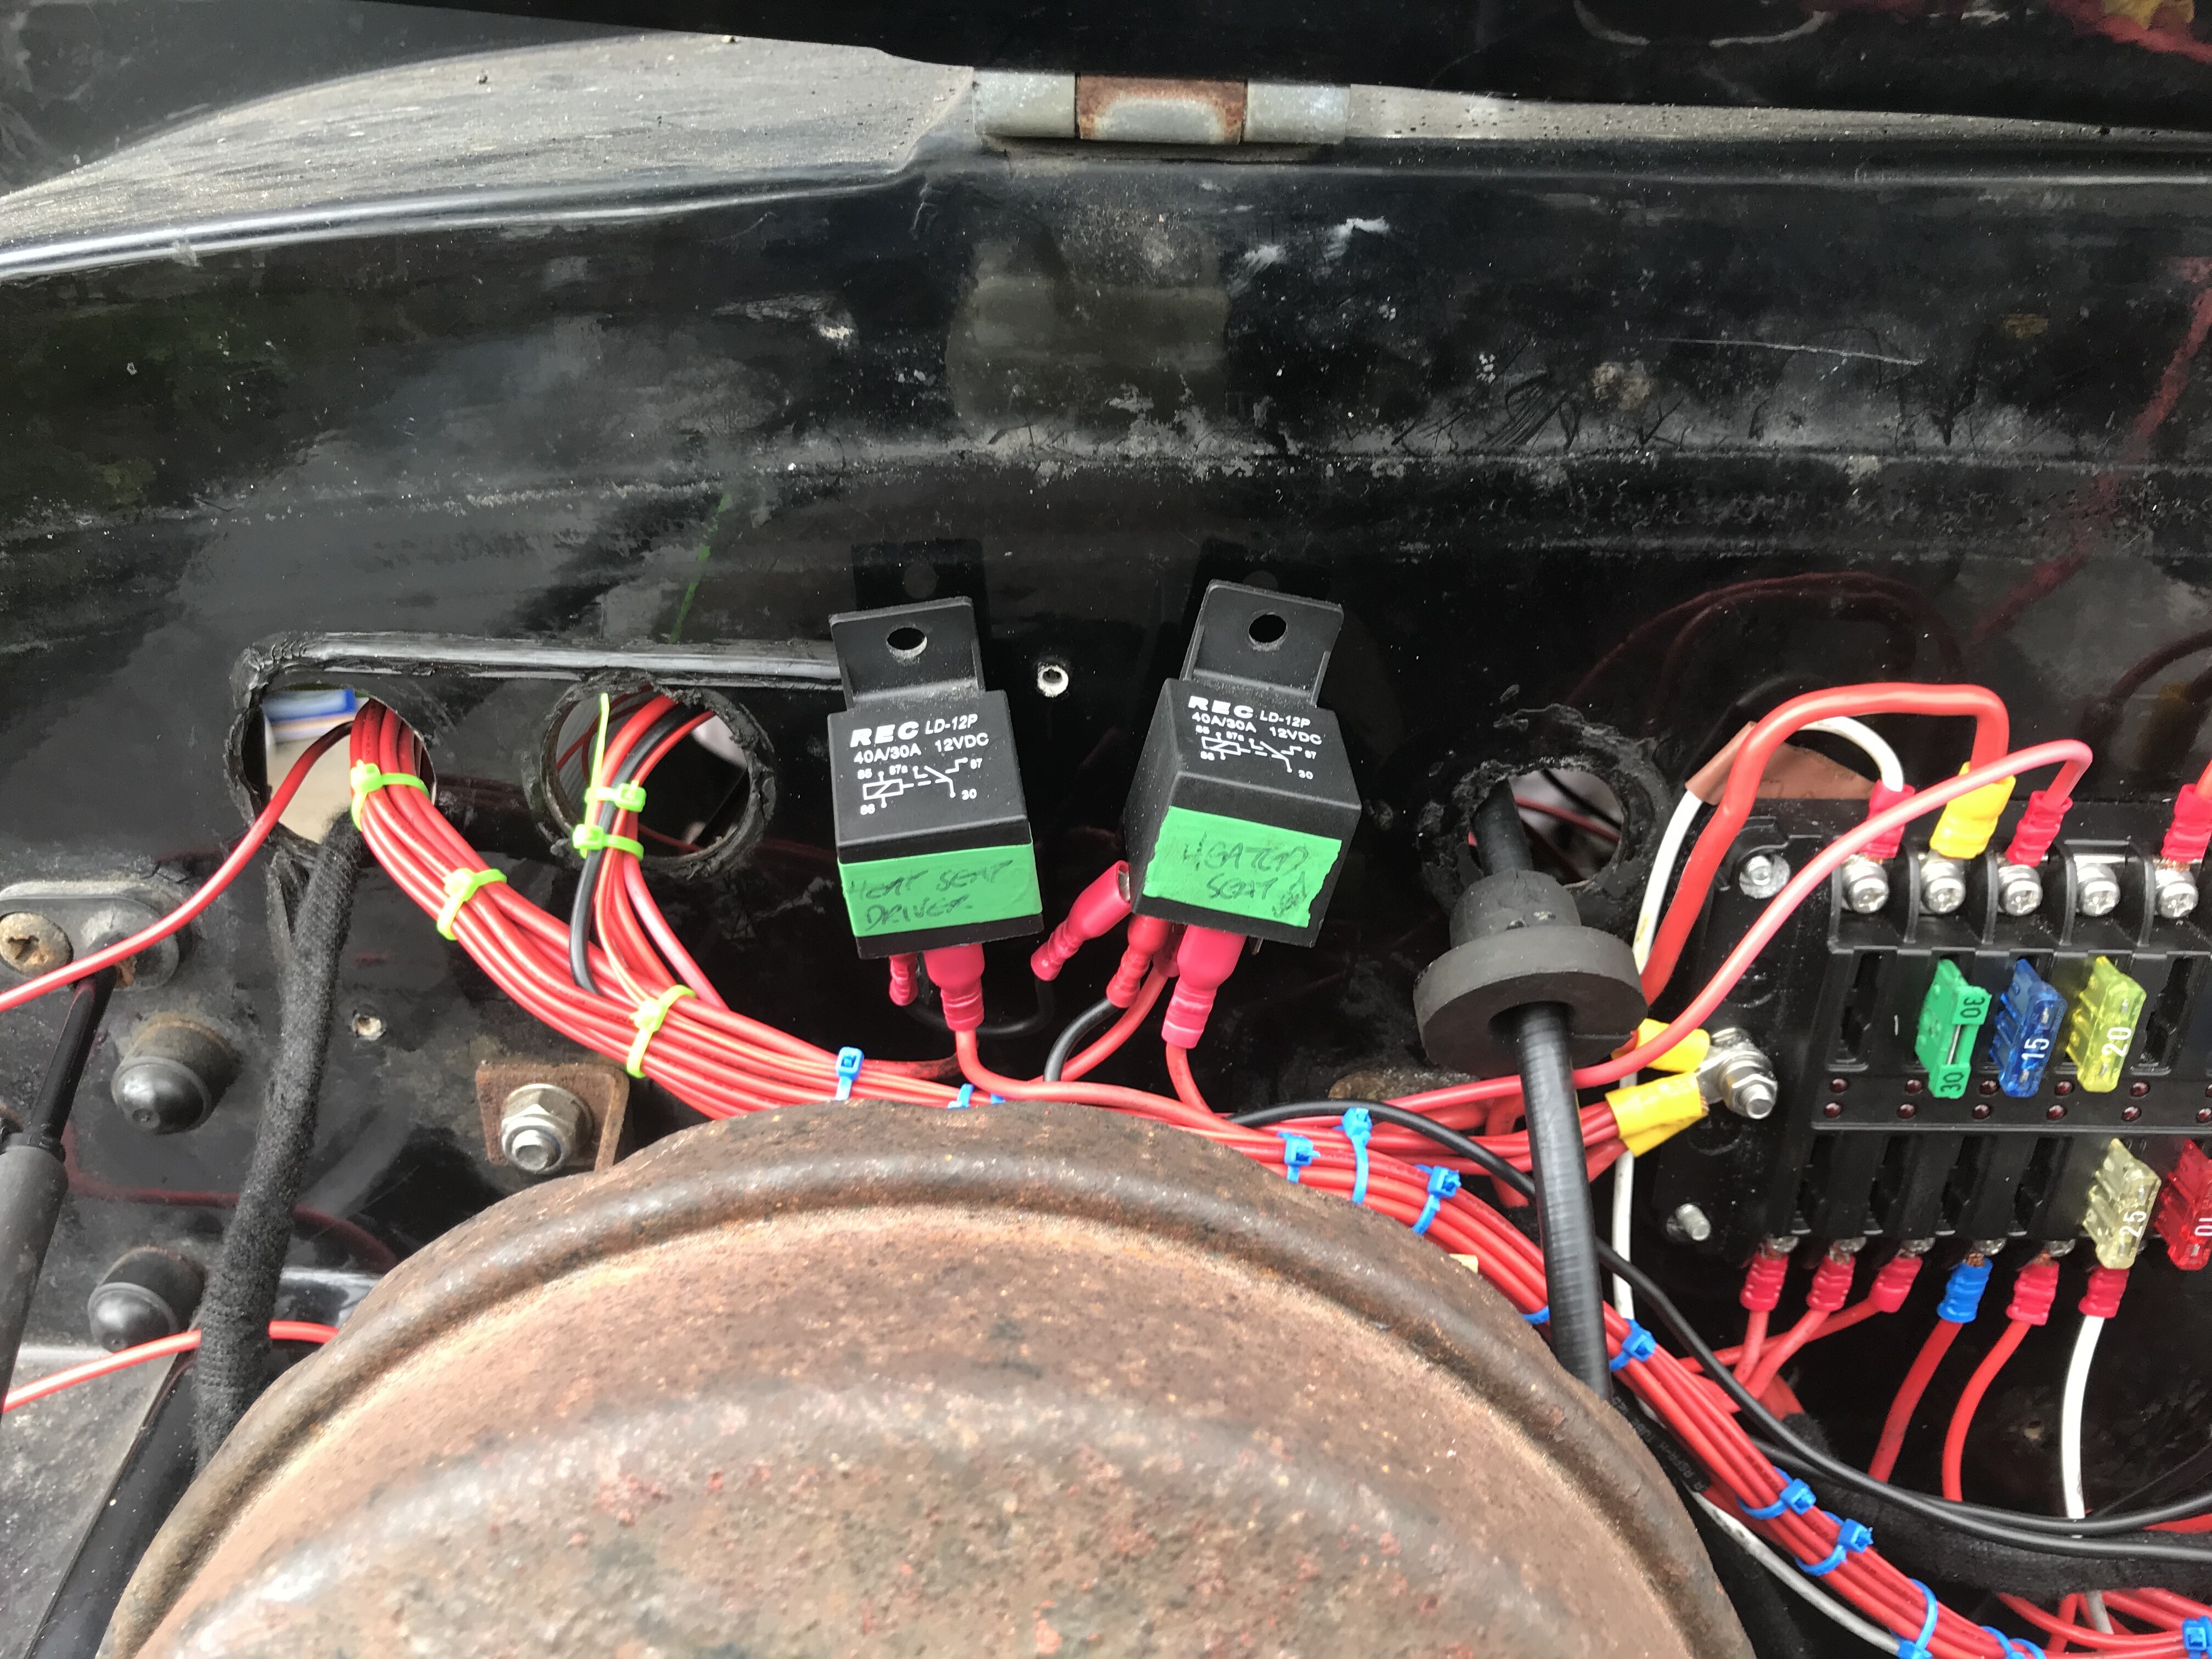
 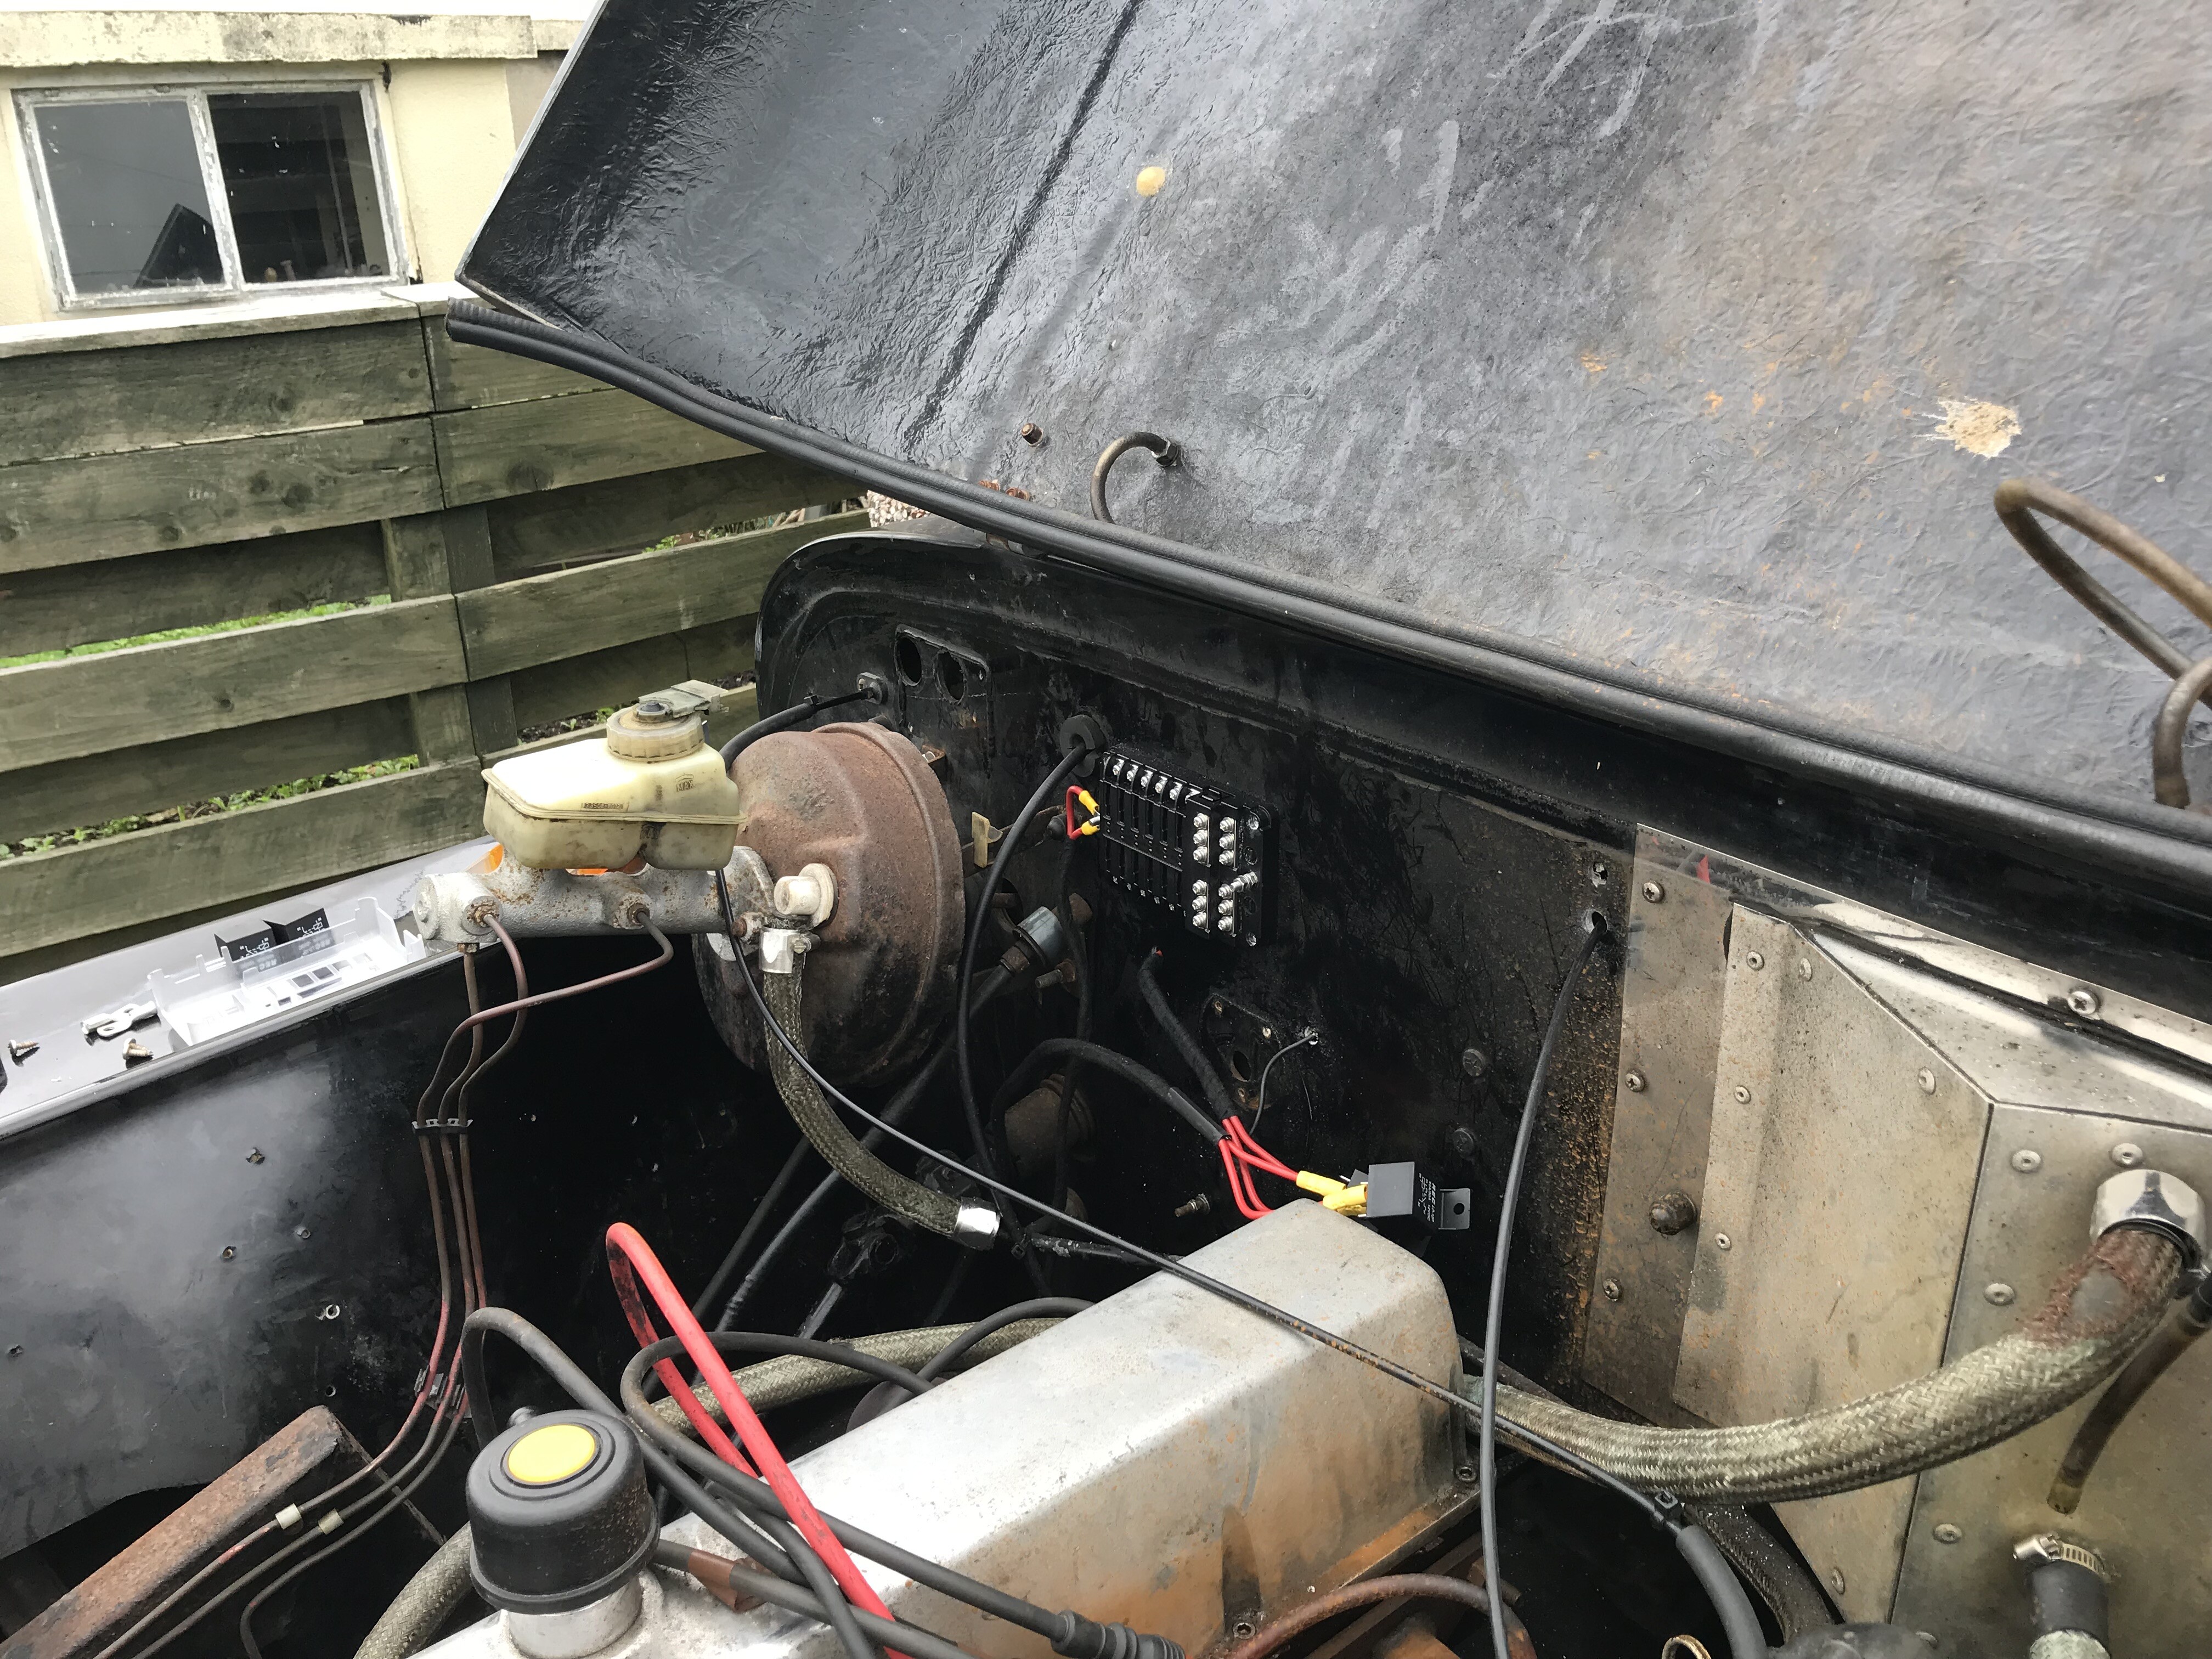 Found a good place and fitted the new blade fuse board. Started with the ignition circuit and wanted it to operate by switch, I was luck and found some lovey old chrome switches from some aircraft. Split the load over two relays just to be kinder to the circuit. Using the mock dash to get the a better idea of cable lengths but remember always give yourself a little more cable better to be loose than to tight. |
|
|
|
Post by wiggy on Jan 1, 2021 15:12:24 GMT
|
|
|
|
Post by wiggy on Jan 1, 2021 16:36:56 GMT
|
|
|
|
RV rewire
Jan 1, 2021 22:52:45 GMT
via mobile
Post by nickyjuk on Jan 1, 2021 22:52:45 GMT
That's looking very neat!
|
|
|
|
Post by wiggy on Jan 2, 2021 11:22:31 GMT
|
|
|
|
Post by wiggy on Jan 2, 2021 12:10:30 GMT
 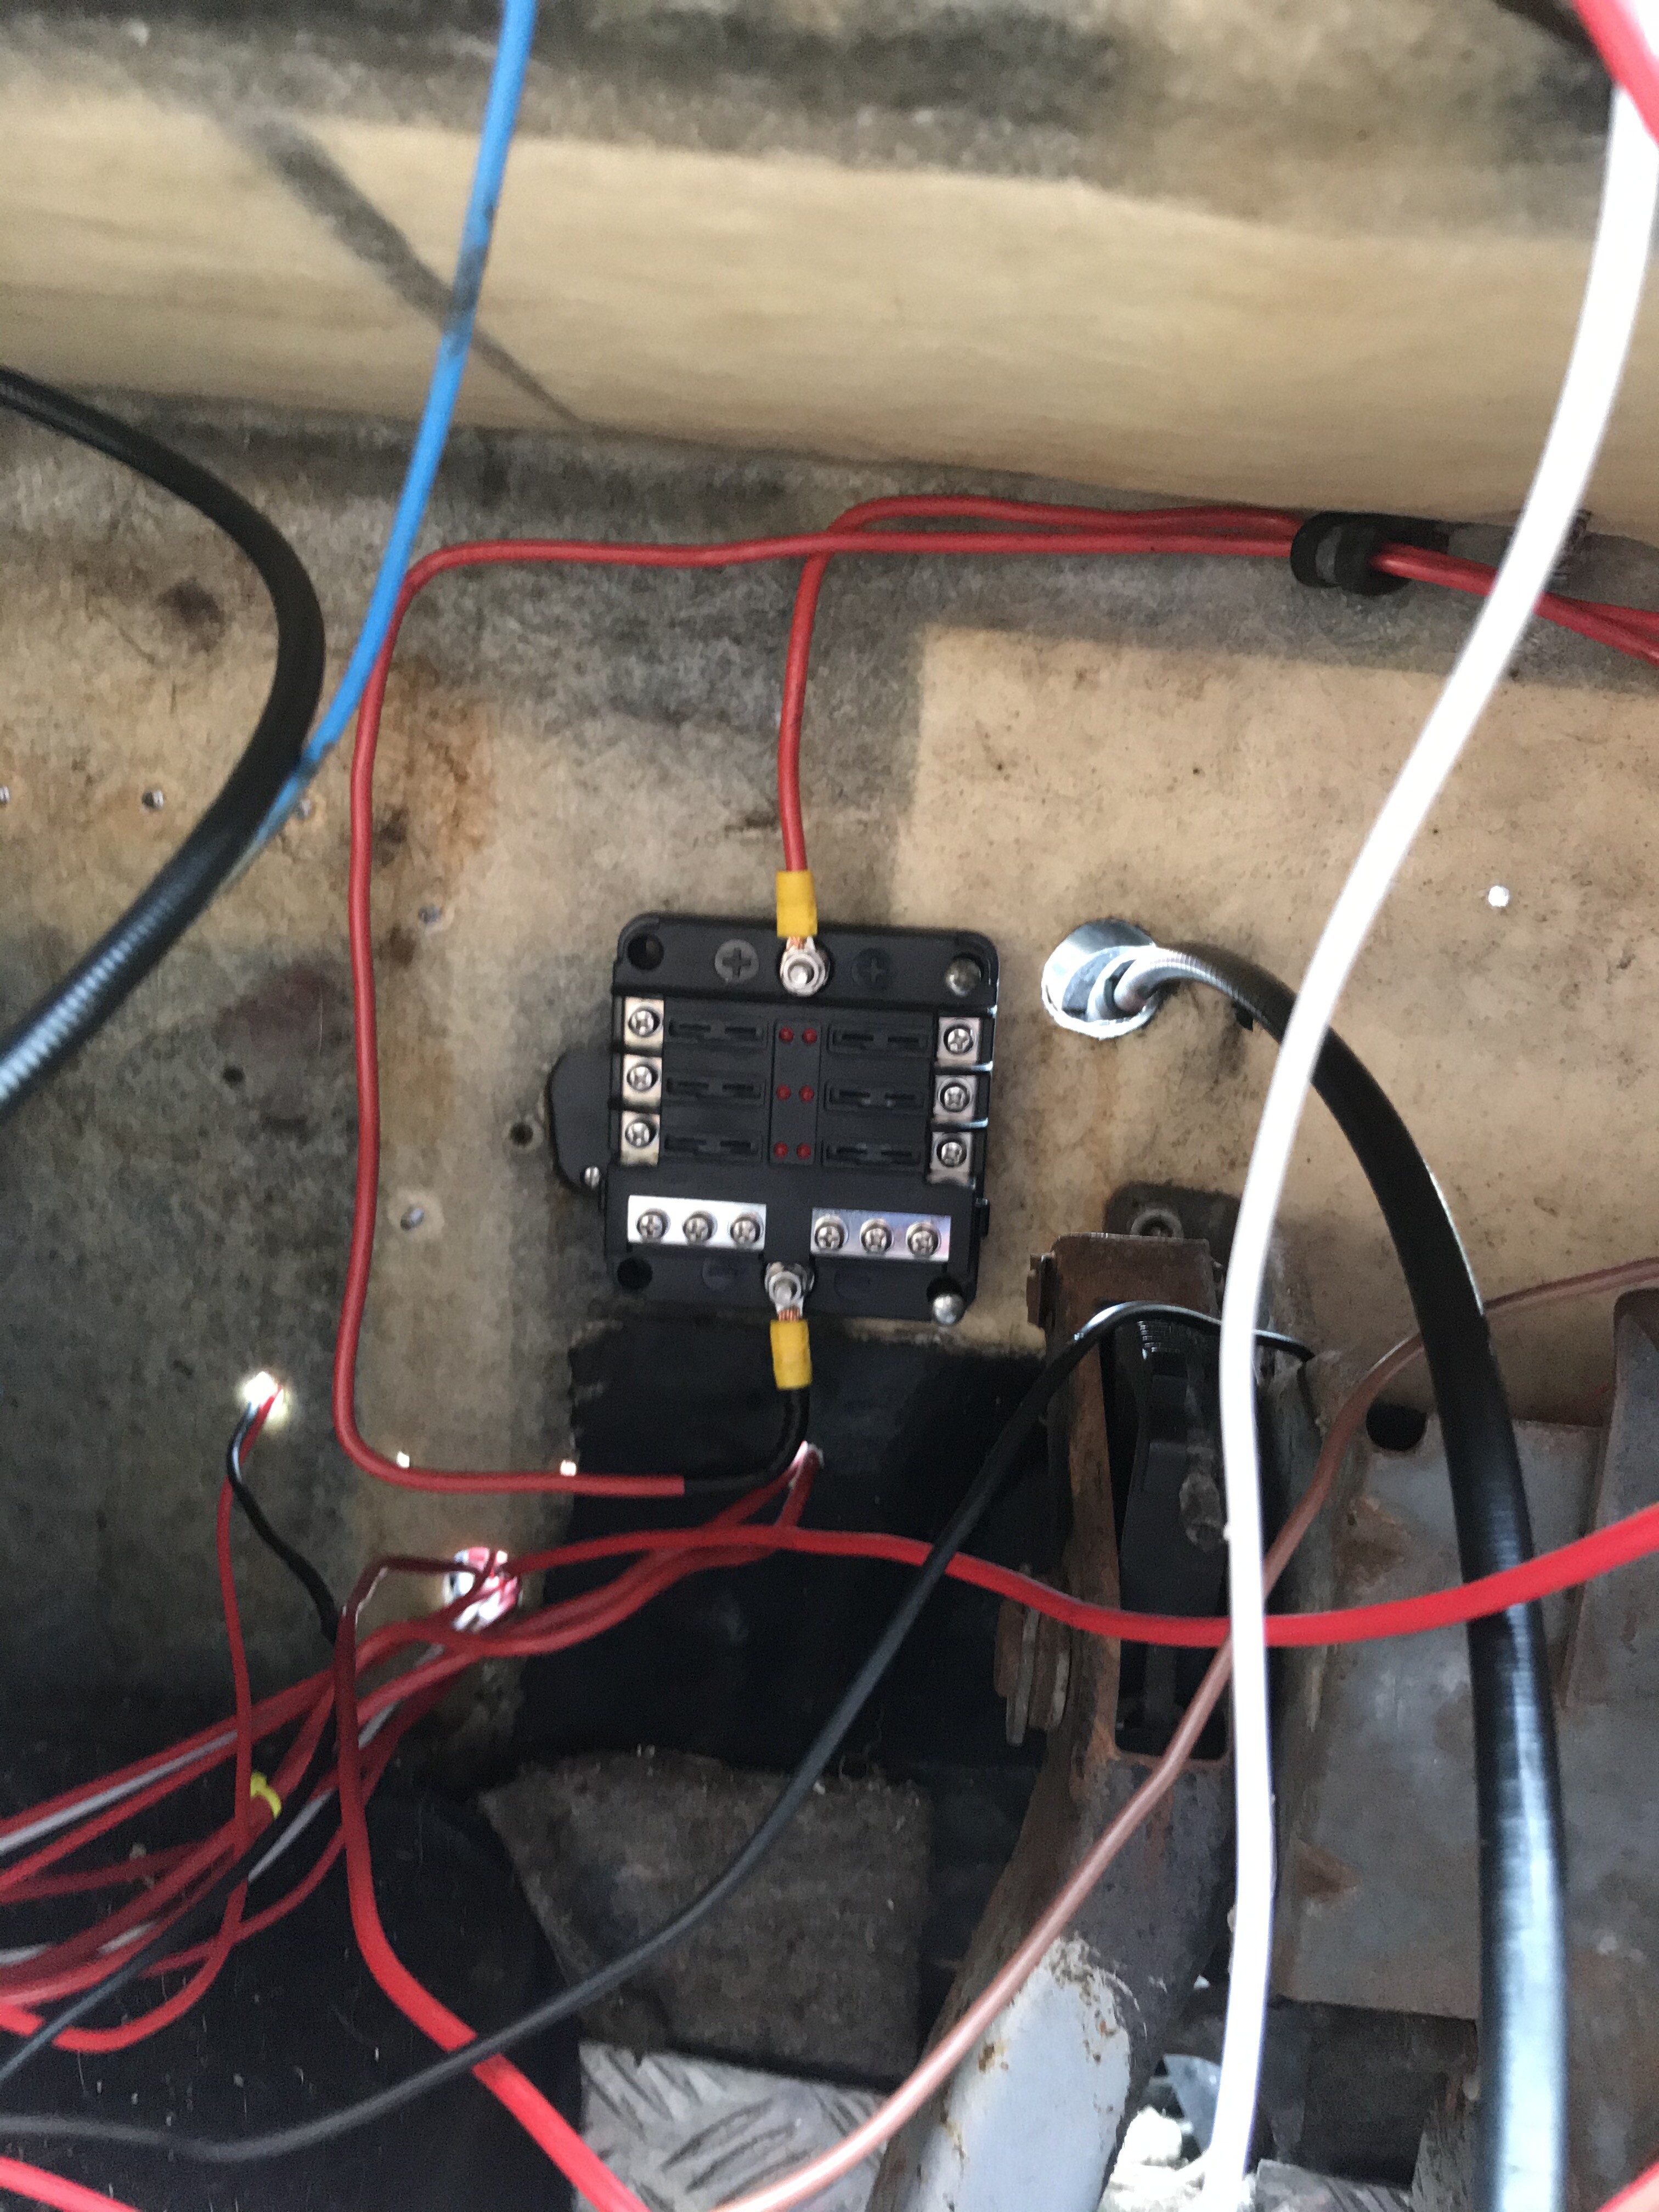 Once again going OTT but with thoughts for the future (never know what madness will follow with old age) proof with the electrics. So added another fuse board behind the dash for the heated seats and any other eventualities. Grommets will be fitted once the wiring is finished to protect any wires from damage going through the bulkhead. |
|
|
|
Post by Peter on Jan 3, 2021 12:41:12 GMT
Sounds like you are making real progress and in the right way too. Onwards and sideways.
|
|
chrisbailey
Forum manager
manager
Posts: 376
Member is Online
|
RV rewire
Jan 3, 2021 16:22:38 GMT
via mobile
Post by chrisbailey on Jan 3, 2021 16:22:38 GMT
Very useful to have a few spare fuse runs.
Spiral wrap is good for wrapping the loom up if you decide to remove the cable ties.
Really cheap too.
|
|
|
|
Post by Peter on Jan 6, 2021 11:26:21 GMT
Spiral wrap is cool, I use split corrugated tubing with a tape wrap every 10" or so, easy to add or remove a wire.  |
|


 all, I got called out on an emergency and just before I had to leave and in my haste I made a mistake an accidentally deleted the images I had uploaded.